Smoothing Groups
i'm trying to get the same effect this guy did with his coffee mug:
Specifically, this is the part i want to achieve:

and also this part:

I asked him how he achieved it and he was very helpful.
He explains it:
'as far as I can tell, you're looking at the smoothing groups, the "ring" in between the 2 bamboo/wood areas looks completely smooth if I smooth it all together, what I did was select the top half and smooth it, then select the bottom half and smooth it, the result is a sharp cut off in smoothing
Yeah any part where the model inexplicebly looks like a sharp edge, is due to the smoothing groups and remember it's smoothing groups, not turbo smooth or mesh smooth.
Smoothing groups are on the editing poly panel, just select faces and scroll down, select the faces you'd like to smooth together, remove smoothing and autosmooth , repeat for the rest of the model.
There's more to it, the edit normals modifier has something to do with smoothing groups but I don't know how it's used properly. '
--
So, after a few Smoothing Groups tutorials on youtube. I tried to achieve the same effect as he did. but i couldn't do it. I haven't touched the edit normals modifier as i'm not sure what that is.
Here's how what I did so far. I created an Oiltank shape. Extended Primitives and then i try the smoothing groups tool to make two parts on the oiltank different in levels of smoothing using the smoothing groups tool. But i don't get the same effect he achieved.
anyone know where I'm going wrong?
how do I achieve the same effect he did on the end of his coffee mug?
Specifically, this is the part i want to achieve:
and also this part:
I asked him how he achieved it and he was very helpful.
He explains it:
'as far as I can tell, you're looking at the smoothing groups, the "ring" in between the 2 bamboo/wood areas looks completely smooth if I smooth it all together, what I did was select the top half and smooth it, then select the bottom half and smooth it, the result is a sharp cut off in smoothing
Yeah any part where the model inexplicebly looks like a sharp edge, is due to the smoothing groups and remember it's smoothing groups, not turbo smooth or mesh smooth.
Smoothing groups are on the editing poly panel, just select faces and scroll down, select the faces you'd like to smooth together, remove smoothing and autosmooth , repeat for the rest of the model.
There's more to it, the edit normals modifier has something to do with smoothing groups but I don't know how it's used properly. '
--
So, after a few Smoothing Groups tutorials on youtube. I tried to achieve the same effect as he did. but i couldn't do it. I haven't touched the edit normals modifier as i'm not sure what that is.
Here's how what I did so far. I created an Oiltank shape. Extended Primitives and then i try the smoothing groups tool to make two parts on the oiltank different in levels of smoothing using the smoothing groups tool. But i don't get the same effect he achieved.
anyone know where I'm going wrong?
how do I achieve the same effect he did on the end of his coffee mug?
Replies
The easiest way is through Edit Poly, select the top part that you want to blend together, hit Autosmooth (make sure your angle is set high; it's 45 by default, that may or may not work. Try going higher or lower to see the effect). Then select the bottom part, do it again. Autosmooth will place things into groups as needed to get the smoothing you specify.
Or, select the top chunk, assign to Group 1, select the bottom chunk, assign to group 2. Since they're not in shared groups, they won't smooth together.
It's relatively simple, so a screenshot of what you're looking at will make troubleshooting easier.
ya. i tried this. it didn't work : /
i think this is where i'm going wrong. every time i smooth group. it seems to basically even out all the vertices. so i can't seem to achieve a sharp edge to make one surface of vertices stand out significantly against another surface of vertices - like the surface at the top of the coffee mug...
Everything Red is in Smoothing Group 1; everything Blue is in Smoothing Group 2. Since the boundary between Groups 1 and 2 don't have any shared groups, the shared vertices don't blend together.
If you don't post a screenshot, we can't be any more helpful than this. Sorry.
Are you removing them from the other smoothing group when you change their groups? Polygons can be in multiple smoothing groups. They only form a hard edge when they do not share smoothing groups - then the hard edge will form along the group boundaries.
I can't seem to do this. I select the polygons and can't seem to figure out how to assign them to a group. I tried the smoothing groups table where i click 1 from the table with a series of numbers. but it never seems to stick. I'm having trouble assigning the polygons to separate groups..
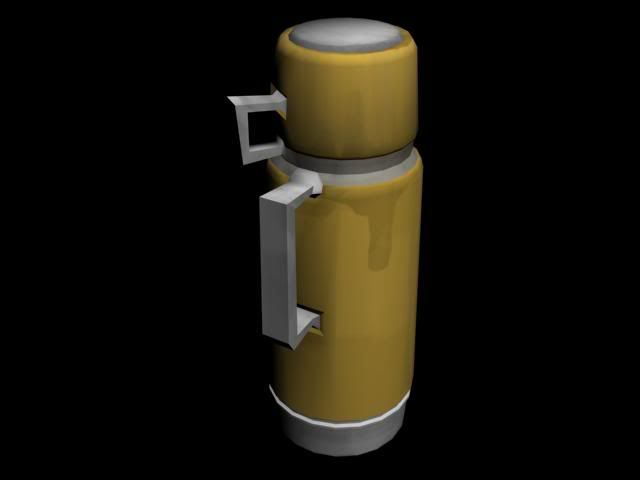
or this:
on this:
using this:
and as far as I know, Smooth, MeshSmooth or TurboSmooth modifiers aren't selected.
Before you even worry about the smoothing groups...if you want the top to have that extruded shape on top like the coffee mug..you need to model the shape first.
Don't take this the wrong way...I don't want to come off as a jerk...but you should really spend some time doing some beginner modeling tutorials.
I took a look through your previous posts...which date back to February...5 months ago..and they were also very beginner level questions: How to turn a cylinder into a tube, and how to add an extruded ring to a cylinder. Besides this, the rest of your 140 posts were almost all in the tf2 art thread.
I think you can find answers to a lot of your questions that way, and get a better understanding of the tool and modeling in general.
It's something you have to play around for yourself.
Also, what gsokol said, take one step at a time. Focus on the modelling first, no matter how inconsistently "chippy" and smooth it looks. Those can be fixed at the later step/s. Don't be angry at your models all the time. =[
There's more to model smoothing techniques. Still, for now, model out your model first. After that, the groups.
Please do post back when your model updates so that we can help you with what to group/smooth! :thumbup:
You just need to select the faces you want to have smooth, and then click the [1] or [2] or [3], etc, smoothing group buttons to put them in that group. Then they will be smoothed.