Baking issues
polycounter lvl 13
Hey all, so I have been searching the forums for the answer for this, and I'm sure it has been asked a million times before, so I hope I don't piss anyone off be reiterating this.
Here is my issue, I made my high poly, then tried to transfer the rounded edges and such with Ultimapper (softimage), transfer maps (maya) and even Xnormal (dont really know how to use it), and keep getting this result. I must be missing one step. I know the buttons suck, but they are at least just an issue of strength, and not actually baking wrong.
What is happening is evident, but basically I can only describe it as the rounded edges are coming out... wrong.
Problem: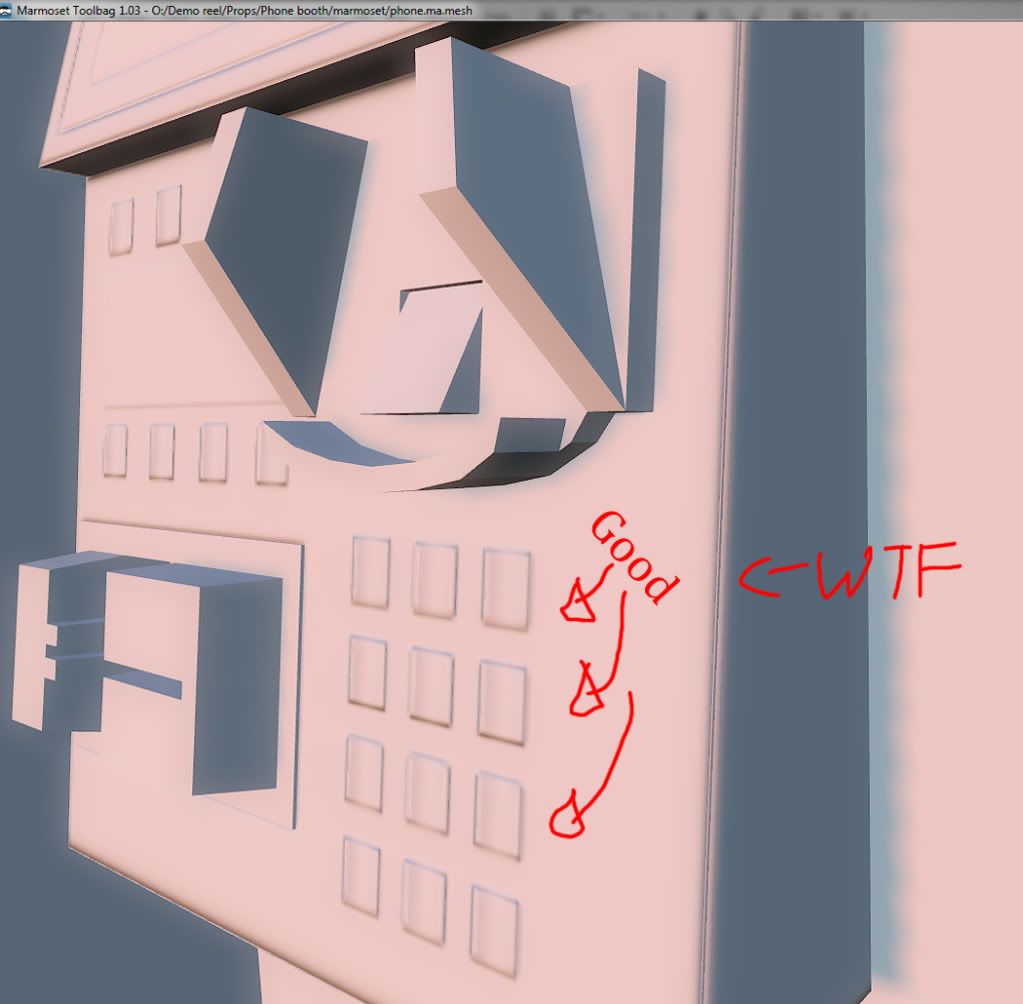
Map: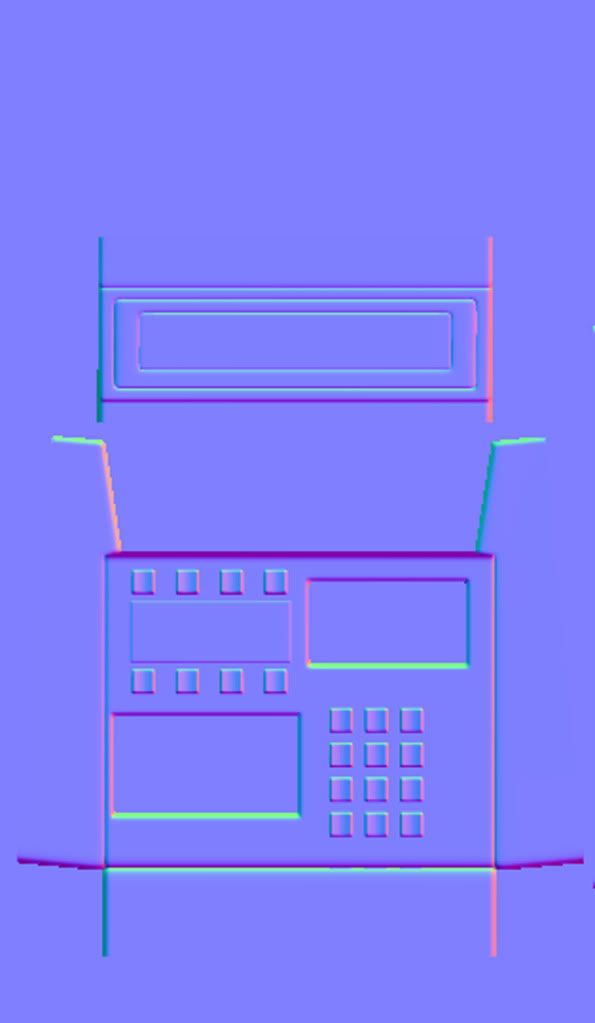
High poly:
Replies
See these two threads on how to fix it:
Normal Maps: Can Somone Explain This "Black Edge" issue
Understanding averaged normals and ray projection/Who put waviness in my normal map?
Its a setting in your app, different for every one. For xnormal you either create a cage in the 3d viewer or import an external cage, if you have no cage loaded it will bake using the surface method by default. Maya has a toggle between geometry normals and surface normals in the advanced bake setting. Geometry normals allow you to bake around corners while surface normals will give you a seam on the edge but more accurate surface detail.
PredatorGSR: I think I am learning quite a bit right now, getting a bit of a grasp. By hard edge, it just means >90 degrees right? Because obviously I am trying to get a soft, beveled looking edge. So do you know how to change these in softimage? I know in maya how to designate soft and hard normals, but no idea in softimage (only how to mark hard edges). Also when you split the uv's, do you just move the islands far enough apart that they don't bleed into each other? Thanks!
Yeah you can move your UVs apart to make sure there's enough pixel padding between the different shells. This value can vary depending on the texture size, 8 pixels between shells (so 4 pixels around each shell) on a 1024 is a good place to start. You really can't ever have too much padding as mip mapping can shrink you textures down a lot when viewed from a distance. Don't forget to actually generate the padding on the textures as well.
In xNormal -> Baking Options -> Edge Padding
There's also a xNormal Photoshop plugin that can help make padding.
In Photoshop -> Filter -> xNormal -> Dilation...
Though you need to have an alpha channel that represents the UV shells without padding for this to work. White = the texture, black = the area to be padded.
I labelled them to show what I think is going on. Ugh seems really noobish to be asking, but my school basically taught normal mapping as the easiest thing in the world, and I am starting to find out it is extremely complicated.
Yes it does make it harder to paint over the seams, especially if you are only using Photoshop (prior to 3d painting in PS? I'm on CS2 so don't know anything about how that works...).
Nowadays people use various 3D painting apps, Mudbox, 3DCoat, Bodypaint, etc... to get around the painting over seams issue.
Another way is to deal with seams is to use Blender's projection painting, it works with Photoshop as well.
[ame]