[Finished] Kaminsky Handheld Device
greentooth
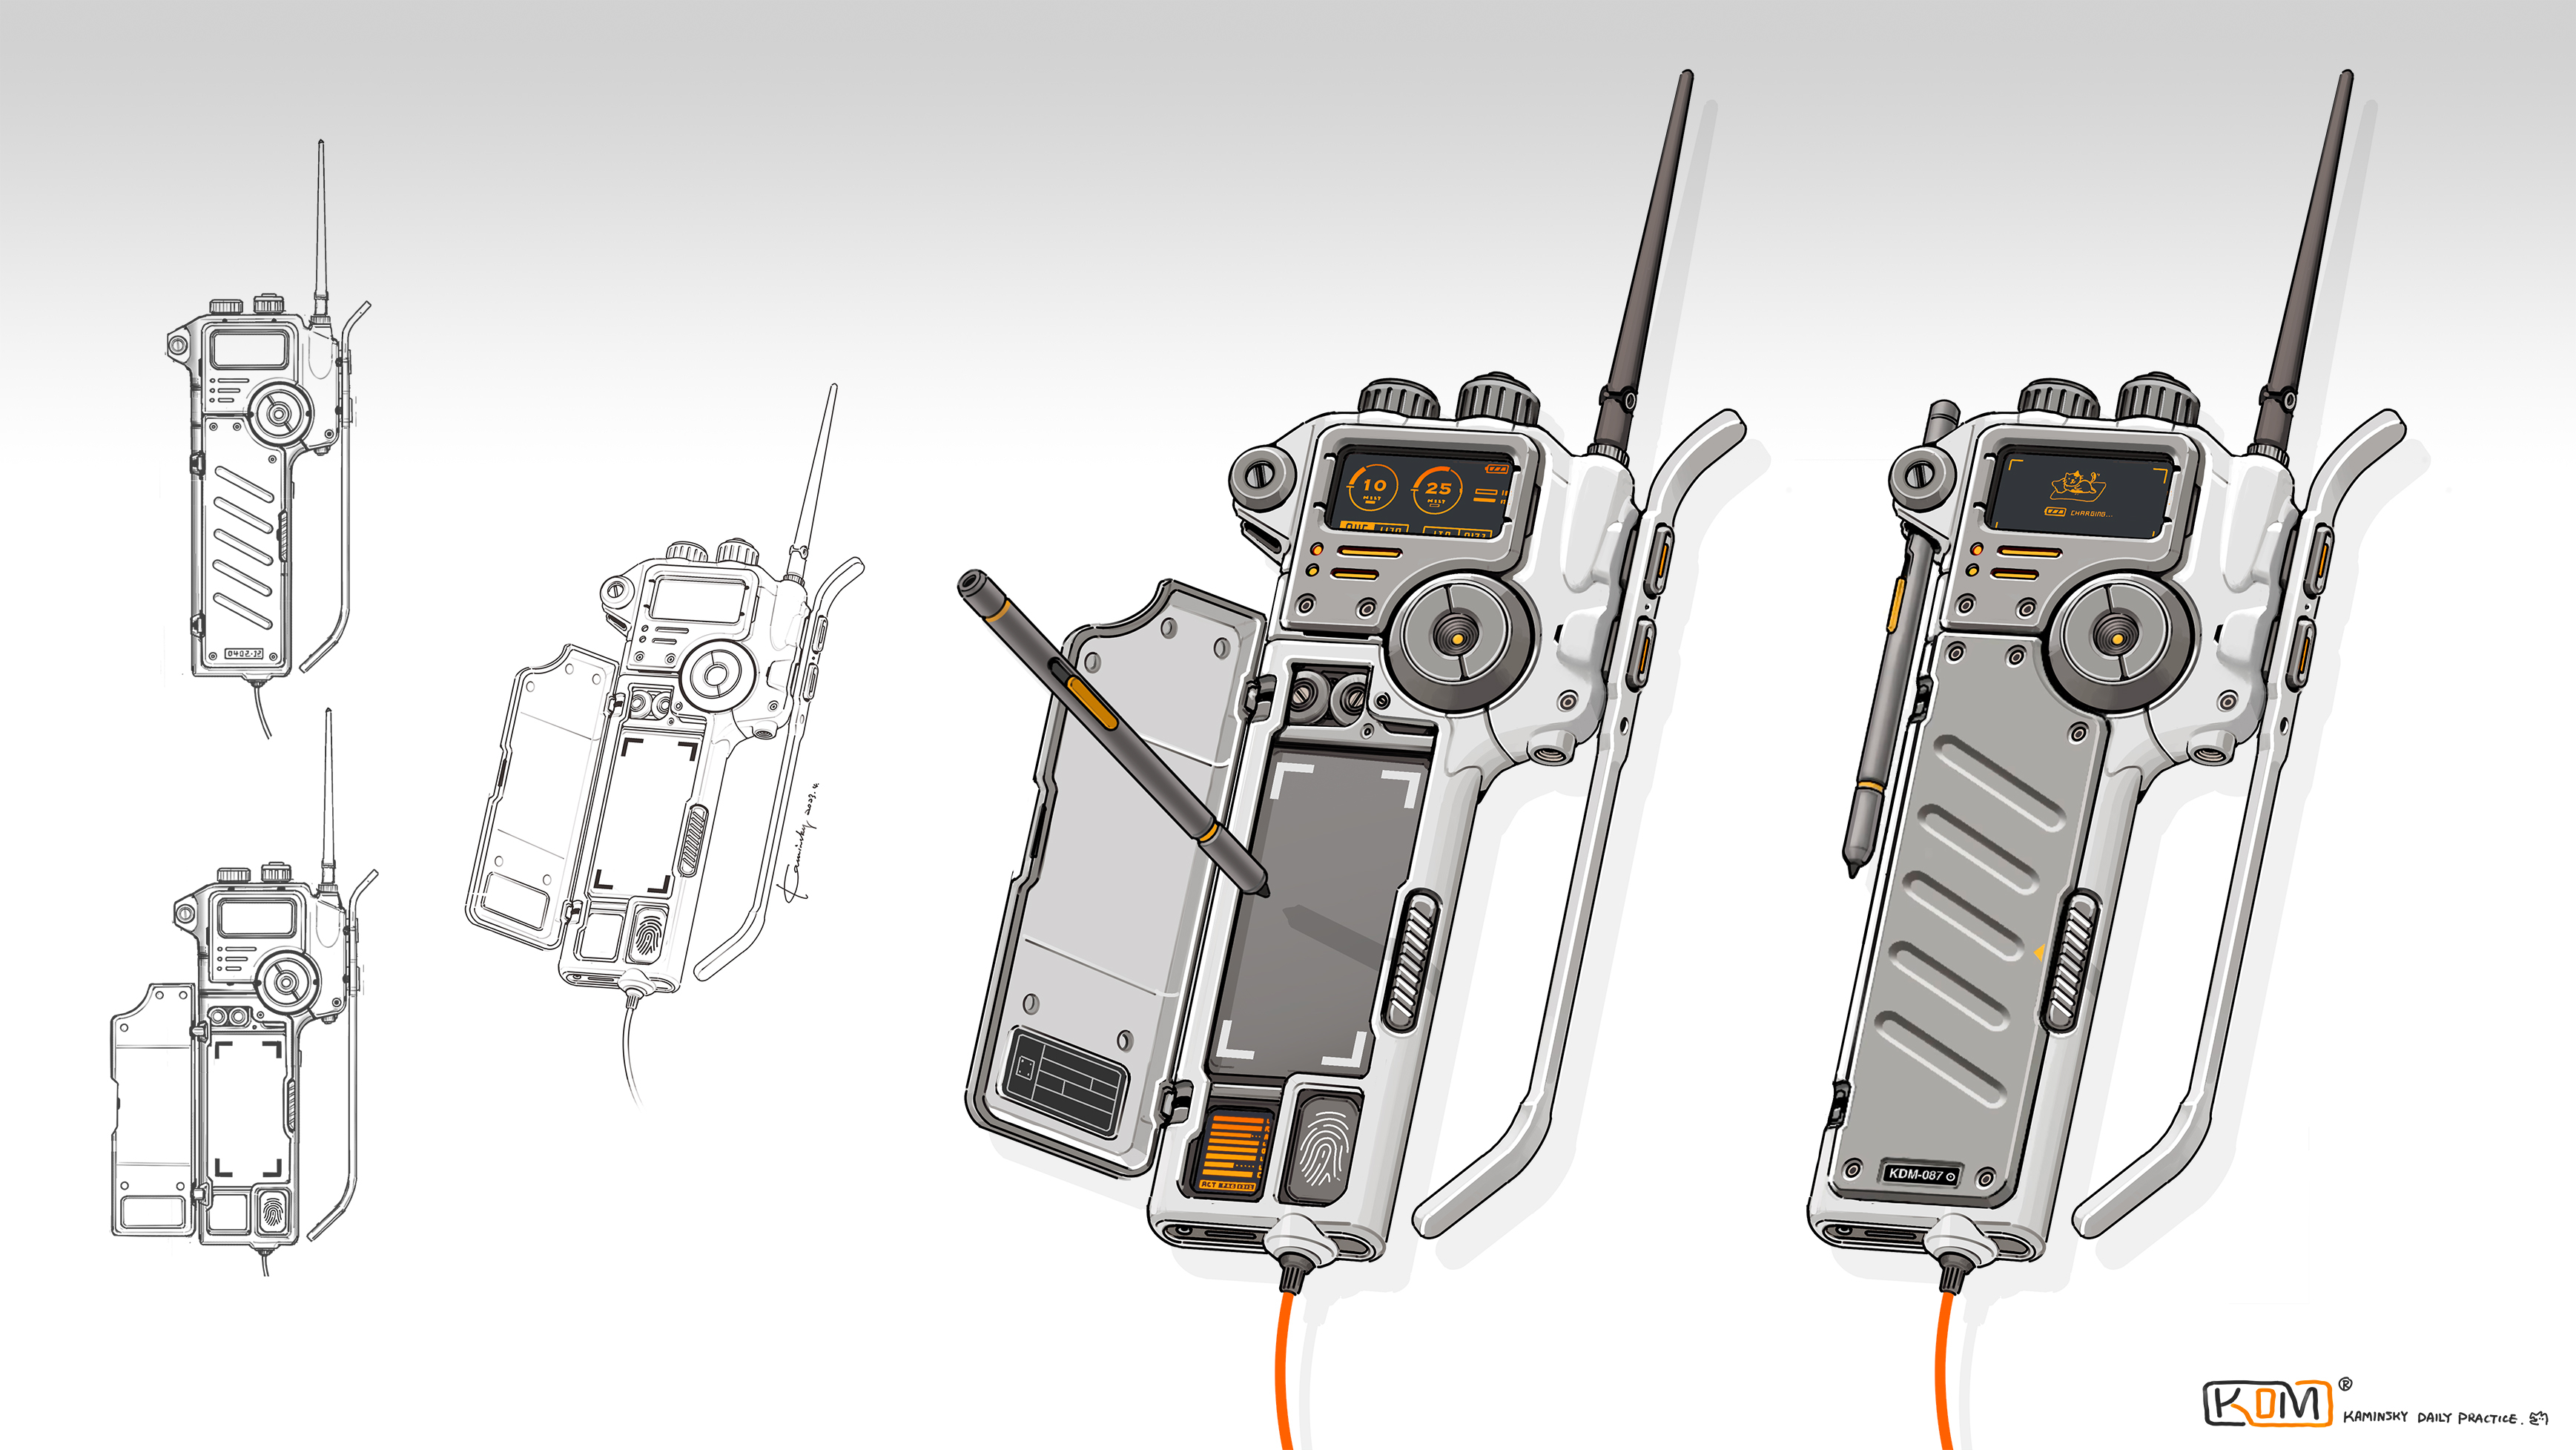
The final piece:

Taking a break from some other work to make this handheld pad from Kaminsky designs, used with permission.
All critiques welcome.
The concept:

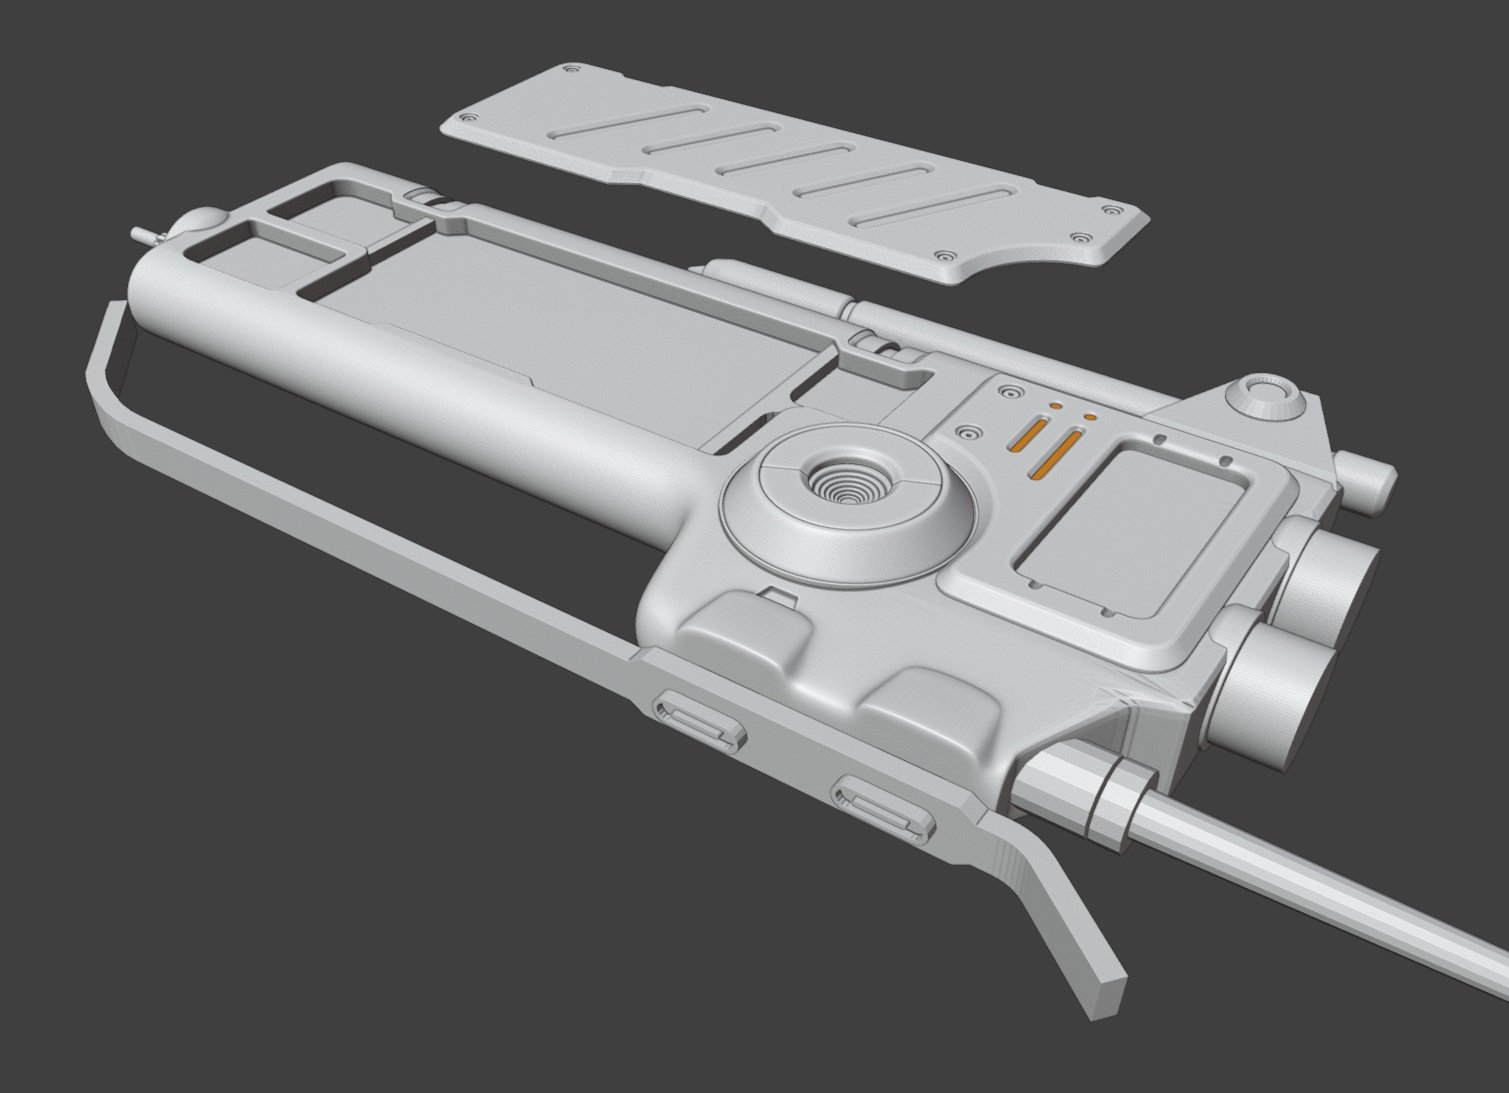
Here's the current progress:

Originally I'd worked with a subd only workflow for practice, but found that blender's remesh modifier alongside smoothing modifier did a pretty good job of bringing hard surface stuff together. So I've switched to a combination subd and medium detail modeling, then boolean and remesh/smooth workflow to unify it.
Previously I'd used Zbrush to do the booleans and finish the highpoly. It's nicer to stay in one app, but Blender's modifiers are a bit slow, and there's a lack of fine control. I'm going to use vertex groups and data transfer to try and get some control back.
More shots:

Taking a break from some other work to make this handheld pad from Kaminsky designs, used with permission.
All critiques welcome.
The concept:

Here's the current progress:
Originally I'd worked with a subd only workflow for practice, but found that blender's remesh modifier alongside smoothing modifier did a pretty good job of bringing hard surface stuff together. So I've switched to a combination subd and medium detail modeling, then boolean and remesh/smooth workflow to unify it.
Previously I'd used Zbrush to do the booleans and finish the highpoly. It's nicer to stay in one app, but Blender's modifiers are a bit slow, and there's a lack of fine control. I'm going to use vertex groups and data transfer to try and get some control back.
More shots:
Replies
Just a few more tricky parts. and making something up for the back.
Doing a test of the hinge and lid opening mechanics for this, and it worked!
I was worried about this change to the concept, since it required animations to maintain the look and still function.
This will be a hero prop, seen up close, and currently sits at ~14k tris
Main thing worrying me are all those long and thin polys, and a lot of the transition areas between main forms. RTX doesn't like some areas at steep light angles and I may try to fix that by adjusting the meshes to be even closer to the highpoly, but I don't know if it's worth the effort. I may also have left too many unnecessary bevels in the low poly.
Time to deep dive into Blender UVs after using Maya for so long.
j/k some normal and other issues I need to fix before really drive into the materials. Nothing I haven't dealt with before, just stuff like the flat surface normal jank like you can see on the flat area under the lid, the top panels, etc. Those flat areas should be bordered entirely with hard edges, ideally in their own UV island split off to make sure it's baked flat and the triangles don't appear. I forget the technical reason why this is, need to read up on it again.
Also some leftover unintended hard edges, because blender requires you set autosmooth set to 180 angle, before any manually marked sharp (hard) edges will take effect.
Because substance can be a paint to see and paint things from one angle, before exporting to substance you should just duplicate your mesh a bunch and rotate it to better angles, and hide parts that get in the way of painting.
It's mainly a problem with metallic or glossy materials... oh wait, that's almost all the medical equipment I've been modeling the past 2 years. Thankfully, the fix is easy enough, but will require some UV adjustment.
The problem that my old team ran into is if you don't cut and separate the UV seams where you split/harden the normals, then you get a nasty obvious seam along every split edge in the bake.
However I just tried the above, which seems to fix the issue without the need to cut UVs. The normals aren't split, they're just Set to Face, and the edges have to be hardened (and in Blender autosmooth needs to be on, but set to 180). With those two combined, I can avoid cutting the UVs. However, I'll still have to test this in engine as that's where a lot of these issues finally show.
I'm so glad that the Blender 4-5 roadmap has a giant change to the way they handle normals, even removing the extra step of autosmooth 180, and manual sharps as its weirdly required for game meshes.
I can't say how to do this in Maya, since I recall Maya auto splits normals when you harden an edge, but there should be a way to.
But, seeing this in Unity when it used to be a common annoyance at my previous job is a relief.
So why this works greatly simplified is we're taking the equation for how something looks 'lowpoly + normalmap = highpoly' and taking lowpoly out. Or most of lowpoly anyway.
First off; Normalmaps baked from highpoly are the above equation moved around. 'highpoly - lowpoly = normalmap'.
A highpoly facing up(0) - a lowpoly facing left(-1) = a normalmap facing right(+1).
If the lowpoly is instead a metaphorical zero that shortens the equation down to 'highpoly = normalmap'.
A highpoly facing up(0) - a lowpoly facing up(0) = a normalmap facing up(0).
A highpoly facing left(-1) - a lowpoly facing up(0) - a normalmap facing left(-1) With me so far? Lets add error to the mix.
Error happens is because the lowpoly and normalmap don't both use the same kind of number.
Once again simplified the highpoly and lowpoly can use decimals but the normalmap cannot.
Highpoly(6.40) - lowpoly(3.17) = normalmap(3.23)
But normalmaps cannot have decimals. So instead of 3.23 we get really get 3.
lowpoly(3.17) + normalmap(3) = 6.17.
Our highpoly was 6.40 so 6.17 has error from the normalmap. Now for the wobbly surface ripple on reflections.
The rippling happens because each lowpoly triangle on the model has 3 decimal numbers. We will once again simplify and instead say each triangle has 2 decimal numbers. A triangle will use both those numbers as well as Every Single Decimal Number Between Them. The normalmap still cannot use decimals.
So what happens if we have 'lowpoly(4.40 & 4.92) + normalmap(3)'?
Out of all fifty-ish numbers the lowpoly uses the normalmap will add up to the right number exactly once. Every other number is error. That is a lot of error. An entire curve of error.
The ripples are all of those error curves made visible. The many hundreds of thousands of spots across the entire triangle where the normalmap can't add the right number.
Having the triangle use the metaphorical 0 from earlier means rather than two numbers with thousands of numbers between them instead the triangle has just one number. Once again shortening it down into 'highpoly = normalmap'.
Mind you we will still almost always have error since the highpoly has decimals and the normalmap doesn't. But the error is the same across all the triangles of the flat panel instead of curving wildly along where each triangle meets another.
Why just moving the normals to point perpendicular without setting the edges to hard didn't work at all for the baker. Or why splitting the normals caused seams unless the UV was cut. I haven't had time to really get the fundamental math behind it, let alone deep dive into it. But I'm gonna have to learn it if I want to write shaders and do other tech art related stuff.
As always all critique welcome.
Any critiques are always welcome.
A vertex can only point in one direction. Splitting the normals literally puts a second vert in the same spot pointing a different direction.
Normalmap cannot fix two directions in the same spot without error. It only gets one hypothetical number remember.
Splitting the uv and moving it means those two verts are no longer in the same spot. Normalmap can work with both now. Downside is you now have slightly less resolution on your final model. The padding between UV islands has to come from somewhere after all.
Having the seam wasn't always a bad idea either. Older texture compression was really, really mean to normalmaps and the seam helped a lot. Yeah there's some edge here and there but still better than no normalmap at all.
More shots and breakdowns to follow.
I plan to revisit this to fix anything that comes up once when I create the animated UI for Unreal. But right now I need to start on some weapon props for potential jobs.