The BRAWL² Tournament Challenge has been announced!
It starts May 12, and ends Oct 17. Let's see what you got!
https://polycount.com/discussion/237047/the-brawl²-tournament
It starts May 12, and ends Oct 17. Let's see what you got!
https://polycount.com/discussion/237047/the-brawl²-tournament
[UE4] Mount Saint Michael street - Stylized game environment breakdown

polycounter lvl 2
1. Introduction
Hi! My name is Mark Vives, I'm a junior 3D artist from Barcelona and I'd like to share how I build a street of the Mount Saint Michel, a beautiful fortress in the north of France. I chose this place as a reference because I love its architecture and I thought it would be a good practice for an stylized environment. The texel density I'll use in this project is around 512 pixel/m.
Link to my artstation: https://www.artstation.com/nirvis

Link to my artstation: https://www.artstation.com/nirvis
2. Blockout
First of all, I had to build a simple blockout of the street I wanted to replicate in Blender. As reference I used pictures from internet and google maps 360º views.

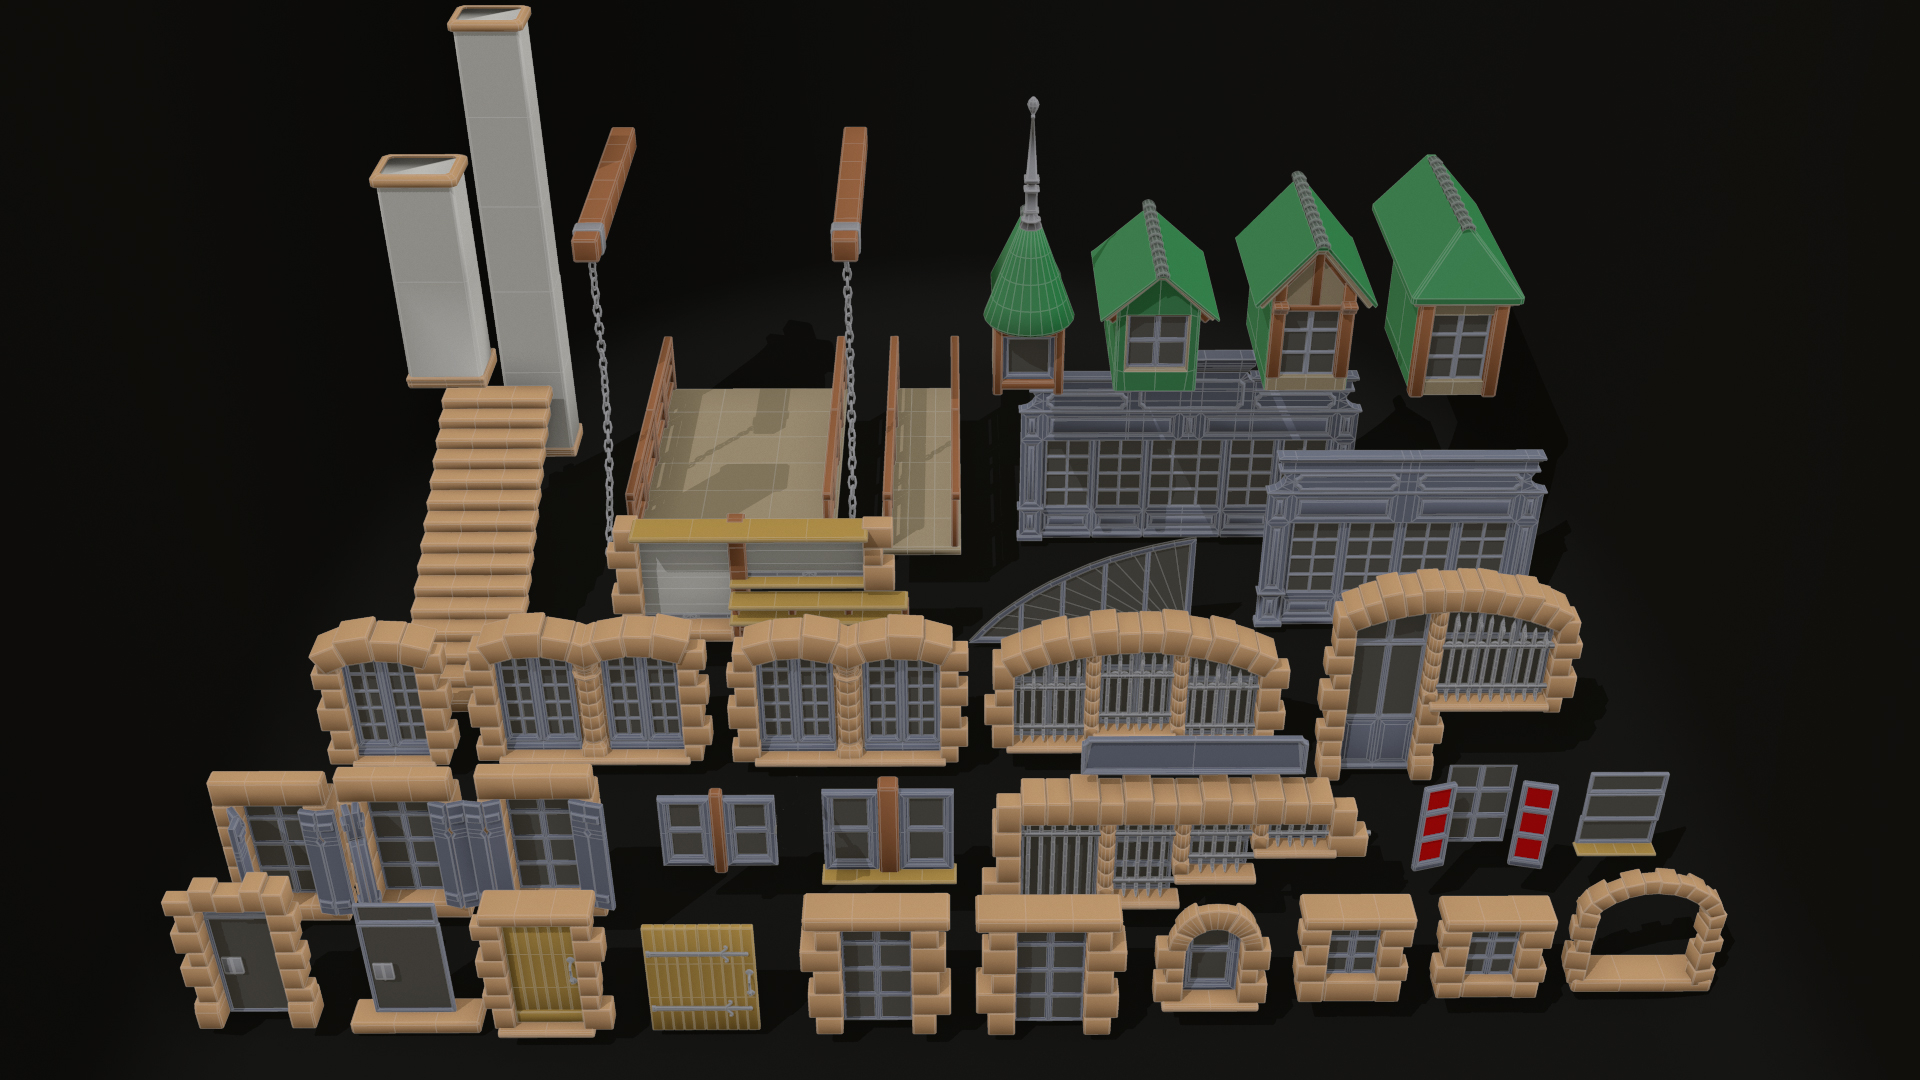
3. Architecture props
Once I had the blockout, I started to model (also in Blender) the main architecture components that I'll need to build all the different buildings. I've divided these props into different categories depending on their materials. Each one will be packed on the same UV map for optimization purposes.
3.1. Low poly meshes
3.1. Low poly meshes
3.1.1. Atlas Wood A (2048x2048) and Atlas wood B (2048x2048)

3.1.2. Atlas painted metal (1024x1024)

3.1.3. Atlas stones (2048x2048)

3.1.4. Atlas painted wood (4096x4096)

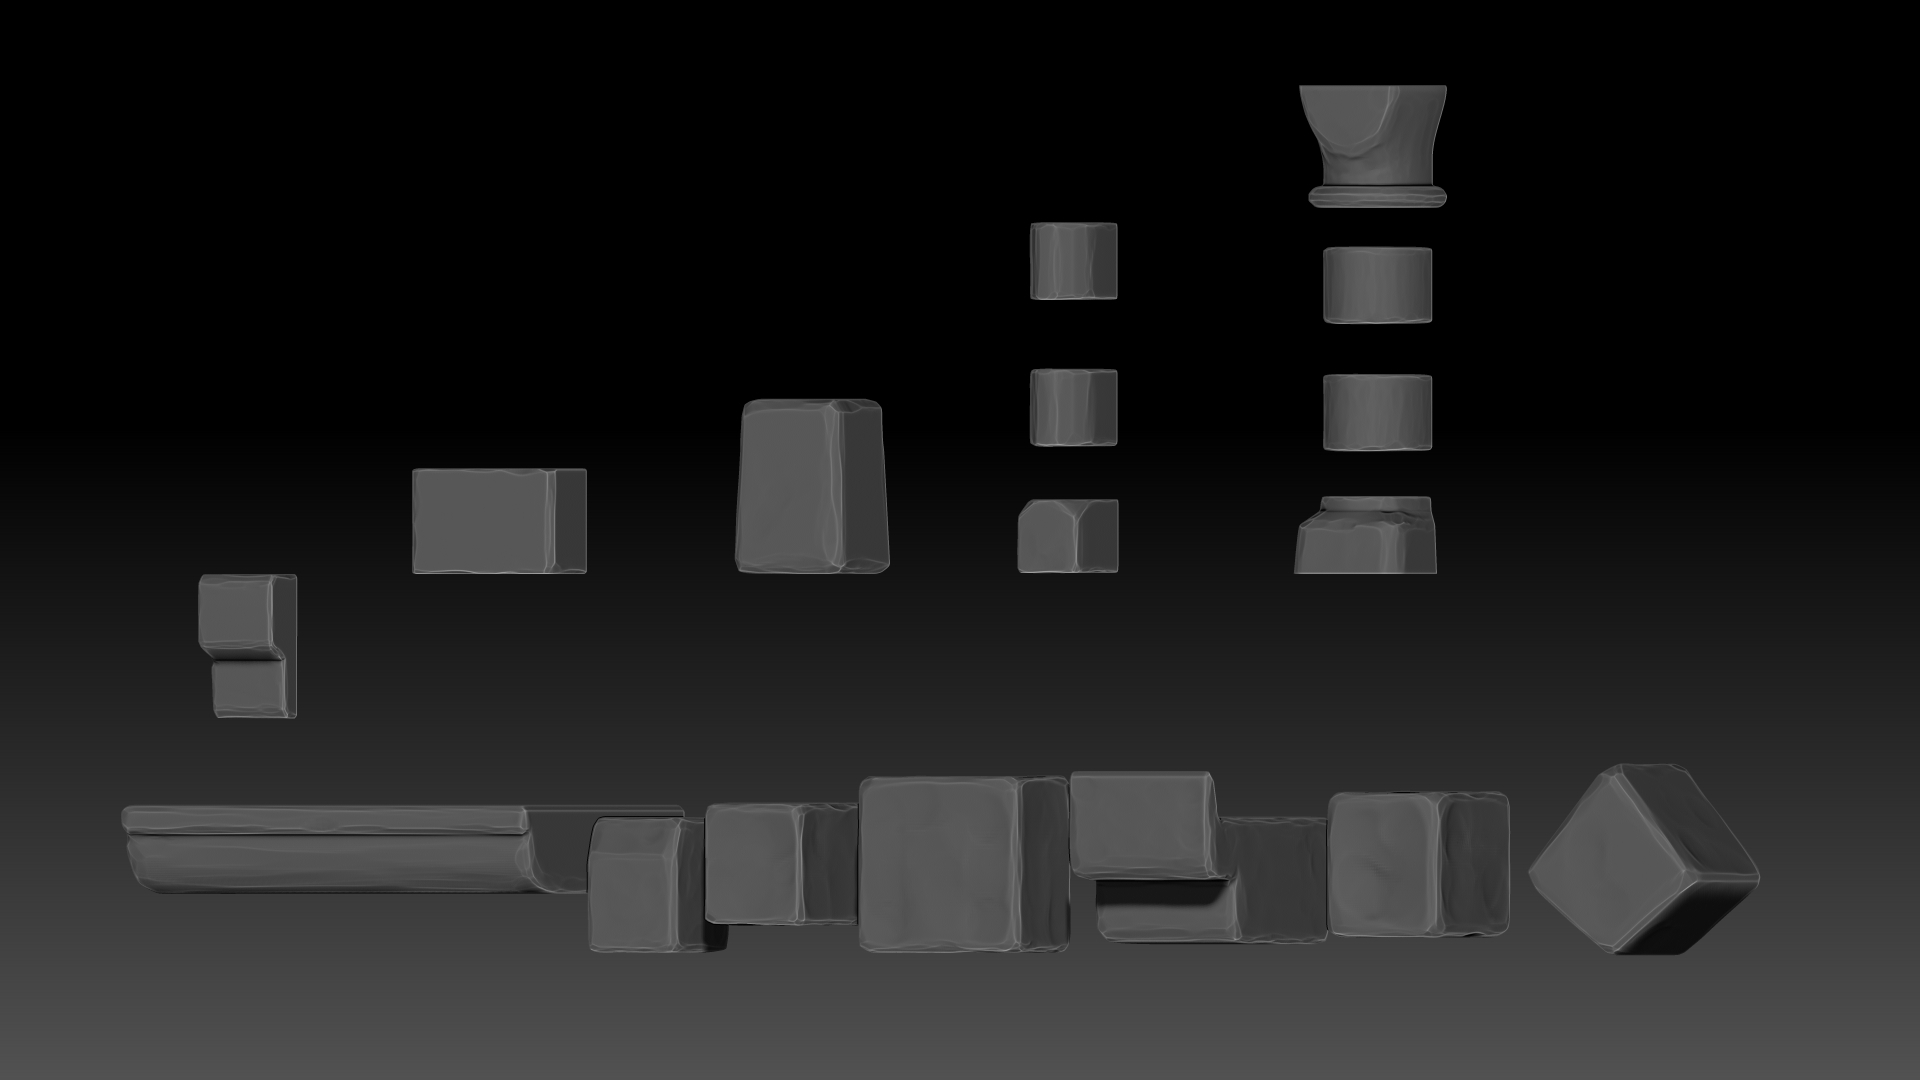
3.2. High poly meshes
After modeling all the low poly archictecture props, I exported them to zBrush and created a high poly mesh of each one. Here's an example of the high poly stones in zBrush.
3.3. Bake maps
After this, I baked the high poly information to get the normal, curvature and AO maps in Marmoset Toolbag.
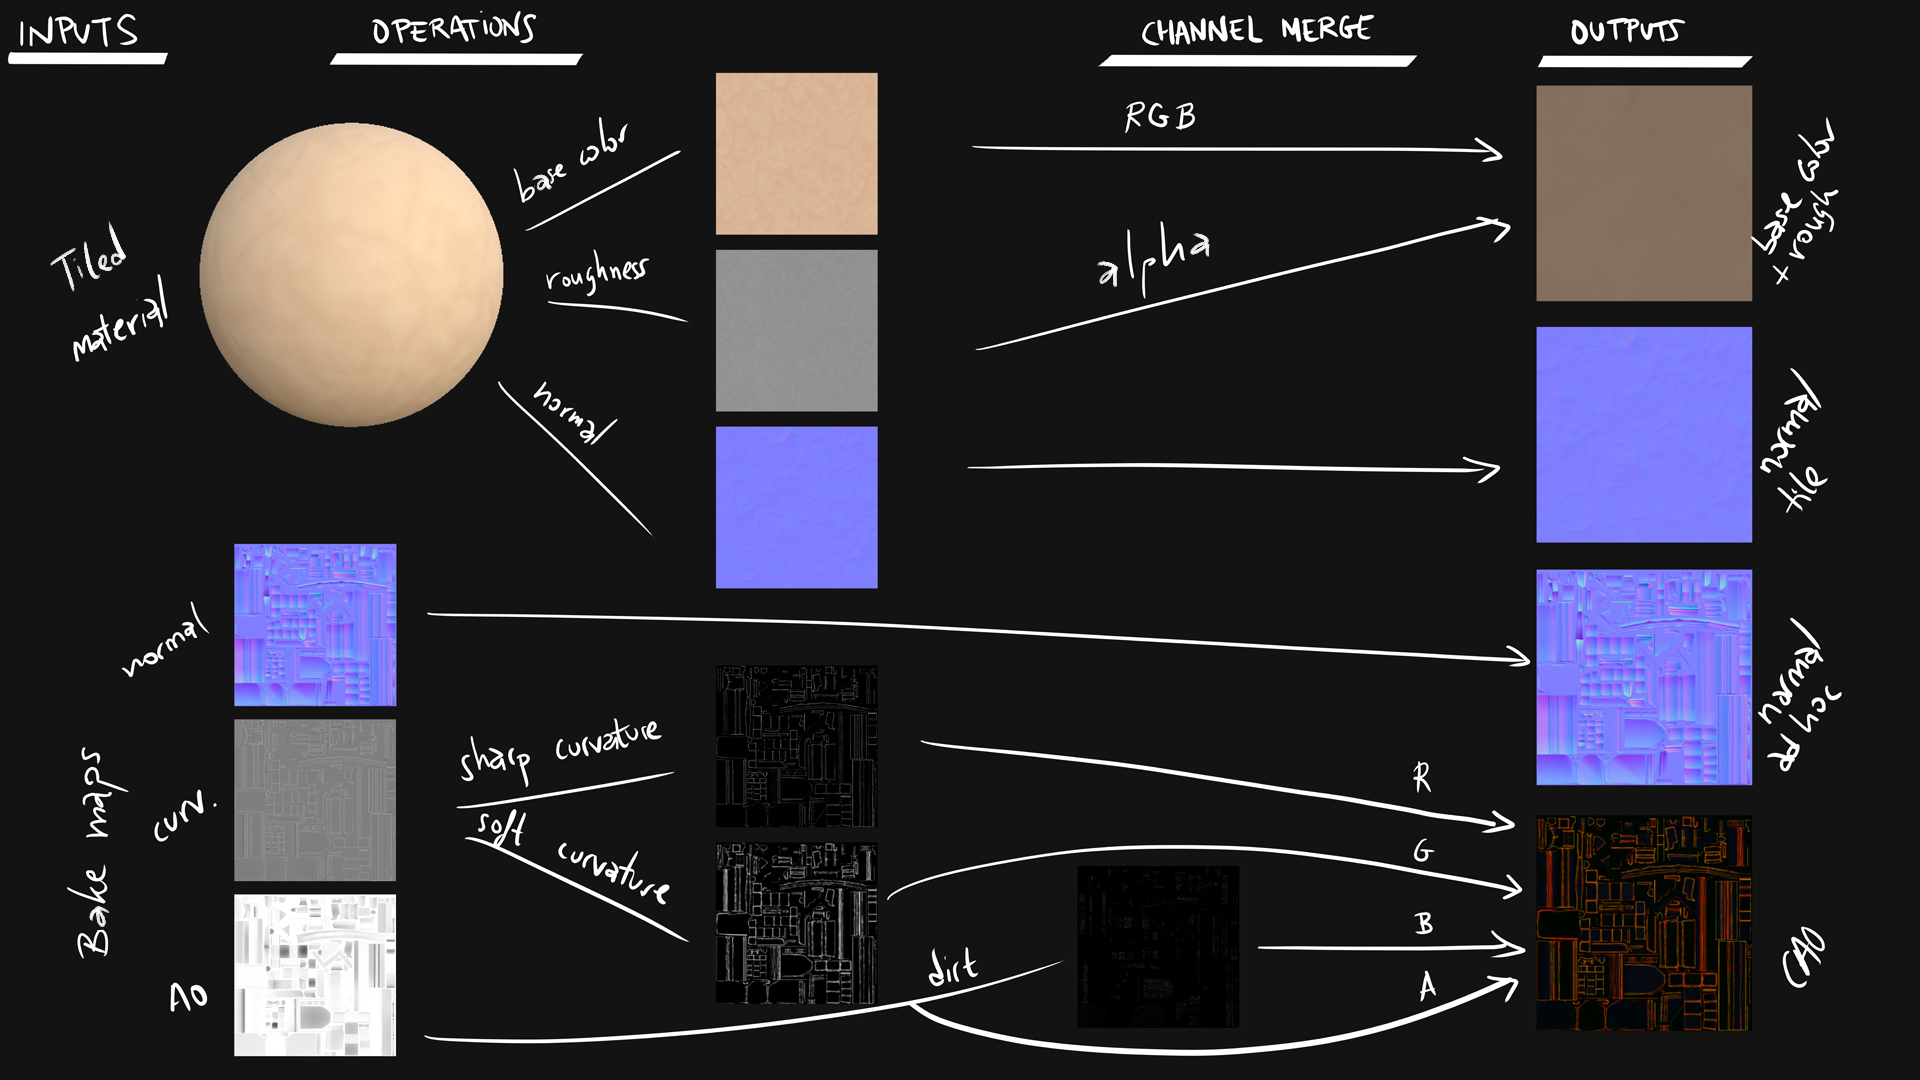
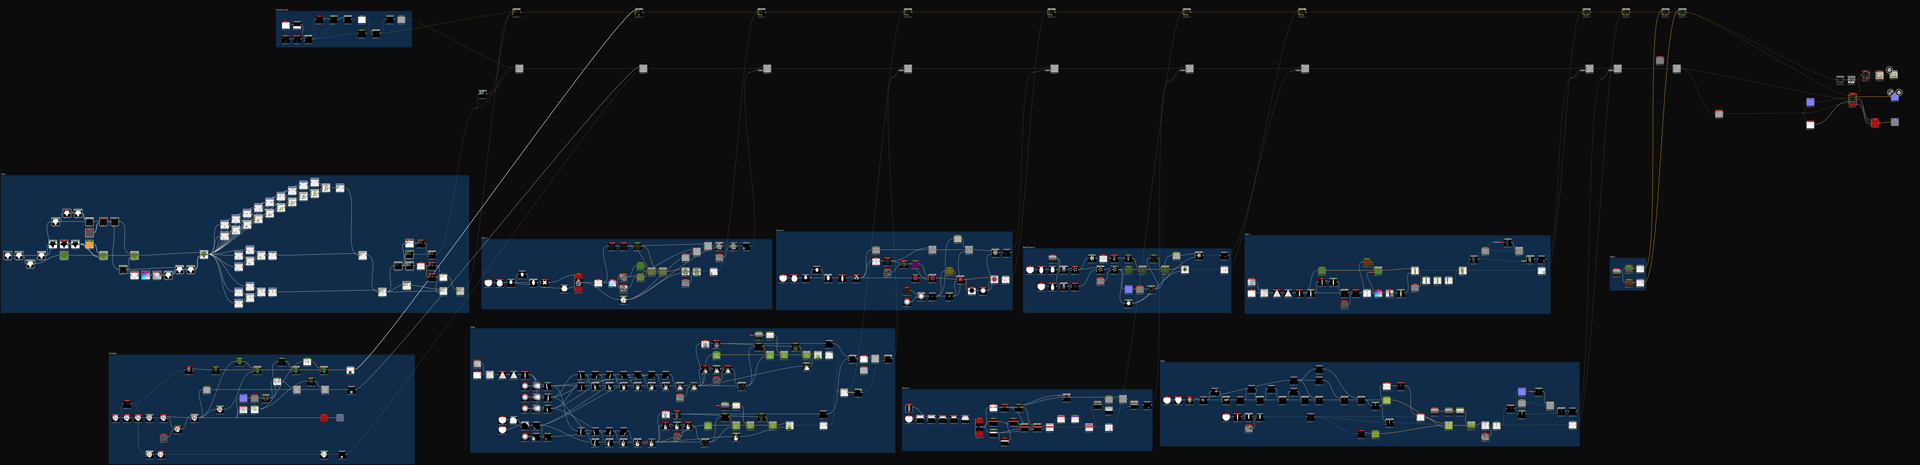
3.4. CAO Shader
To draw all this architecture props in the engine, I created a shader in UE4 which is gonna use a tileable material and some adhoc information for the mesh, such as its normal and some masks to create the stylized effect. For each one of the atlas I meantioned before, I created a tiled material in Substance designer which is going to have a base color, roughness and normal map. Then, separatelly, I used the baked information of each atlas to create 4 greyscale masks that I merged into a CAO texture ("CAO = CurvatureAmbientOcclusion"), all in Substsance designer.
Here's an example of the procedure I used for the atlas of stone.
Back to the engine, I created a shader that is going to use these 4 texture samples to draw our props. I used the CAO texture as masks that blends to the base color texture, using screen or multiply depending on if I want to bright or darken the texture. (V4 means 4 vector node, a color basically).
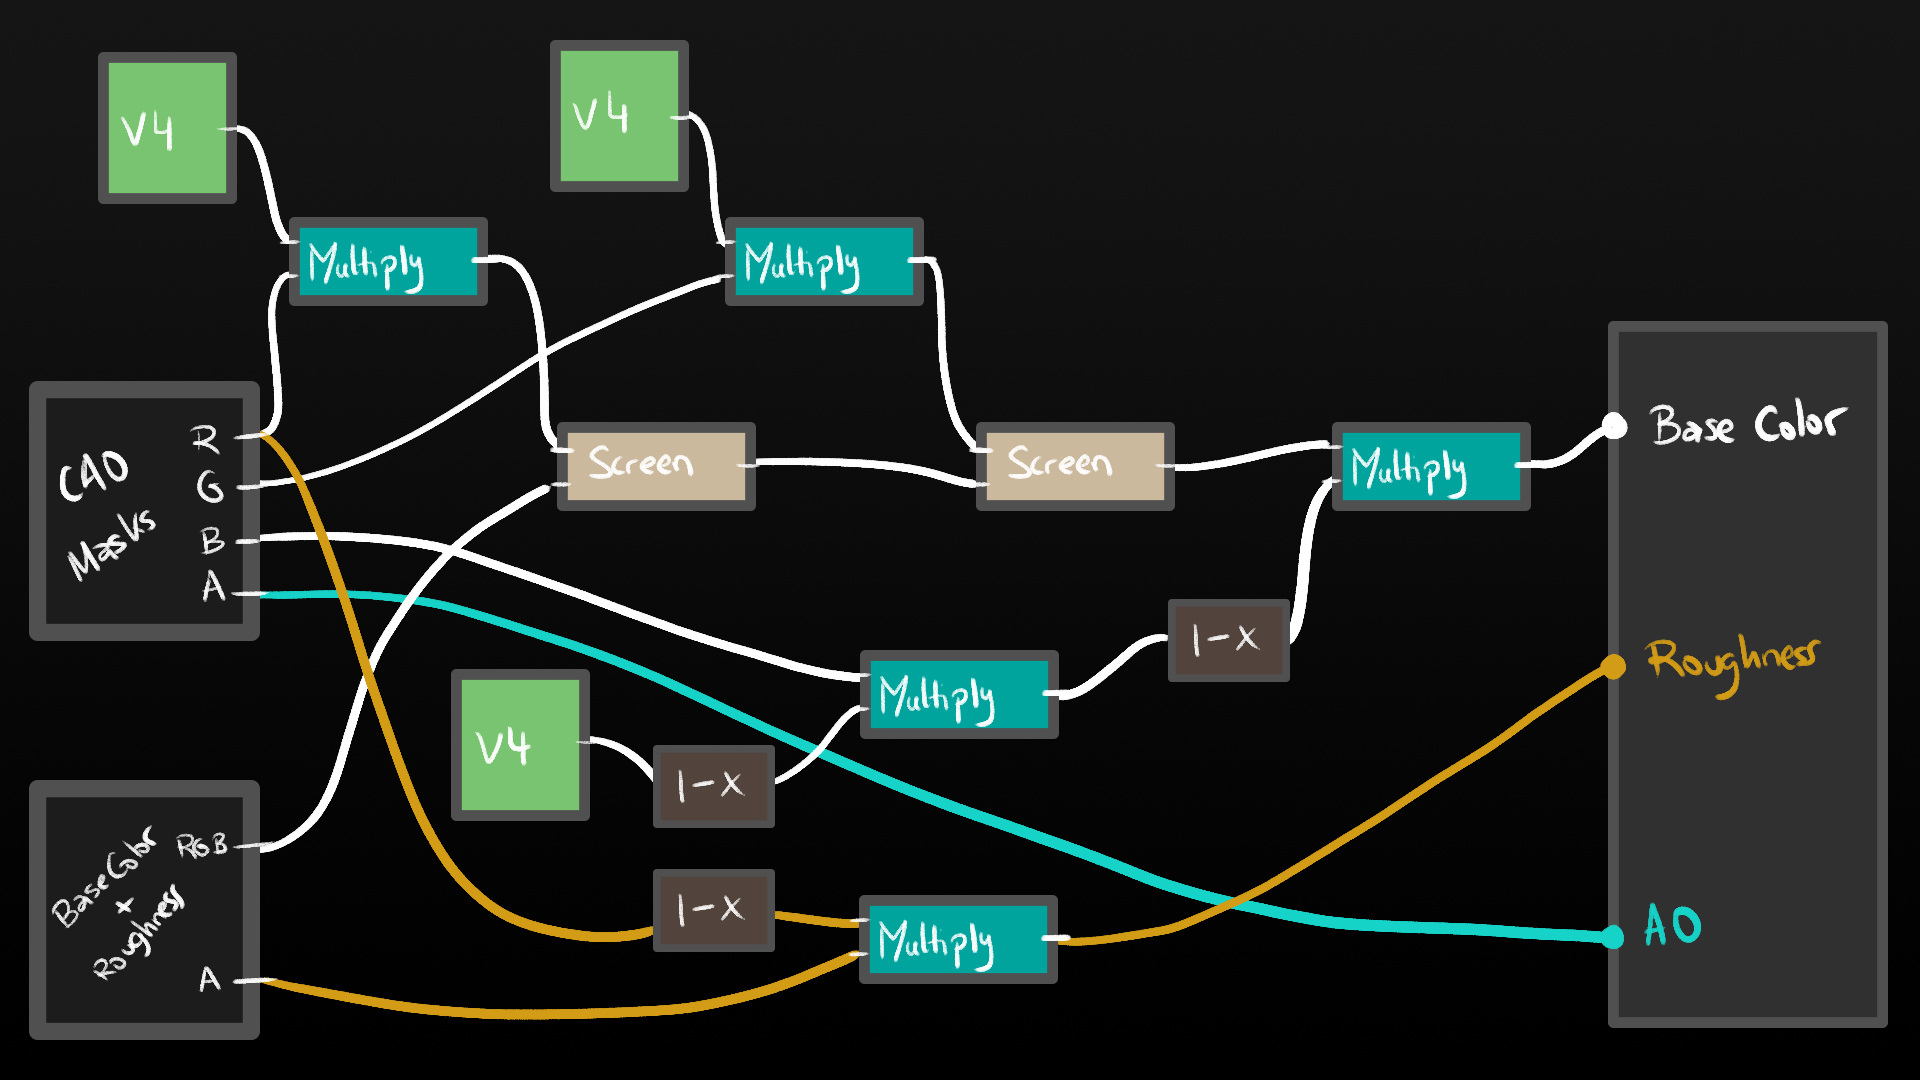
Back to the engine, I created a shader that is going to use these 4 texture samples to draw our props. I used the CAO texture as masks that blends to the base color texture, using screen or multiply depending on if I want to bright or darken the texture. (V4 means 4 vector node, a color basically).
For the normal maps I just simply added both textures. Then I used some additional nodes to control the contrast of the masks and set some parameters to create variation in the instanced materials.
4. Unique, other architecture and filling props
I had to create some other props that will need an adhoc texture so I created different atlas. Modeled in Blender, high poly in zBrush, baked in Marmoset and texturized in Substance Painter. These props use 3 texture maps: base color+opacity(if needed), normal and RMMAO (Roughness/Metallic/UserMask/AmbienOcclusion).
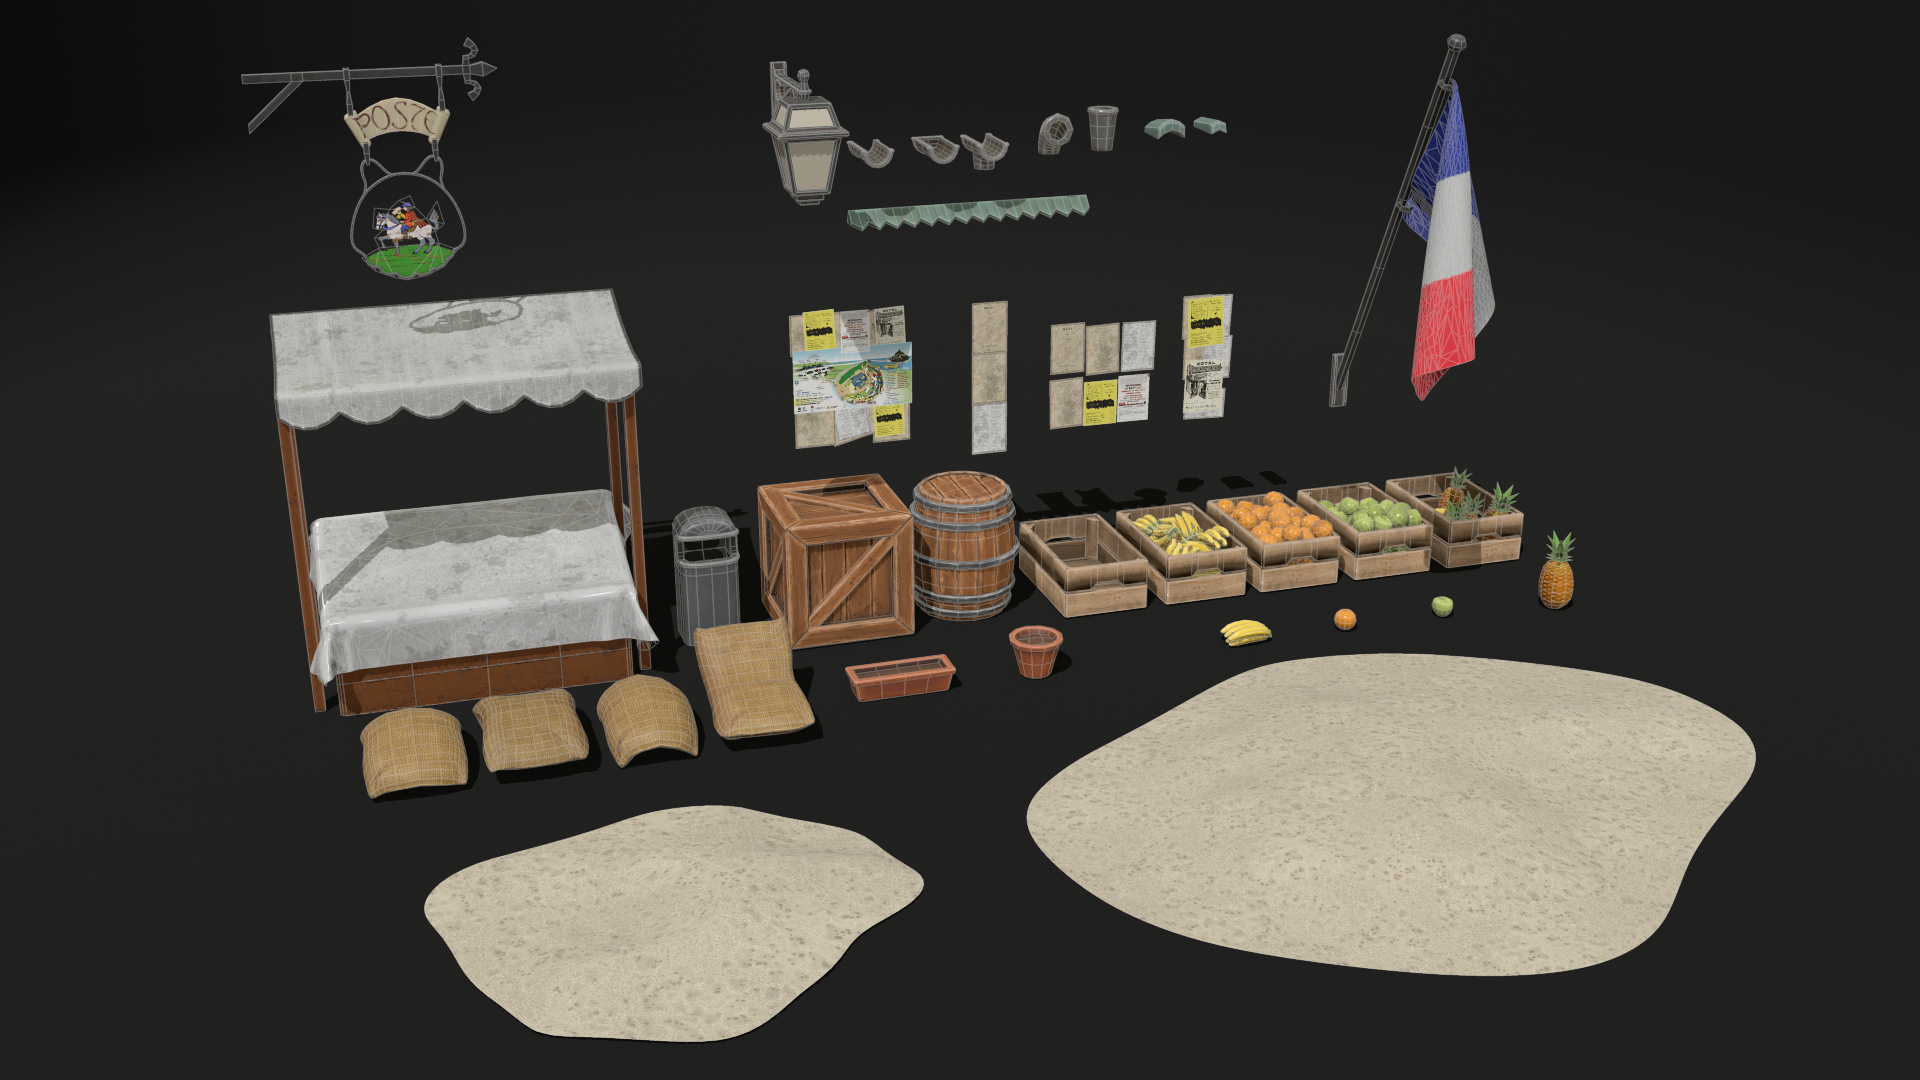
Well, the sand it's a tiled material.
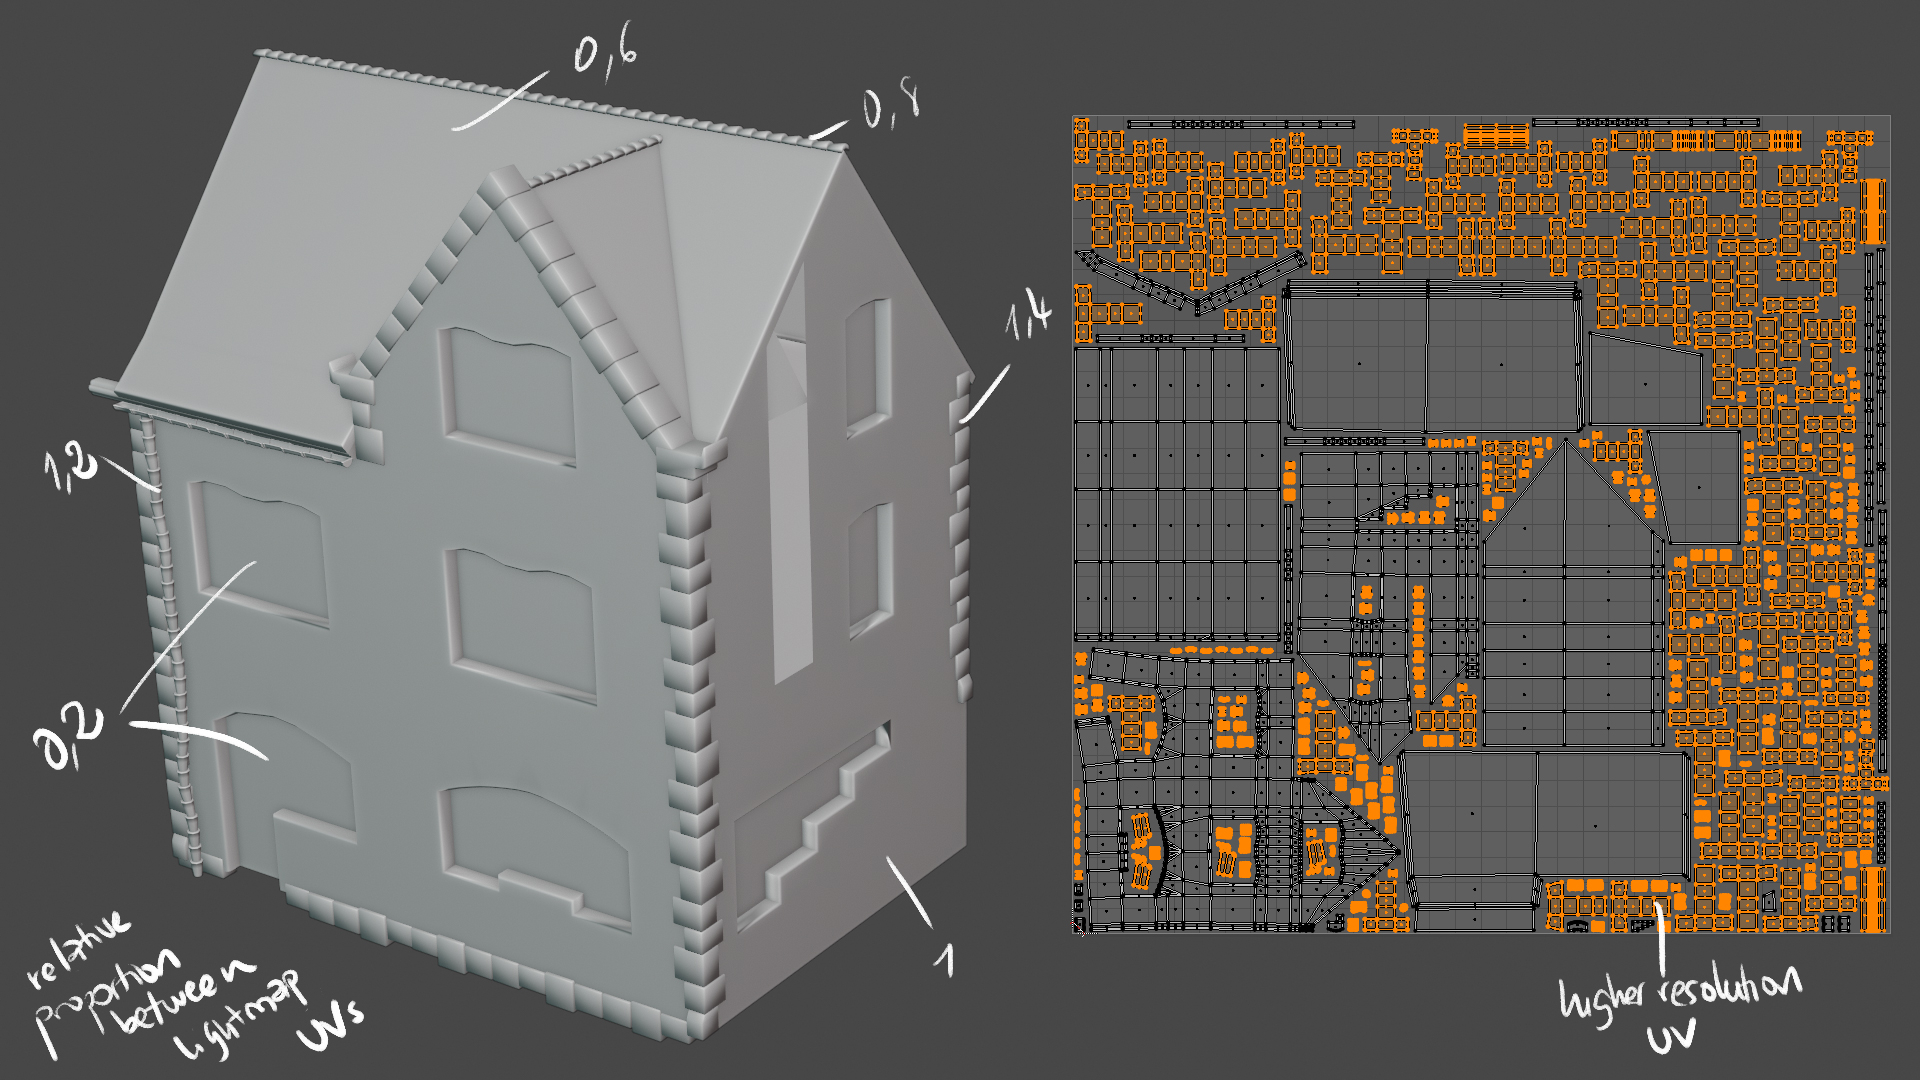
5. House building and game ready export
To build all the houses and structures I combined the architectural props to create different modules, such as windows, doors, fences or columns. Each module have its own lightmap UVs made in Blender.
In addition, I used some stones and/or wood boards to complement the basic shape of the buildings, such as corners or lintels. Here's an example of the post office house, where I added stones, a gutter and roof tiles to its basic shape. I merged all this props into one mesh and created its lightmap UVs, giving each type of prop different resolutions to have a better result and optimizing when baking in UE4. My criteria is that small props need higher resolution, and far props need lower. Also, the faces that will be covered by modules doesn't need much resolution.
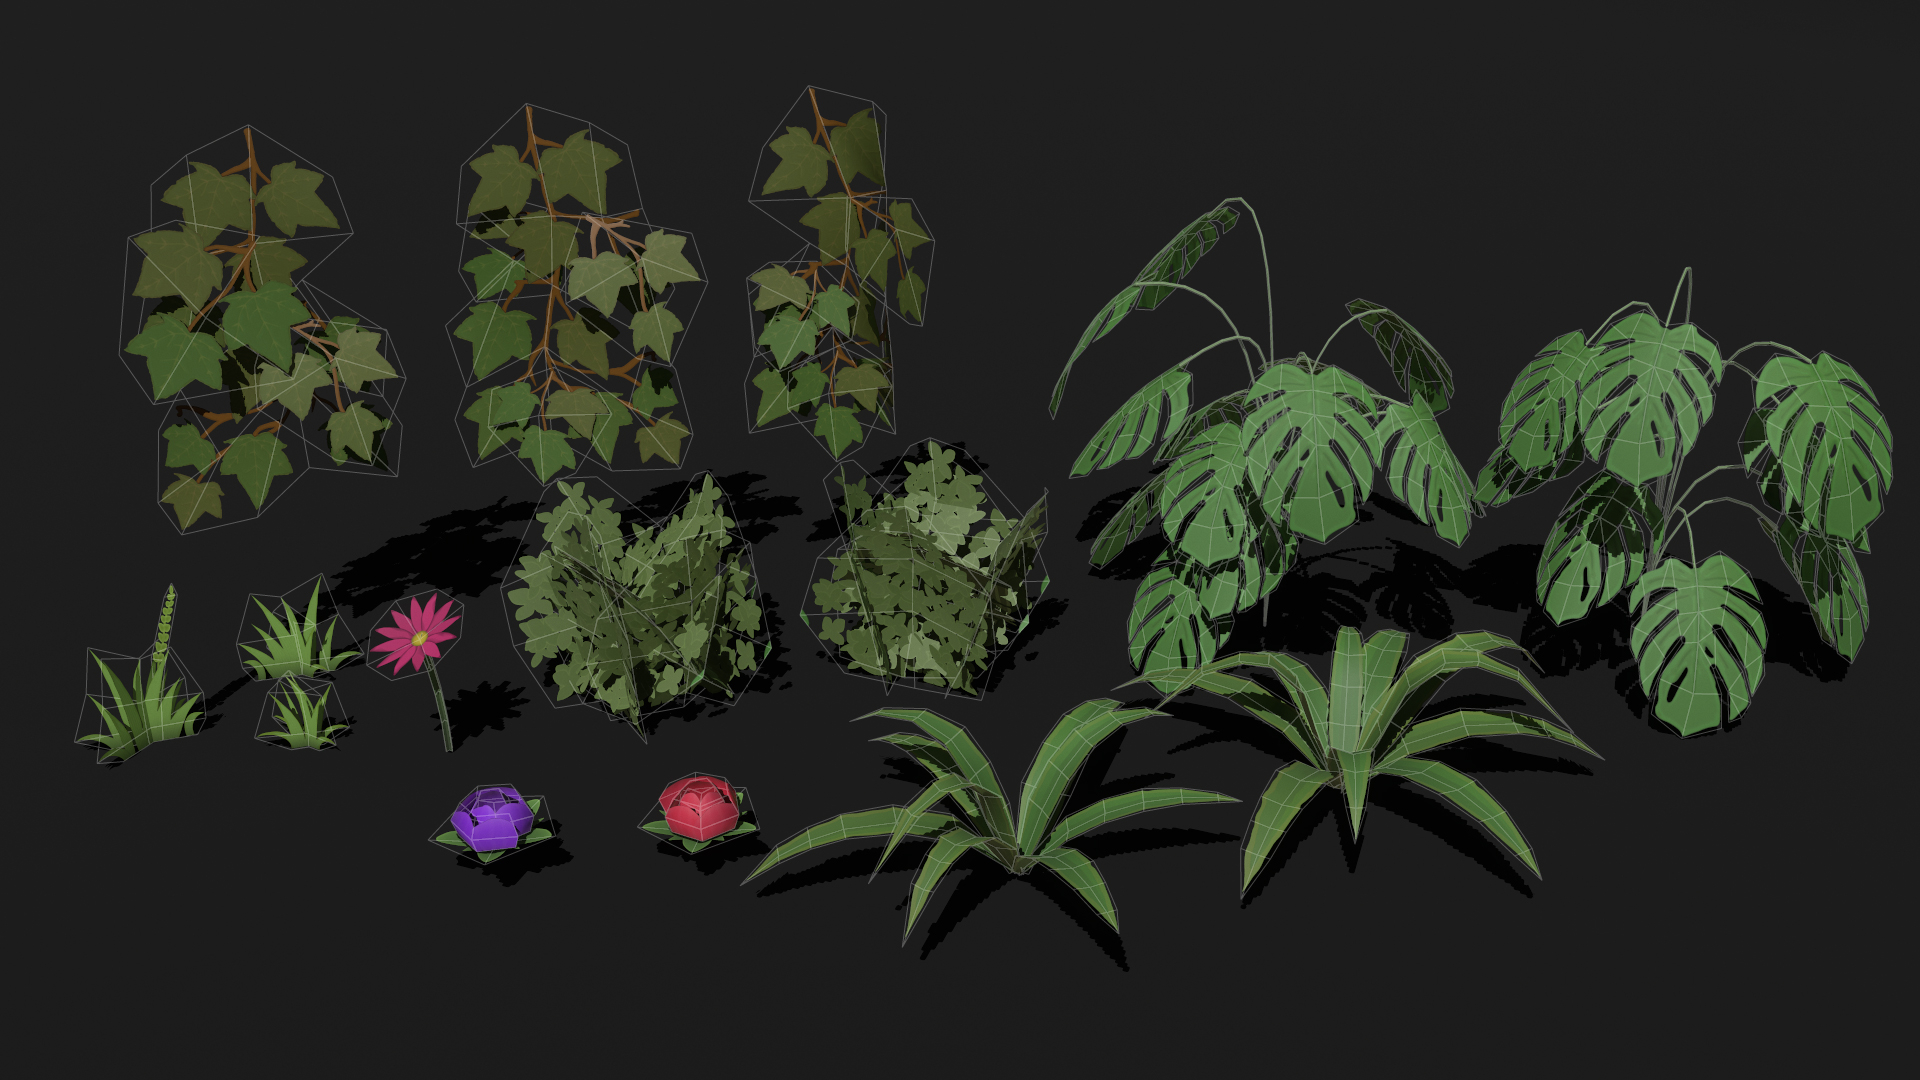
6. Vegetation
To create the vegetation, I wanted to use Substance Designer mainly, with the help of Photoshop to draw the shape of the leafs and use these as input for Designer.
After creating the atlas, I cropped the texture and build the plants in Blender.
7. Tilling materials
I used Substance Designer for creating all the tilling materials.
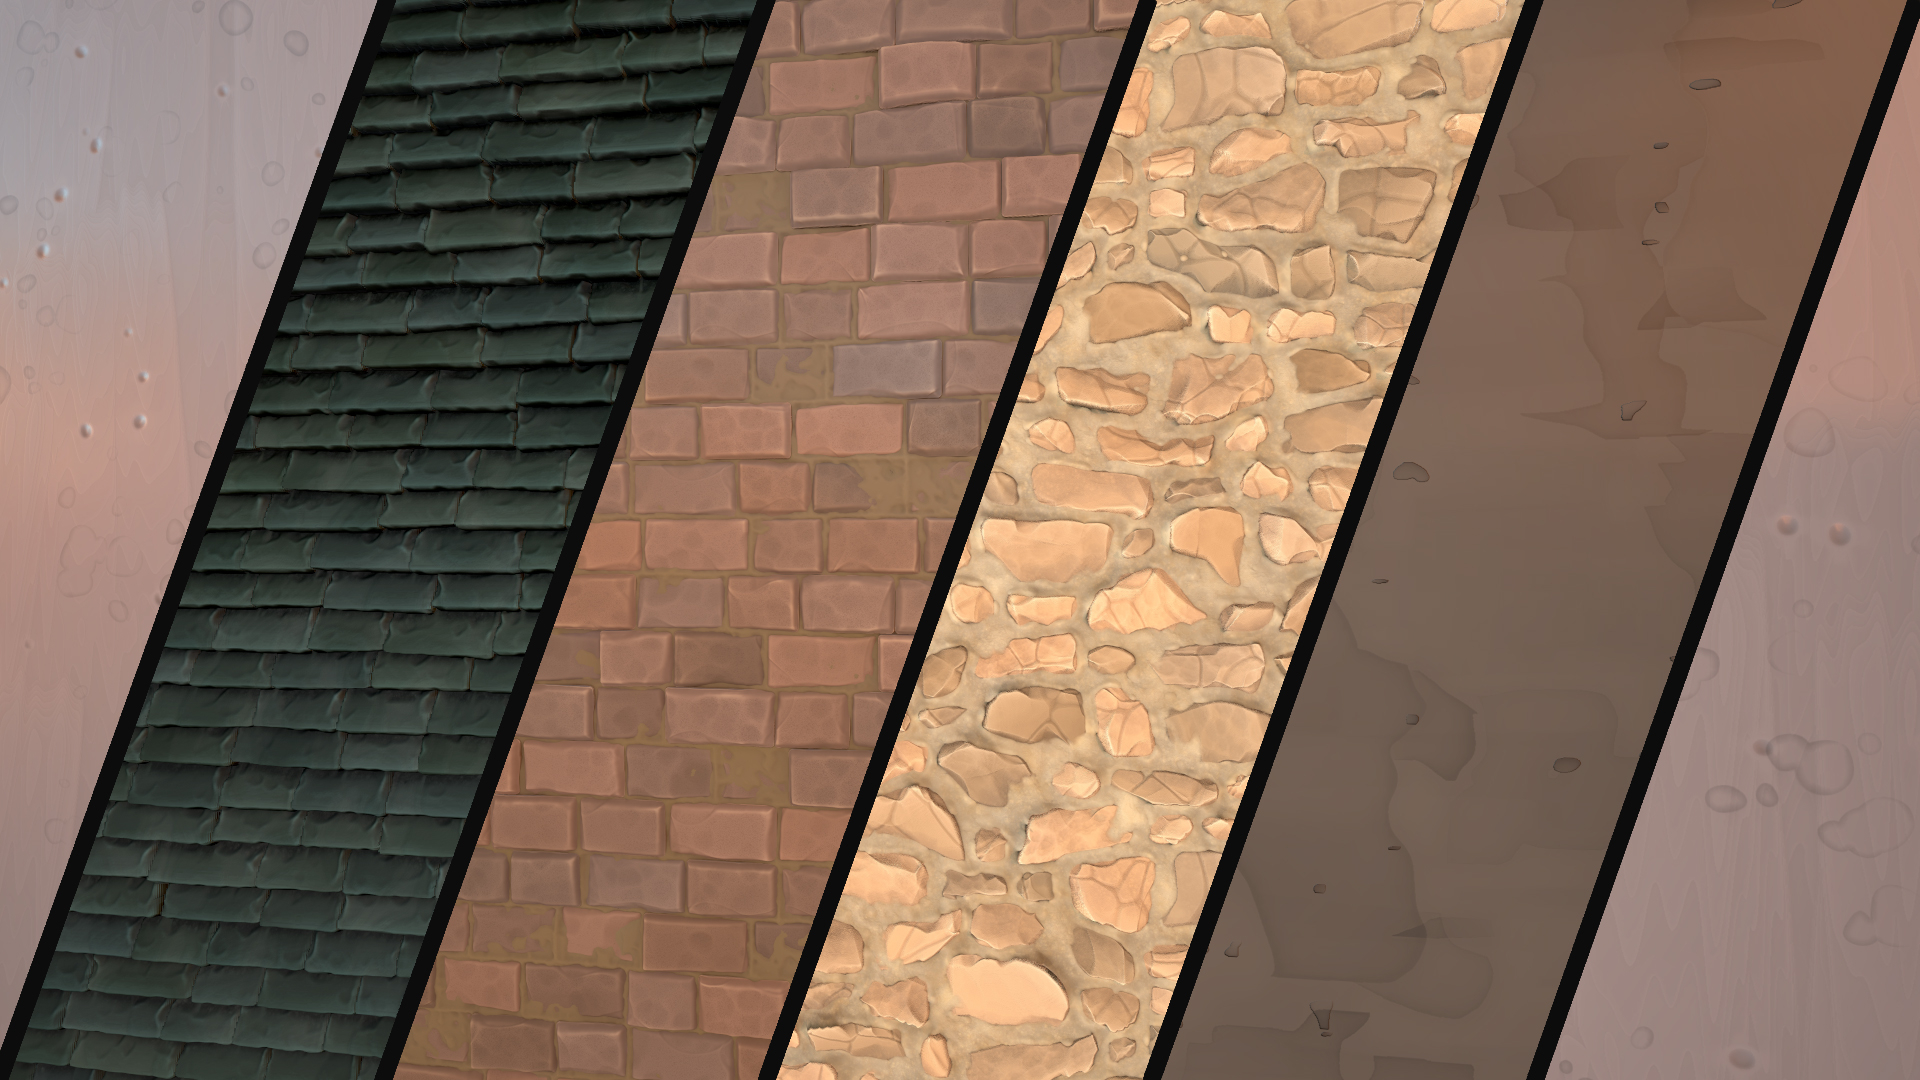
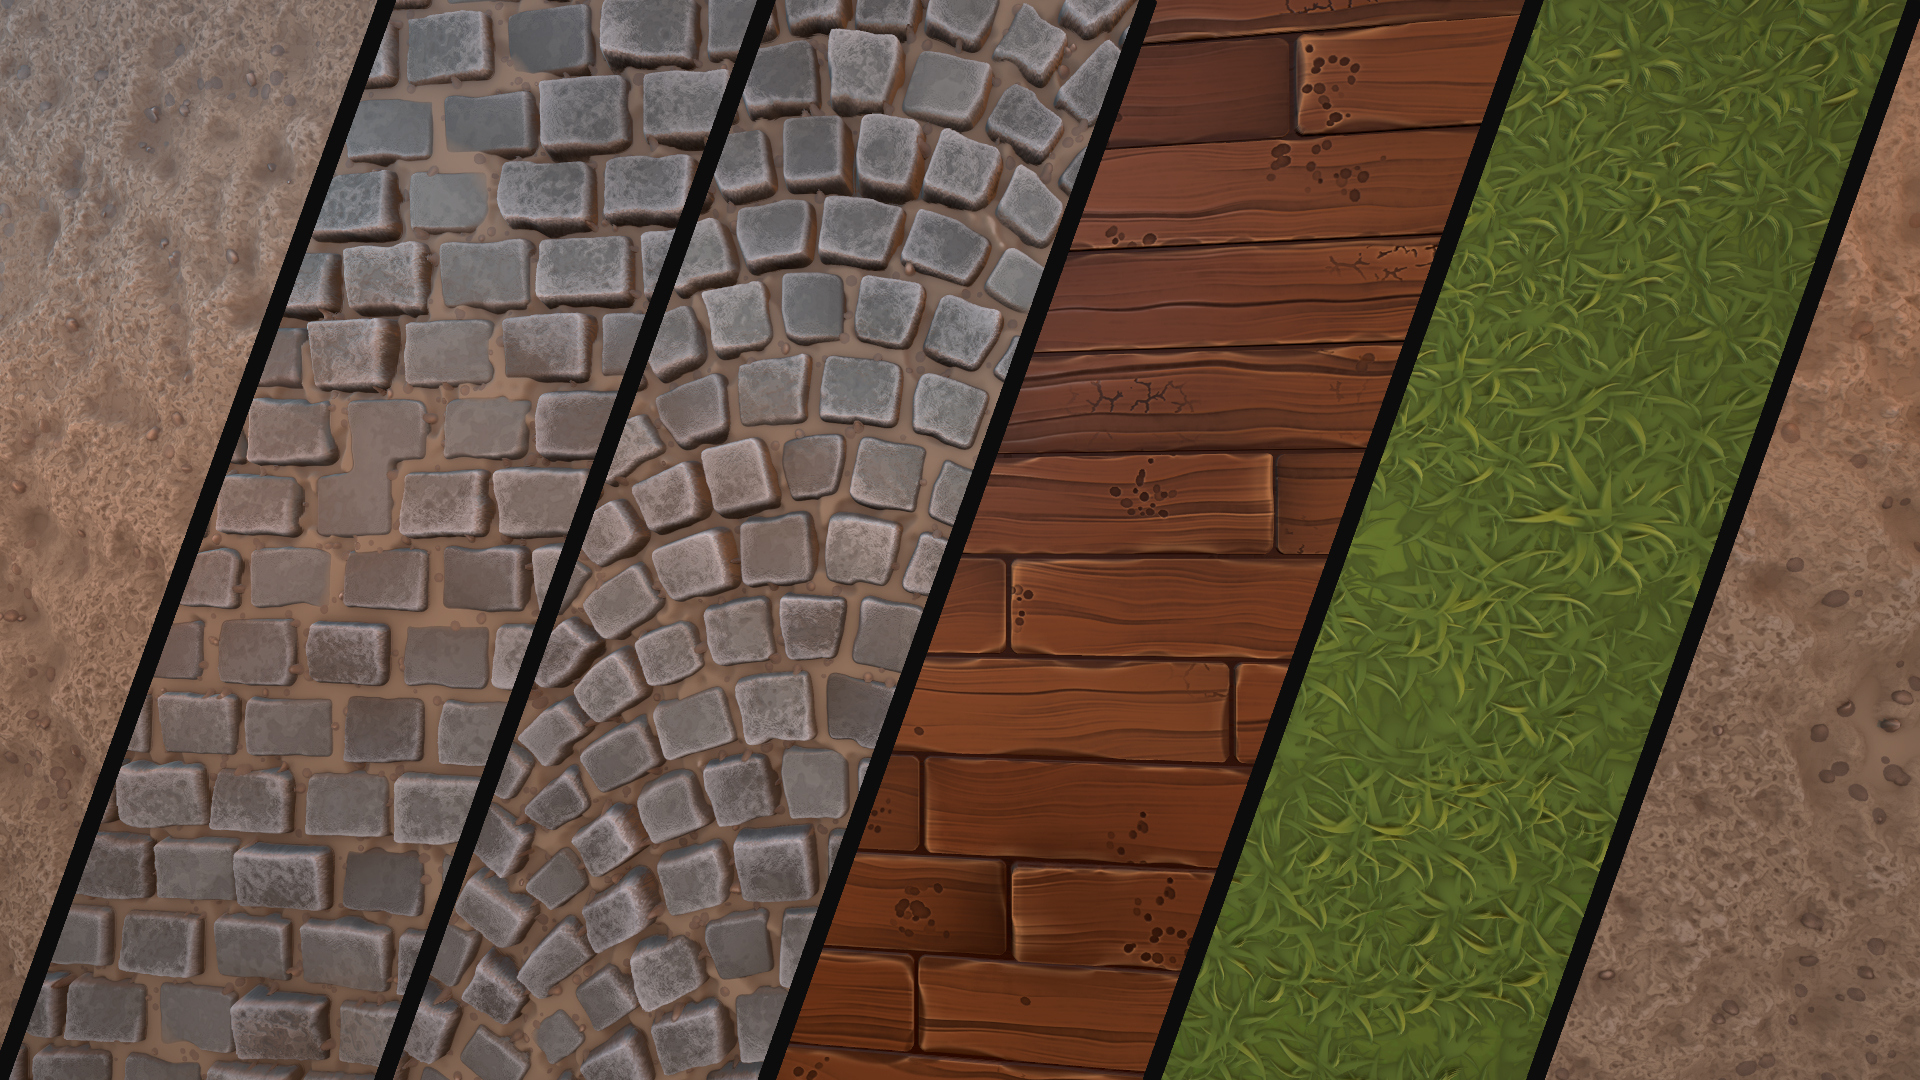
Some of them are used as a single material on the project, and others are mixed with a shader that uses vertex color and a height lerp node to blend them.
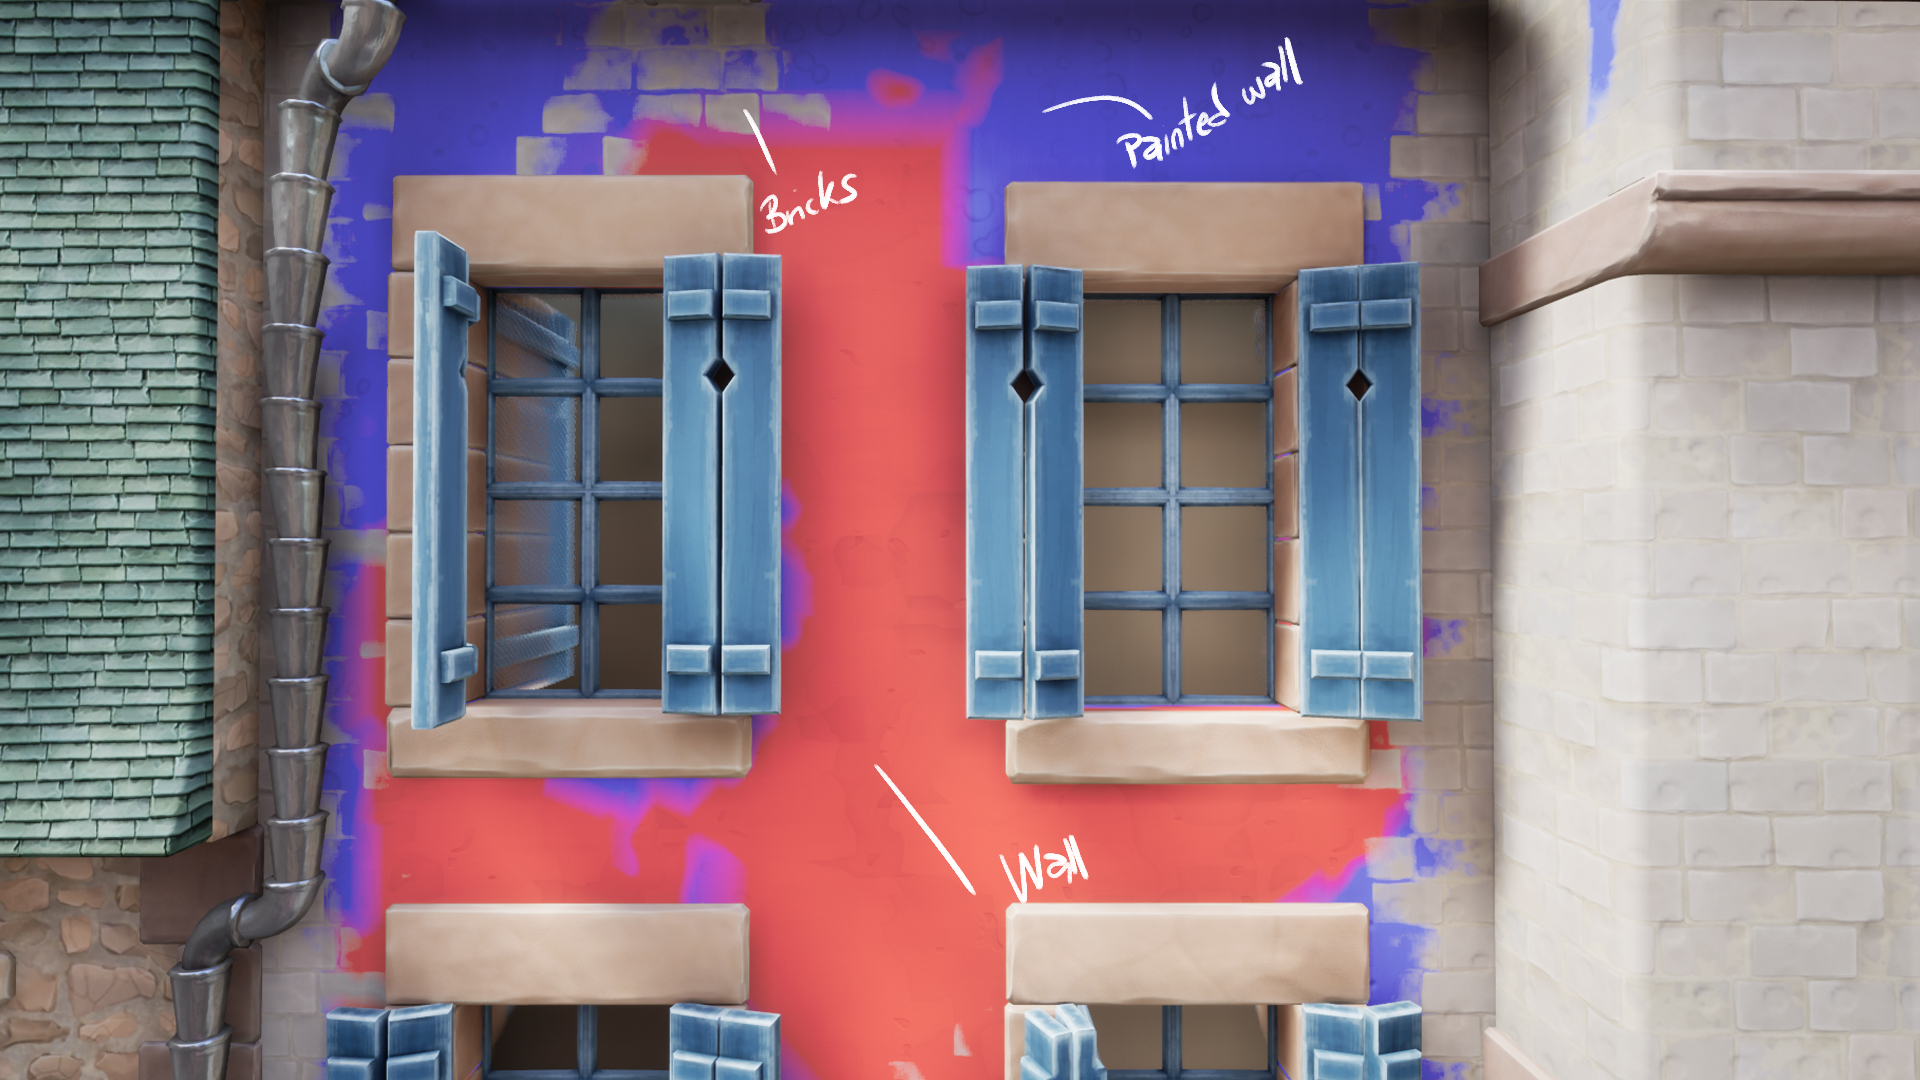
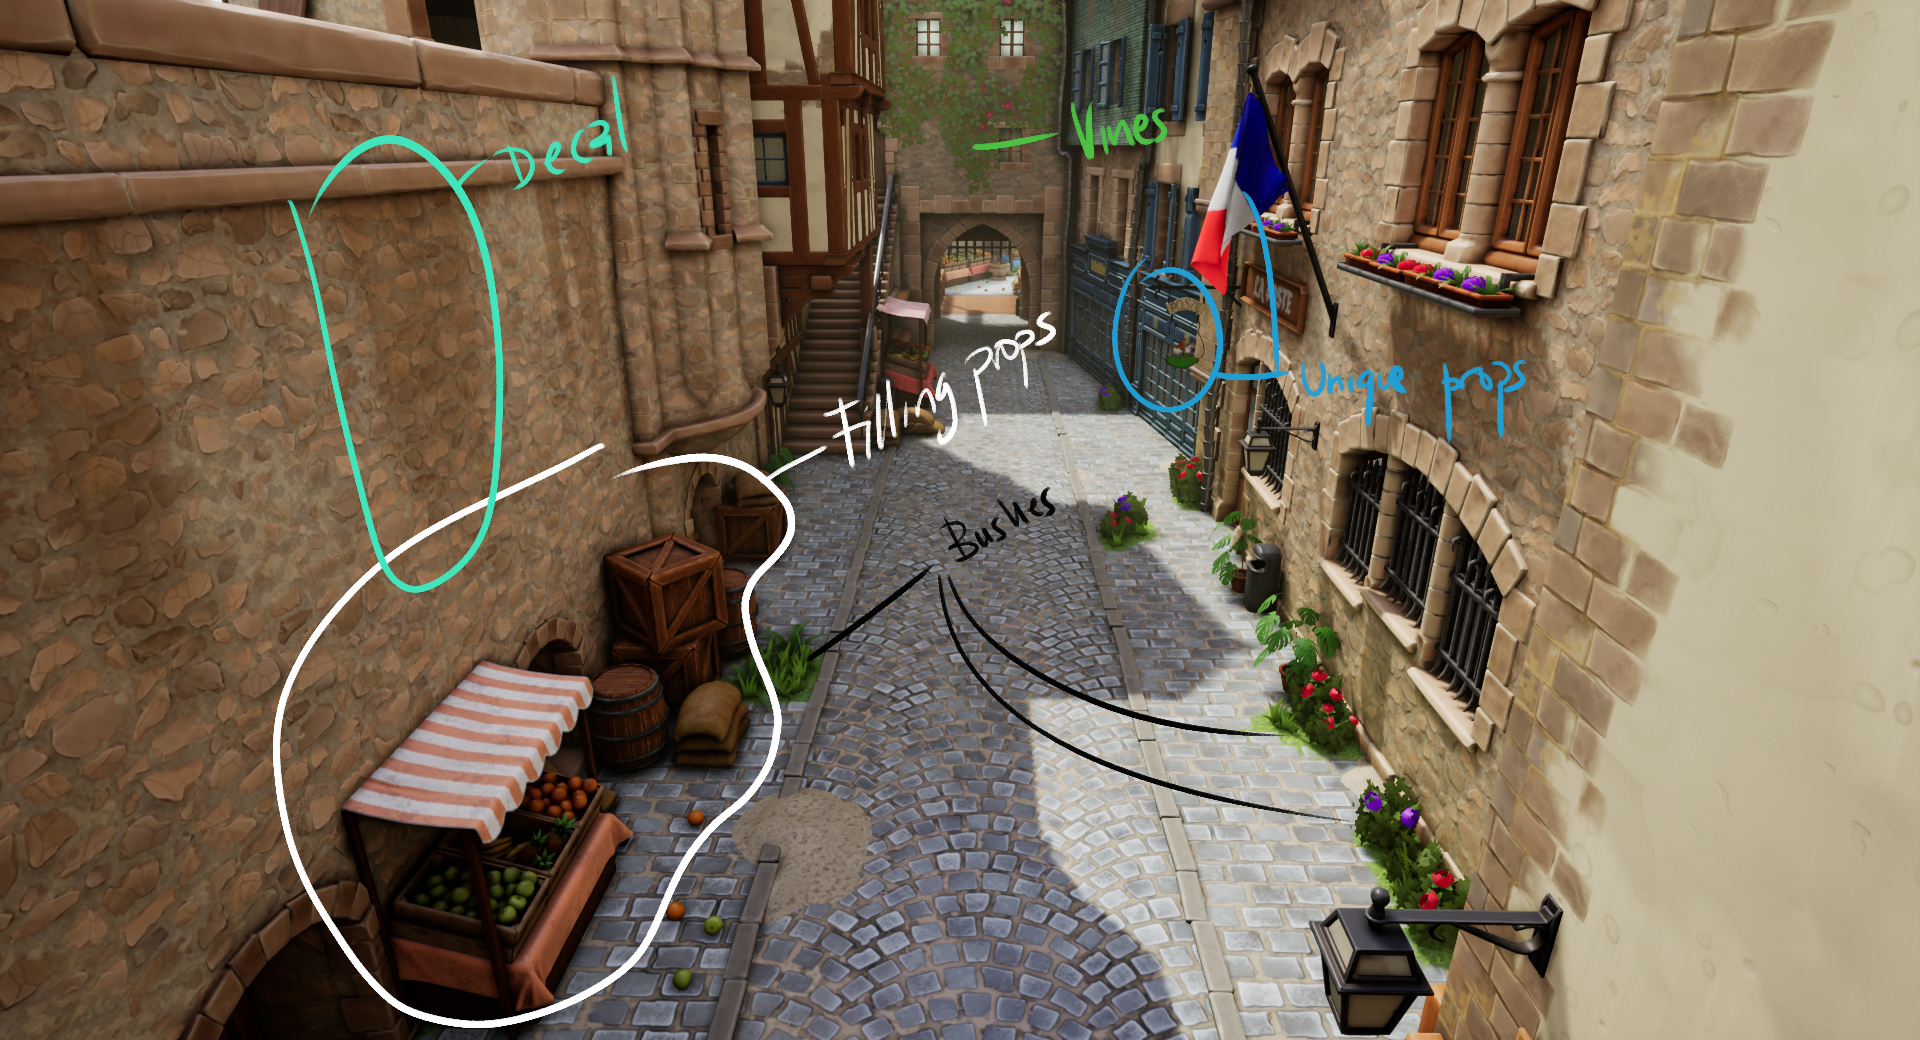
8. Dressing and decals
Putting all pieces together in the UE4.
9. Lighting and post-processing
Then I had to set proper lightmap resolution to the static meshes of the scene, priorizing small and near props. Green means higher resolution and blue lower. Brown meshes are set to movable.

Finally for the lightning, nothing fancy, only a directional light (set as stationary) and a skylight. I takes around 40 minutes of bake in production quality. I adjusted a little the contrast of shadows and warmed a little the overall temperature in the postprocessing effect.
10. Set some cameras and...voilà!


Link to the artstation project: https://www.artstation.com/artwork/k4A4Pn
Thanks for watching, hope you found this interesting!
Thanks for watching, hope you found this interesting!
Feedback and comments will be apreciated ")
Replies