The BRAWL² Tournament Challenge has been announced!
It starts May 12, and ends Oct 17. Let's see what you got!
https://polycount.com/discussion/237047/the-brawl²-tournament
It starts May 12, and ends Oct 17. Let's see what you got!
https://polycount.com/discussion/237047/the-brawl²-tournament
[WIP] Cambodian Temple scene

triangle
Hi there! I will be showing my progress on this environment I am working on, Critiques are more than welcome!

Things that I am taking from this is primarily the use of pinks to contrast the general greenish tint that the ambient light from the jungle gives to the grey stone pieces, moss, etc. It will be a nice color triad if we include the ground, which will be and almost redd-ish colored soil:


INTRODUCTION
This scene is inspired by the real-world location of the temple located in Angkor Wat. The main interesting feature being ancient carvings on the stone pieces that conform the temple, overgrown by huge roots, since it's in the middle of a jungle. I decided that it is recognizable enough for most people to recognise it as real and grounded, but still having an almost unbelievable and fantasy-like vibe.
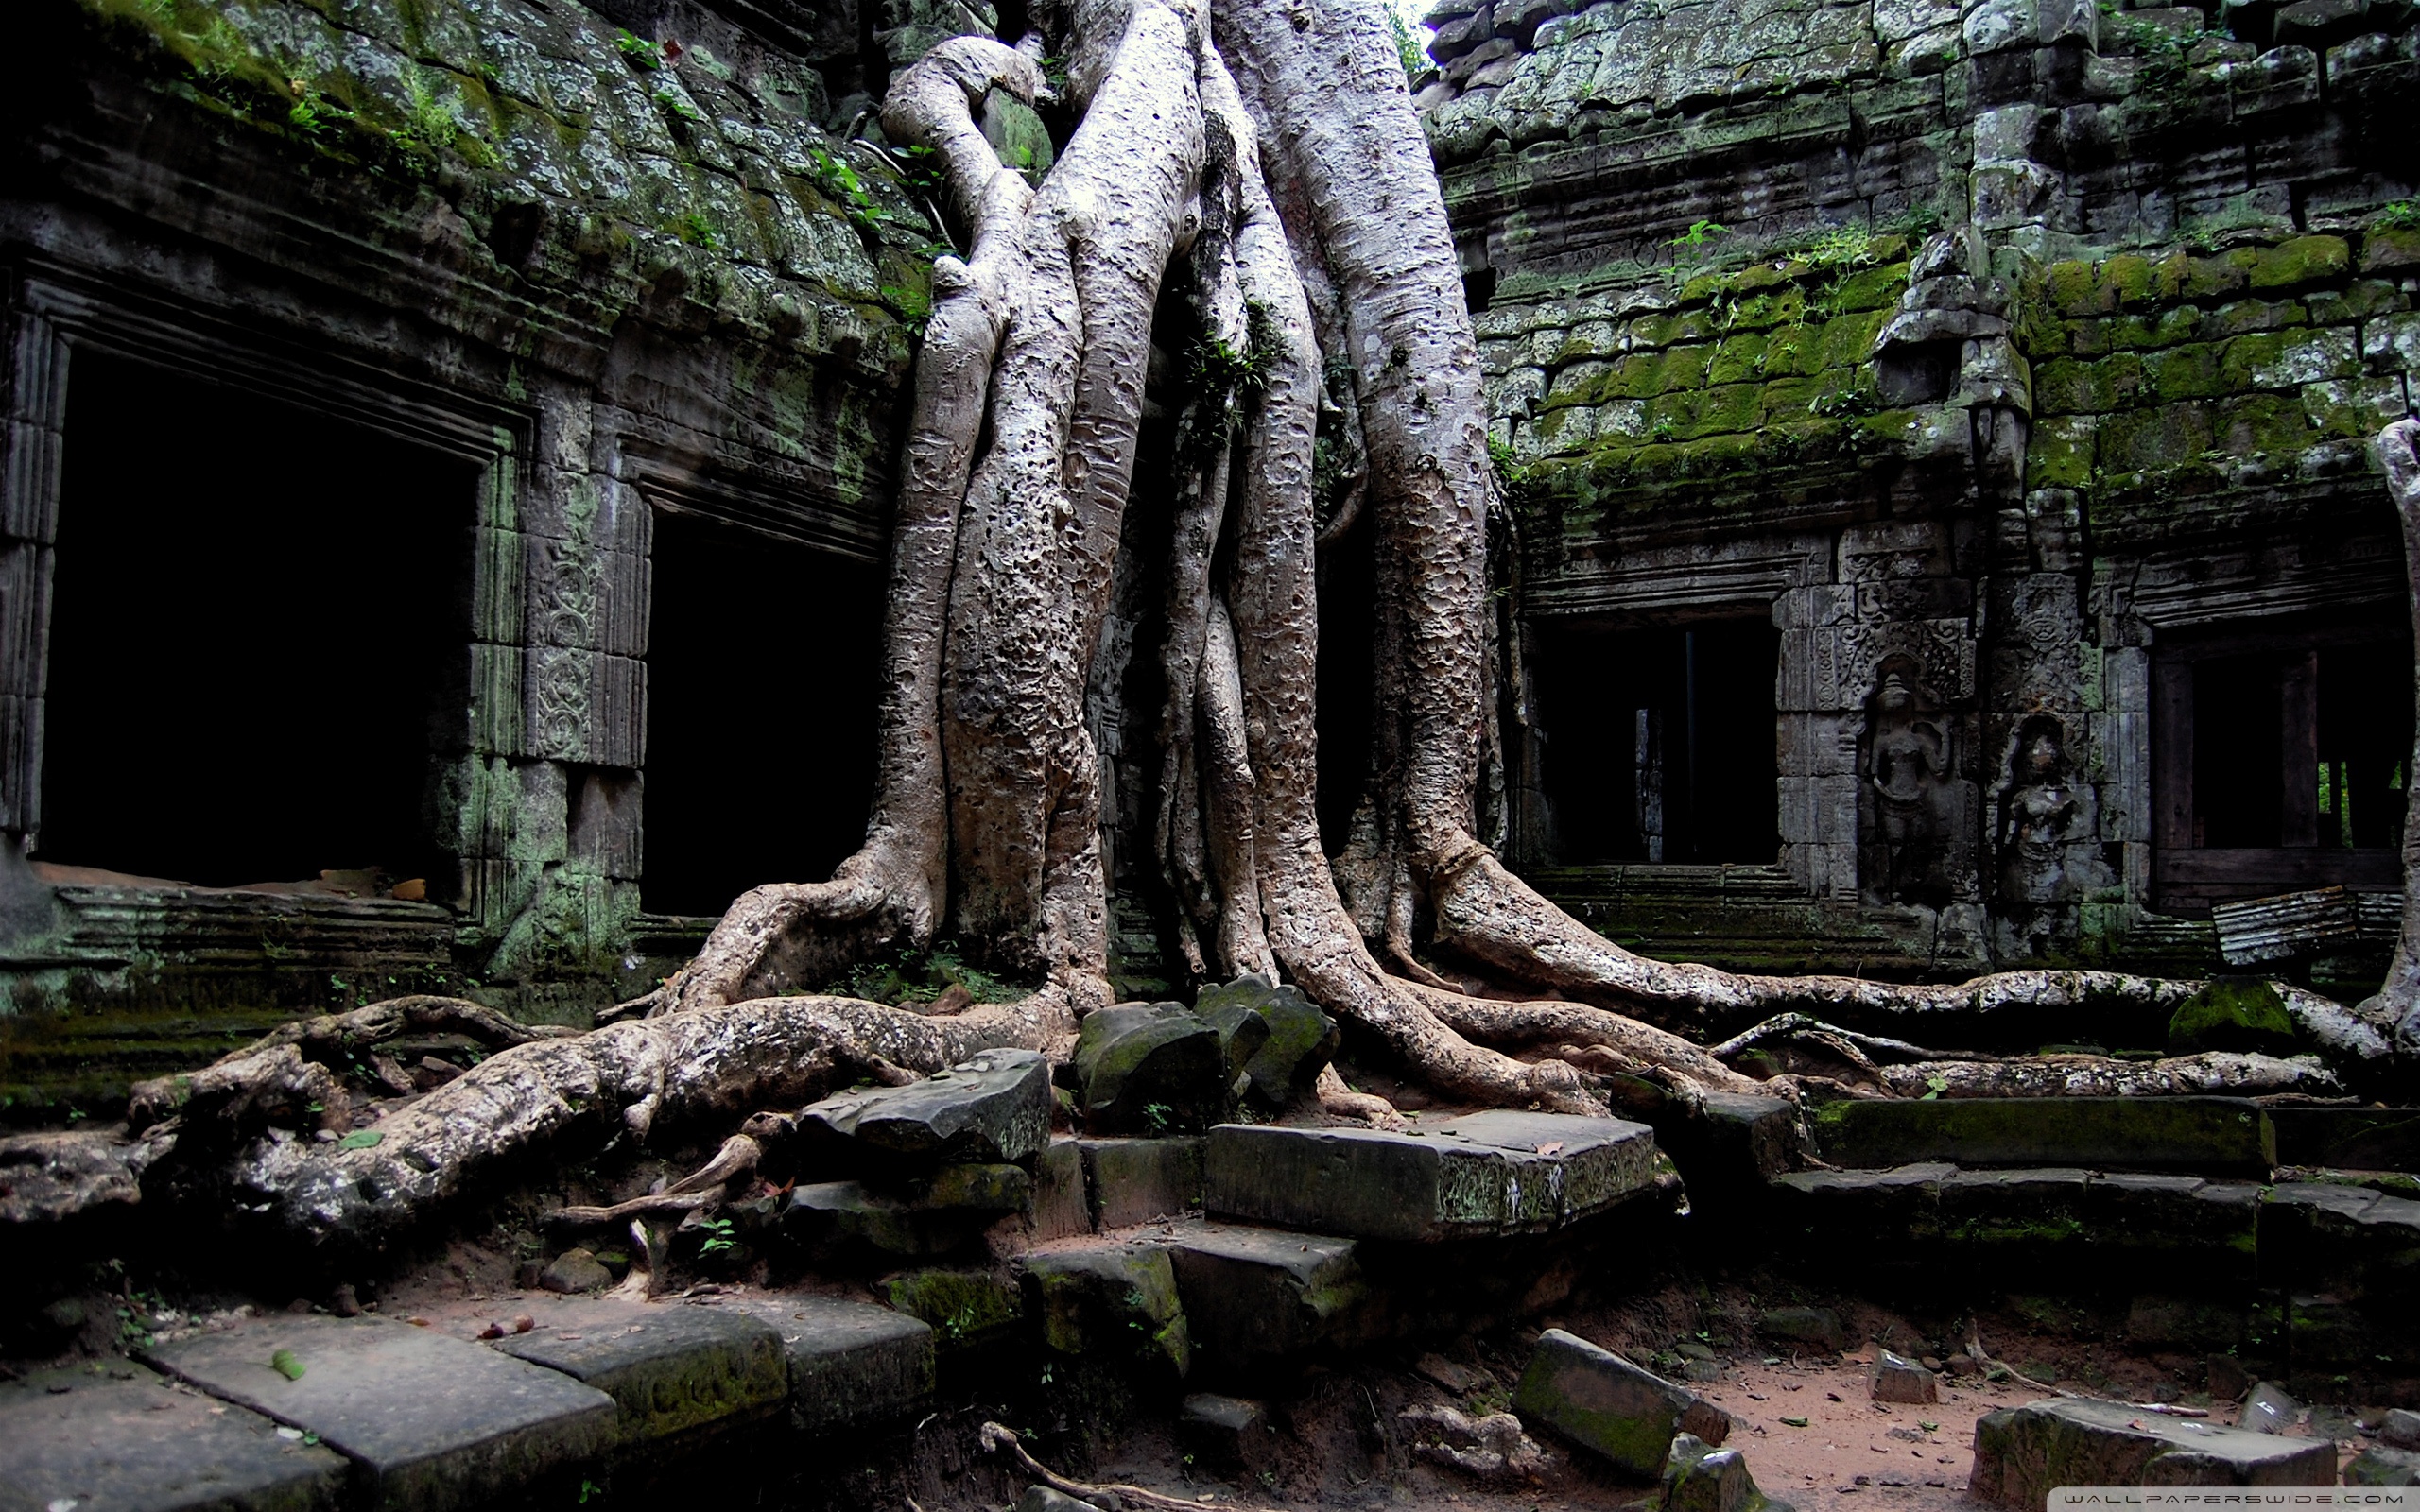


I thought of using a fantasy concept that takes that idea to a more stylised extreme and cherrypick elements that would allow me to achieve a very specific aesthetic that has the best of both worlds: believability along with flashy hints of fantasy here and there. This is the main concept I am using, by concept artist Veikka Somerma:Things that I am taking from this is primarily the use of pinks to contrast the general greenish tint that the ambient light from the jungle gives to the grey stone pieces, moss, etc. It will be a nice color triad if we include the ground, which will be and almost redd-ish colored soil:
Replies
So, first things first. Scale. I quickly put together placeholders of the pieces and the main roots to try and get proper scale before jumping into anything else. When I had some base pieces to work with, I played with them to create a composition that I believe is interesting, having the eye lead throughout the image, flowing along direction lines created by the roots and the path I created going up in the distance, using the big arch to frame that part so it acts as a seconday composition on its own. Notice also how the focal points are balanced left to right and how I used that framing technique to create a foreground, middleground and background separation for the eye to read easily.
I would later separate this piece into 3 different trims that share the material for optimization and speed purposes.
Carvings reference
Example of High to Low poly bake
At this point I had enough elements to bring the scene to Unreal and start setting things up, and whenever I had a newer version of any asset I could simply update it
After some progress I did a paintover in Photoshop to try and see what direction I wanted the general mood to go, and in a couple of iterations the rough idea was settled:
I started modelling and sculpting my own set of leaves that I would use with masked images found online to texture in Designer, make cutouts and arrange them in several ways to create clusters and variants that I could paint in Unreal but also hand place where I need more control.
First vegetation pass and placed most of the assets. Testing some normal decals for the tire tracks; will make particle emitter for the dust and another for the tire spitting pebbles
Working on the big arch at the moment after exploring different ideas. Currently sculpting the damage from several roots cracking the stone slates on the arch. After that I will move on to the stairs and rubble, then Substances for the stone, vertex painted lichen, and variations of the red-ish soil.
Sculpting the big arch destroyed stone pieces, making sure that the roots interact with them making them crack.
And high poly before baking:
Even if there is still plenty to do I thought I might as well share some screenshots of what evolved a bit since the last post. I've been working mostly on setting up materials, experimenting with a couple of smart materials in Painter to speed up the texturing pass, as well as to quickly create variations in terms of moss masks, dirt, lichen etc. The usage of smart mats allows for a consistent look across all the stone pieces while still gives me that art input to paint in an out specific details I want to bring out.
Here are some examples of first tests of some pieces, when I was trying to decide on the overall look and how far to stray away from photo reference in favor of stylization and personal style:
It eventually evolved into something a little bit darker like my initial reference, since I decided to leave the stylization for things such as the roots and trees design (proportions, color, placement).
Also, since the stone material across assets is pretty uniform looking (in the reference as well), I thought of breaking it up using variations over the texture, particularly on the moss mask and dirt, then heavy grass, plant and leaf placement (possibly decals?) to get rid of this uniform look. The color of lichen really works nicely as an accent to the less saturated base values so I think I'll try to make use of it more, since irl it does appear constantly and covering very large areas at times.
Apart from that, I have reworked the lighting to match my paintover a bit better, started playing with simple particles and subtle color balance since the main values for the textures are there already, so I can get a better feeling of the mood.
Excusing the random blockout placement of a lot of vegetation
Also the big roots have a 0 to 1 simple diffuse map on top of the tiling textures to break it up and add uniqueness to them with paler points, more brownish towards the bottom, etc. I plan on implementing some sort of world based tint to break color up on vegetation assets and ground (althought this, very WIP btw, will use 2-3 masked and vertex painted, as well as puddles with a soft falloff)
Definetely will need to tweak the shapes of some of the roots and transitions between them so they seem more natural.
Also, even if I am not a character artist and not versed in it, decided to actually do the rider myself and try new things. Since its not the main point to have a cinematic quality close up shot or anything, I don't have to spend a lot of time perfecting it, and I can just have fun with it! (Isn't that why we do art!) and that is what I just started today in fact.
Riding into 2018 like:
Hope you all have a good start of the year and I'll make sure I post more (and rmore regular