HELP! xNormal Hates Me! [Solved]

polycounter lvl 5
Hi everyone!
I apologize if there is a post about this somewhere else on here, but I couldn't find one so here I am.
Thanks in advance for any light you can shed on my problem!
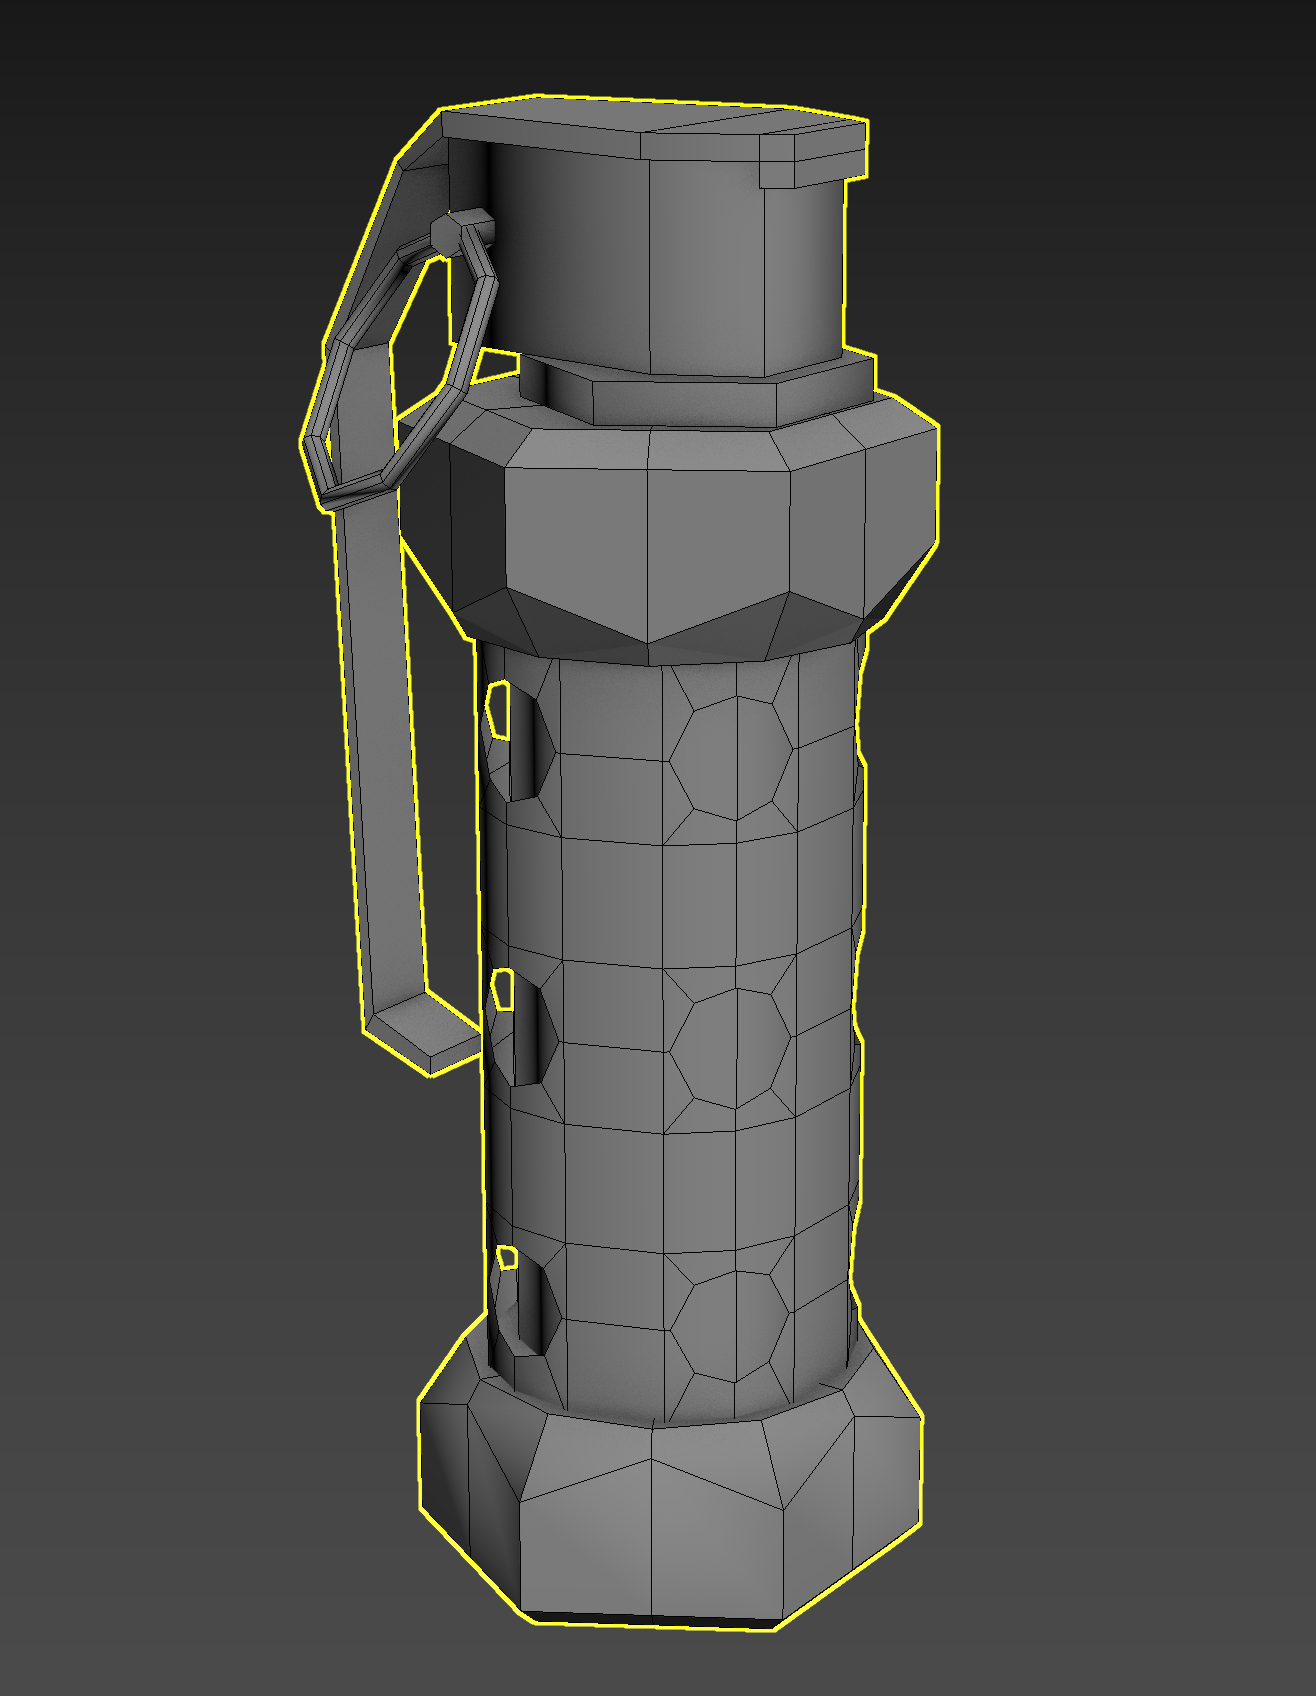
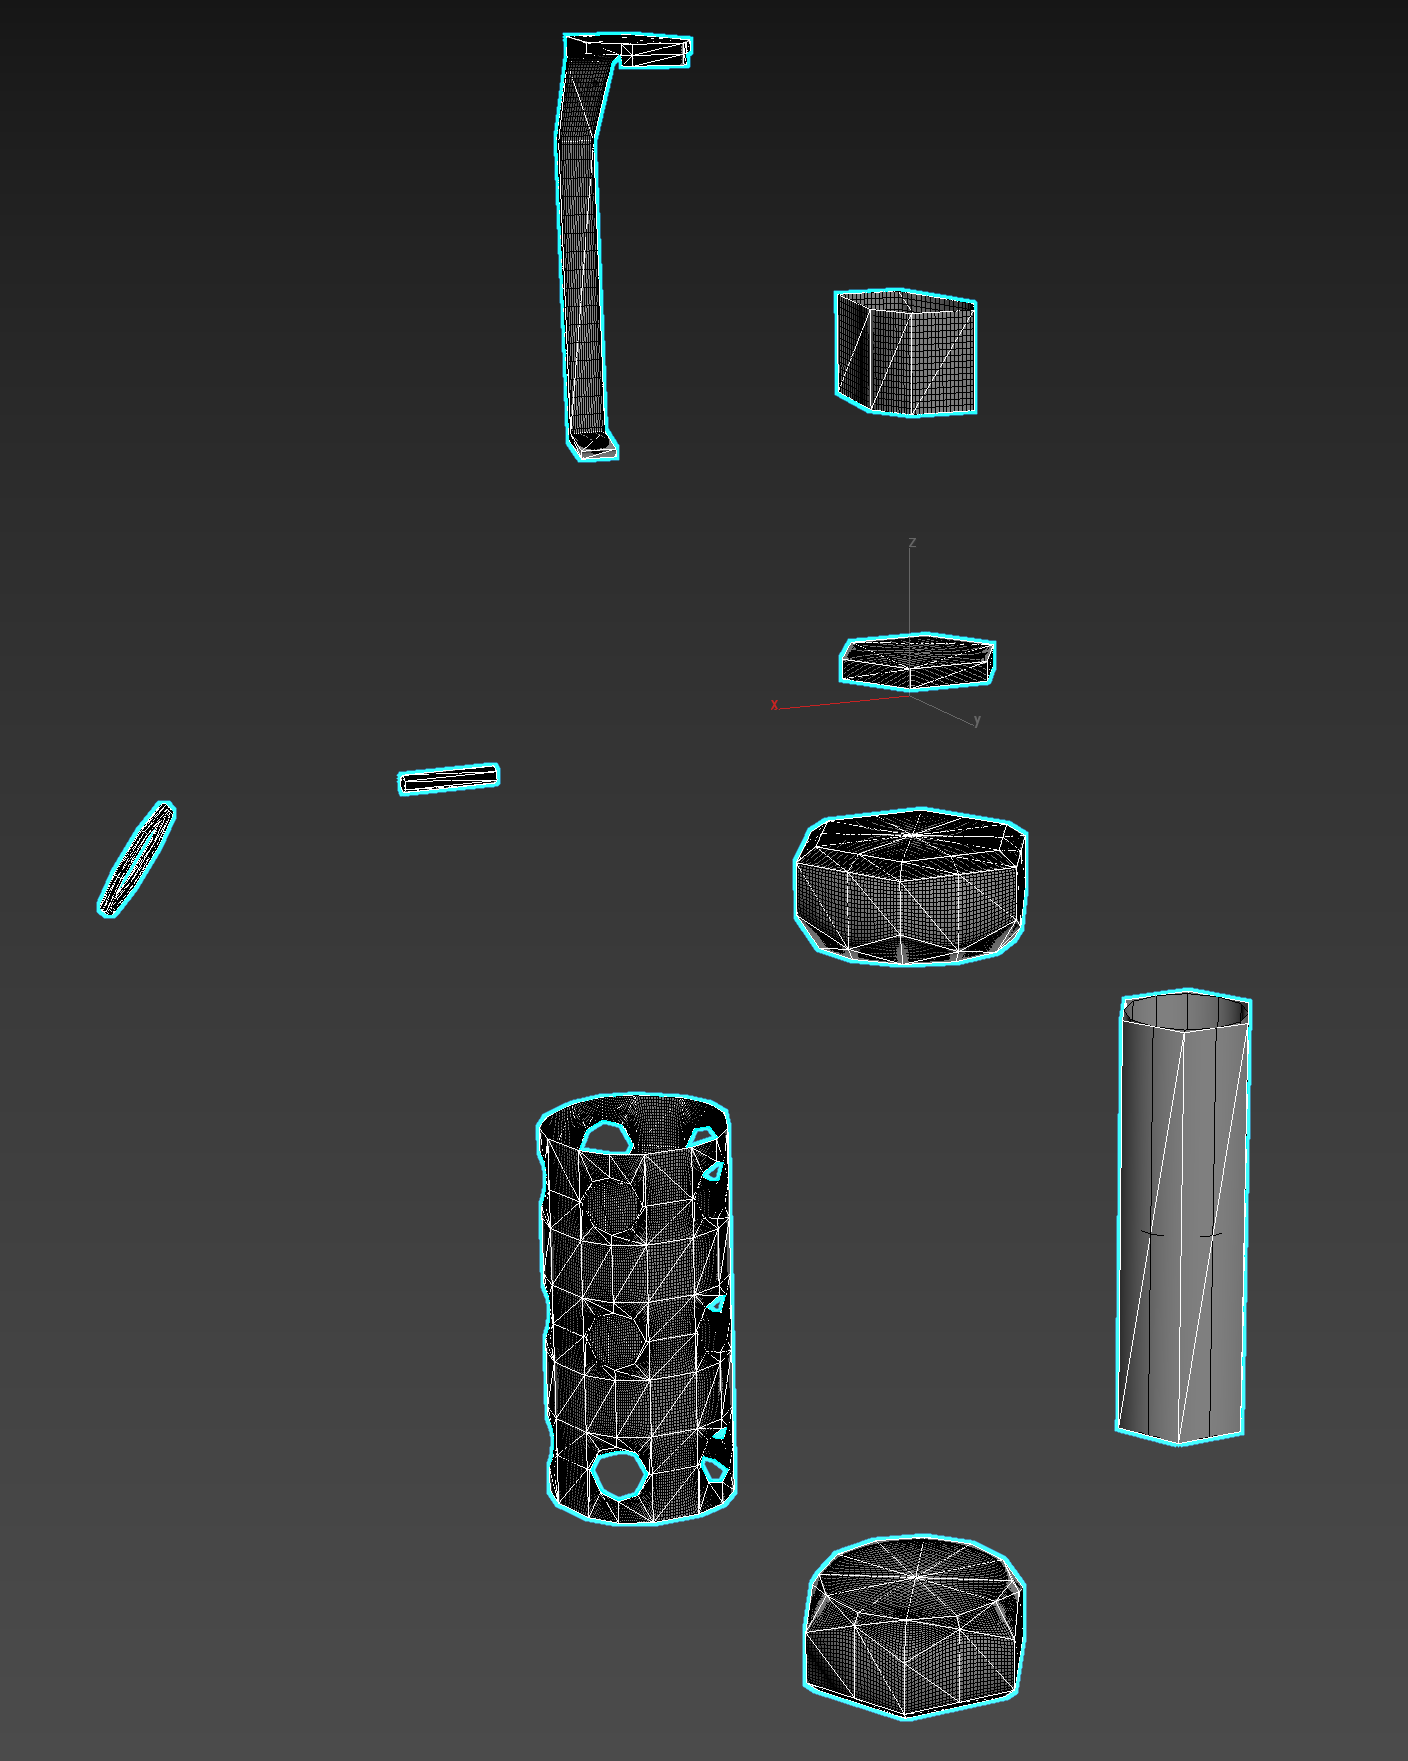
I created a flashbang in 3DS Max, and made a high poly and a low poly model for it. I exploded the model so no two unique pieces are touching. Each lowpoly piece of the grenade has it's respective highpoly piece overlapping it tightly.
Grenade:
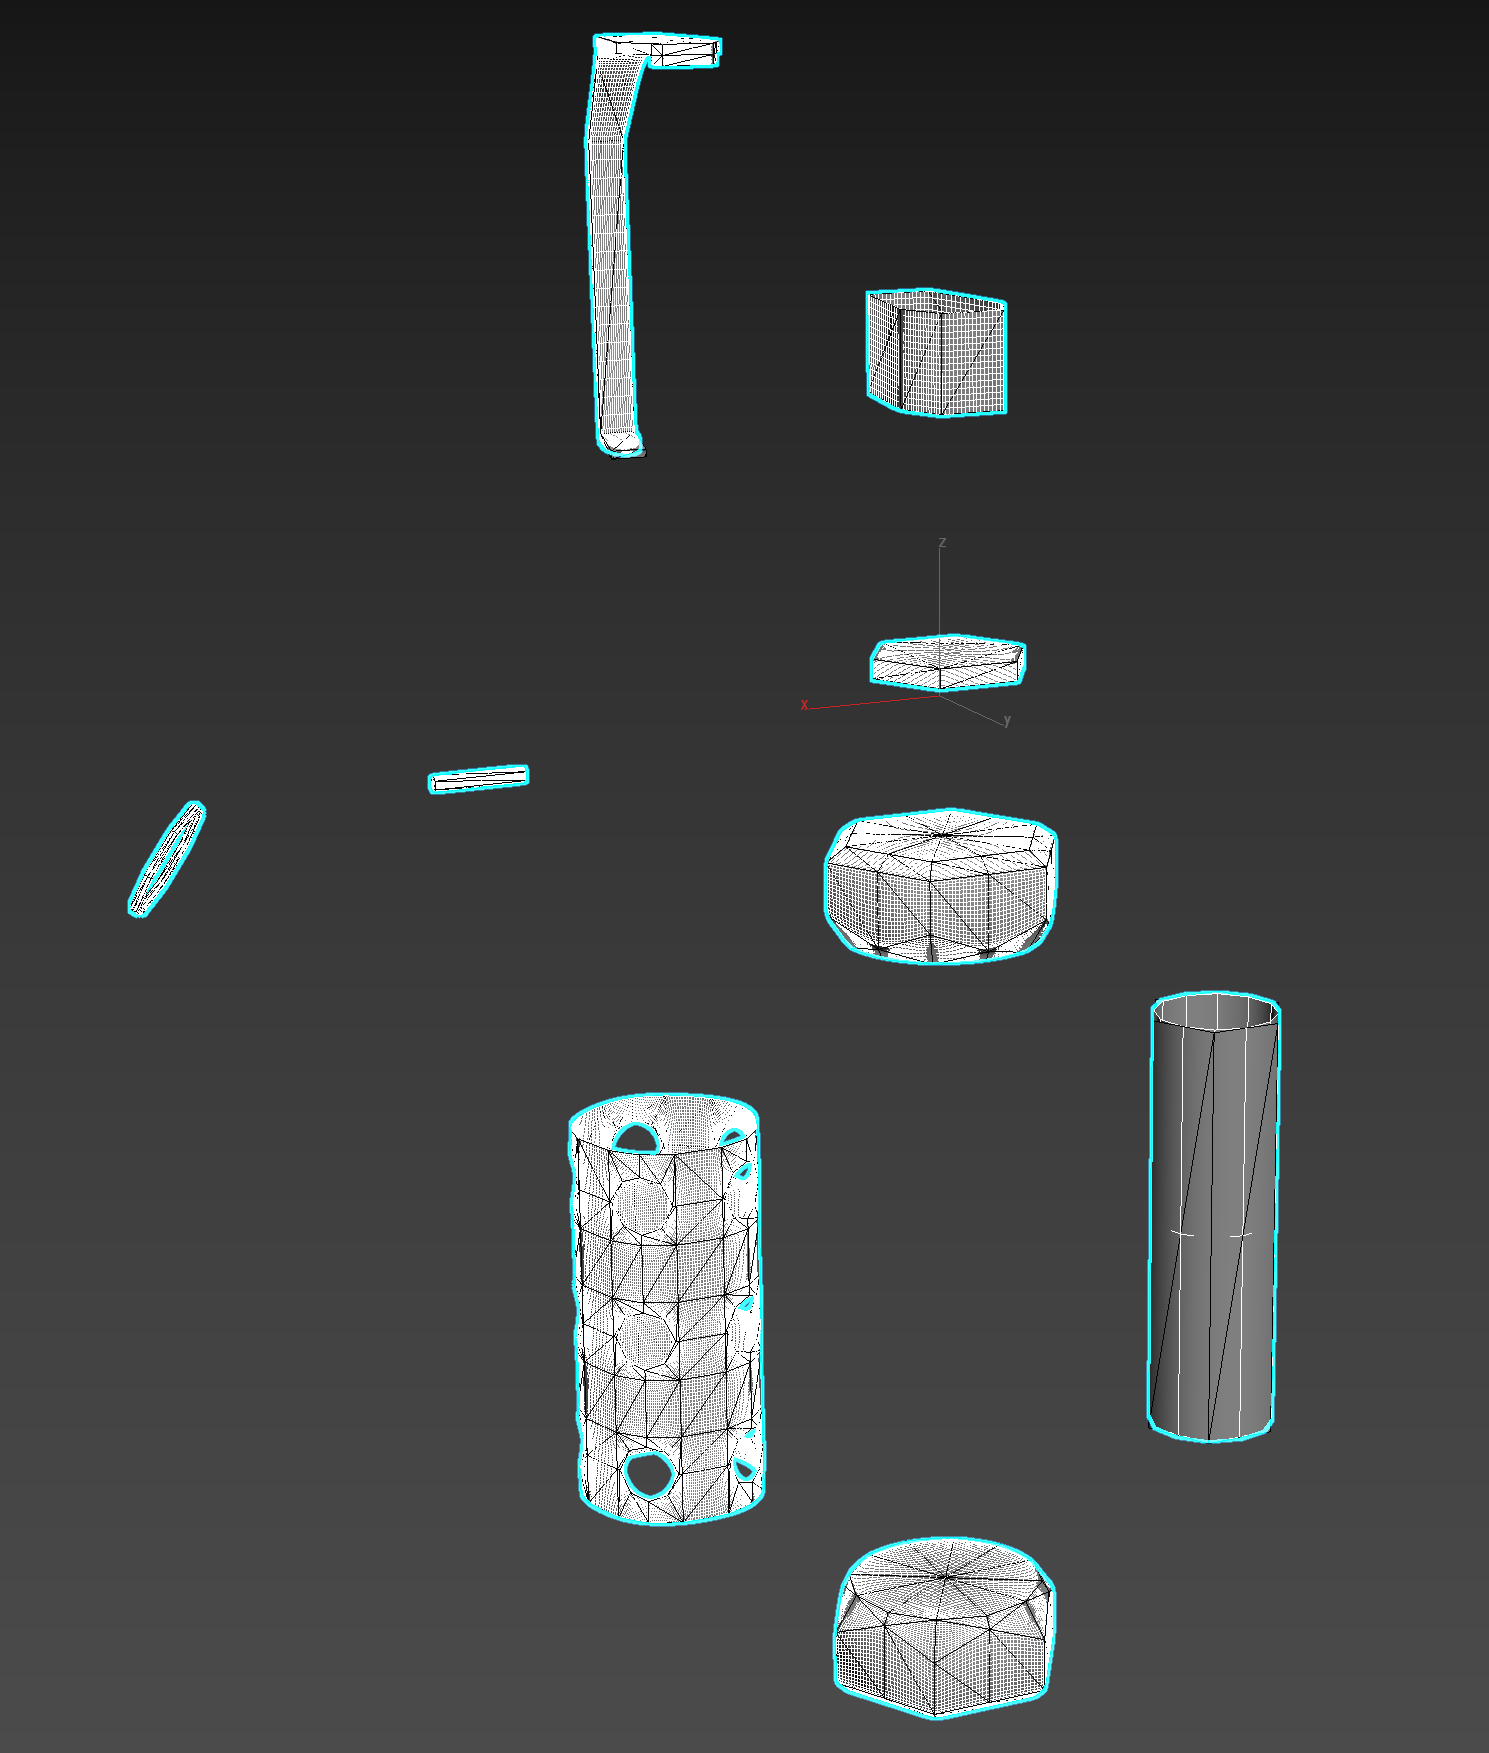
Exploded:
The highpoly is quads, and the lowpoly is tris.
However...
When I use xNormal to bake the normal maps, I get this result: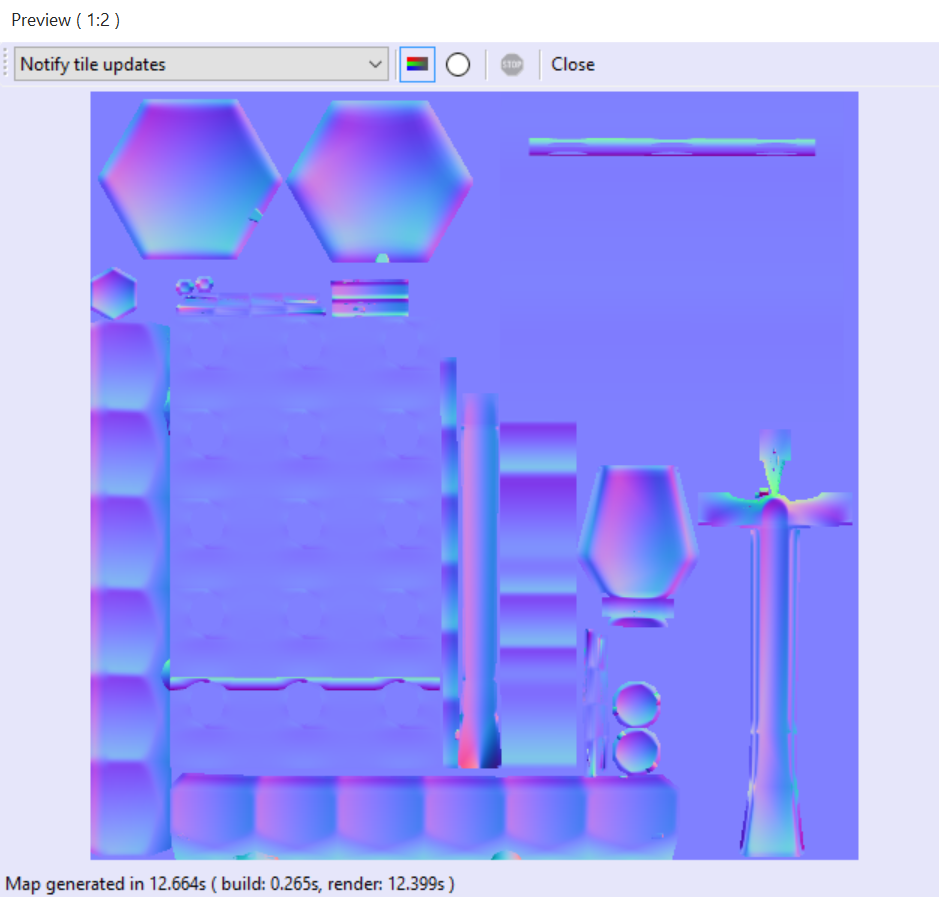
I did not use the "Ray Distance Calculator" before I baked since it didn't seem to make a difference in my prior attempts.
I also set the default scale of the model in xNormal to 16 to see if that would help (it didn't seem to).
I get a similar problem if I attempt to bake the maps in 3DS Max with a "cage" modifier.
For reference, here is the UV layout along with what it looks like with the map applied: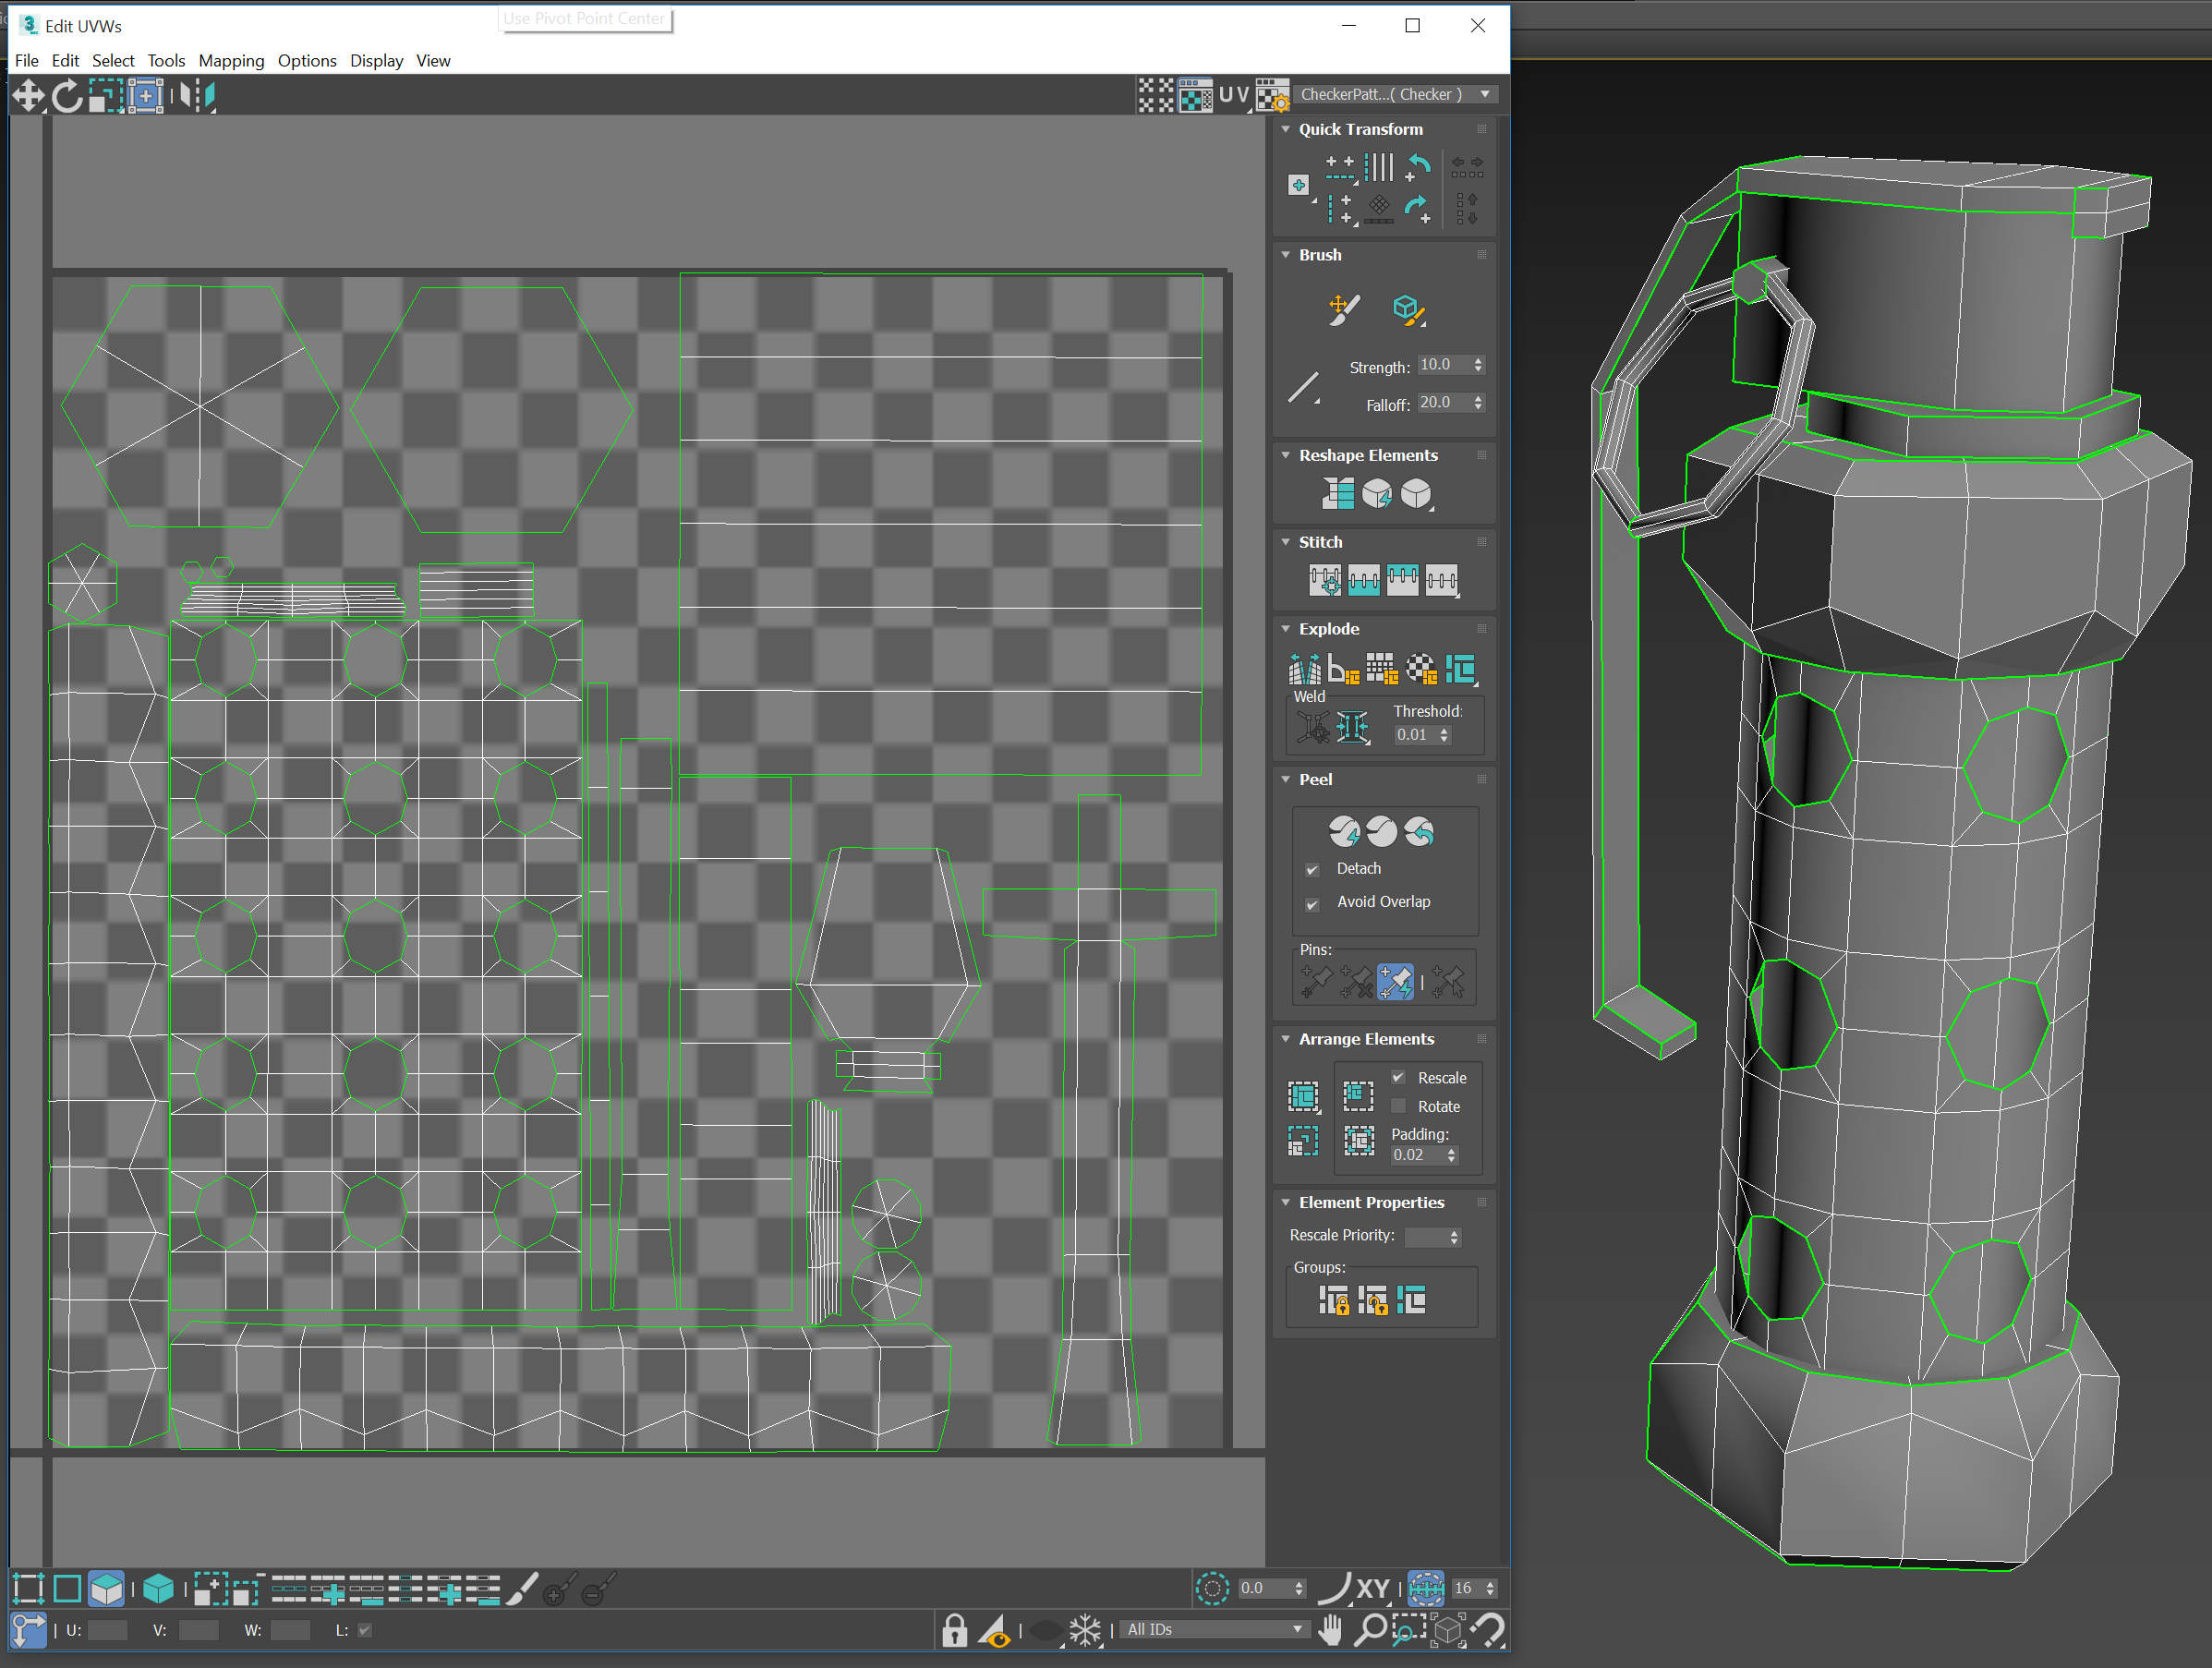

To clarify, I'm not only asking about the random line that goes down the side of the model, I'm asking about the overall quality of bake as well.
Thanks so much!
I apologize if there is a post about this somewhere else on here, but I couldn't find one so here I am.
Thanks in advance for any light you can shed on my problem!
I created a flashbang in 3DS Max, and made a high poly and a low poly model for it. I exploded the model so no two unique pieces are touching. Each lowpoly piece of the grenade has it's respective highpoly piece overlapping it tightly.
Grenade:
Exploded:
The highpoly is quads, and the lowpoly is tris.
However...
When I use xNormal to bake the normal maps, I get this result:
I did not use the "Ray Distance Calculator" before I baked since it didn't seem to make a difference in my prior attempts.
I also set the default scale of the model in xNormal to 16 to see if that would help (it didn't seem to).
I get a similar problem if I attempt to bake the maps in 3DS Max with a "cage" modifier.
For reference, here is the UV layout along with what it looks like with the map applied:
To clarify, I'm not only asking about the random line that goes down the side of the model, I'm asking about the overall quality of bake as well.
Thanks so much!
Replies
If you're having problems with missing information in some uv islands, the HP and LP may not be in the same location. You can use the 3D Viewer in xnormal's tool tab to make sure the HP and LP are in fact occupying the same physical location on 3D space.
If you're having problems with details of your model baking onto other areas they don't belong, you will want to make a cage.
You will want to make sure each UV island is set to its own smoothing group, as outlined in this thread http://polycount.com/discussion/107196/youre-making-me-hard-making-sense-of-hard-edges-uvs-normal-maps-and-vertex-counts/p1 and you might want to consider splitting UVs and smoothing groups at surface transitions that measure close to 90 degrees.
You will also want to make sure you are baking with the proper Y swizzle for your rendering engine. Try ticking "Flip Y" if you are rendering in Marmoset Toolbag, as well as setting the tangent space setting to Mikk / xNormal under the Mesh category in the left panel (when a mesh is selected)
If that is Substance Painter, try adjusting the project settings between OpenGL and DirectX (this essentially inverses the interpretation of the normal map's green channel (Y swizzle)). Alternatively you can set xNormal to bake with a particular Y swizzle by clicking the ... button next to the normal map entry under bake options.
Thanks for the advice @Bartalon .
We have successfully purged all large artifacts from the normal map!
This is what it looks like when I export all of the pieces with only one smoothing group:
And this is what it looks like when I split each piece off into its own smoothing group:
However...
It still doesn't look the way I believe it should. Am I wrong about that?
What is causing the hard edges on this map?
Again, any help anyone could provide on this is GREATLY appreciated.
Thanks!
I was able to get this by making a cage.
Make sure that your smoothing groups are setup properly. Then triangulate your low poly mesh and duplicate it. Take the copied low poly and inflate/scale it so that it envelops your high poly like this.
Then export the inflated mesh as your cage.
Go to xNormal and plug in your high poly and low poly. In the mesh list, right click on your low poly and select browse external cage file and select your cage mesh.
Here's the settings that I used.
Hit bake and you should be good to go.
Also I couldn't help but notice your lowpoly has considerably more geometry than mine. Could that contribute to my problems?
Finally, could someone explain how to set up smoothig groups? Should I assign a different smoothing group to each UV island, or rather to each whole grenade piece? I've also gotten good results with a single smoothing group for the whole mesh before so I'm sleightly confused.
I'll keep reading and see if I can make sense of it in the meantime.
Thanks again!
This looks much better! Not quite as good as yours though for some reason @DRoss3d.
The seams are pretty hard still, as you can see. Any advice for calming them down?
Thanks again!
It looks like the next issue is seam placement. As a rule of thumb, although there may be some exceptions, you will always want to place a seam wherever you have a 90 degree or greater angle. I've marked some of the areas where you should put a seam in red. The blue line shouldn't be a seam.
Here's my UV's as a reference
I'm so close I can almost taste it!
I decided to bake another normal map using 3DS Max rather than xNormal, just to see if there would be a difference.
The result is the basis for my next question:
WUT.
The 3DS Max normals bake came out so well! There's still some errors, but look at those!
Why on earth would it be so different? I double and triple checked to make sure I used EXACTLY the same cage for both programs, as well as the same LP and HP models. Yet in the xNormal bake, there is an absurd amount of distortion on the top of the model, and the seams stick out like a sore thumb compared to the Max bake. What could be the cause of this?
Thanks!
Here's the my modifier stack:
And my export settings for the low poly & cage:
Results:
It's been a long time since I've used Max! The default UV tools are pretty clunky, but I like/miss the modifier stack.
We're in business!
After trying that solution, I kept getting this strange result:
The seams were super sharp, but the majority of the map looked just the way I wanted it to.
It took me around 4 hours of tinkering, and then I re-read this thread to see if I had missed a step.
I realized I hadn't tried flipping the Y-swizzle...
Bingo.
I'm calling that pretty darn good for my first real grapple with xNormal and normal mapping in general. The errors at the base of the 'handle' and near the front of the cap are results of poor LP vs HP modeling on my part, so I'm not to irritated with those. I'm going to re-do that whole piece this week and post the end result here.
Thanks to @DRoss3d and @Bartalon for the help you provided me! You helped open a whole new area of game design to me!
I'd like to open this thread to anyone who is having problems with normal maps in xNormal specifically, or just general questions concerning maps.
Good luck everyone and thanks again!
THIS LIST IS FOR 3DS MAX