Exporting displacement from zbrush

polycounter lvl 17
So i've been working on this dinosaur sculpt for a couple of months now and i've come to the point where i'm wanting to export a displacement map from zbrush. However my mesh is quite dense at 20mil and the displacement i want to export is an 8k displacement.
I'm of course trying to get tv/film quality work out of this little dino so to do that i need to have a higher displacement map than 4k.
My problem. Zbrush is only 32 bit meaning that it only uses 4 out of the 18g of ram that i have on my current pc. Everytime i try to export an 8k displacement map i get an "insufficient RAM" error and have NO CLUE how to work around this.
His body is just one whole sculpt, breaking up his limbs would create nasty seams that i dont want.
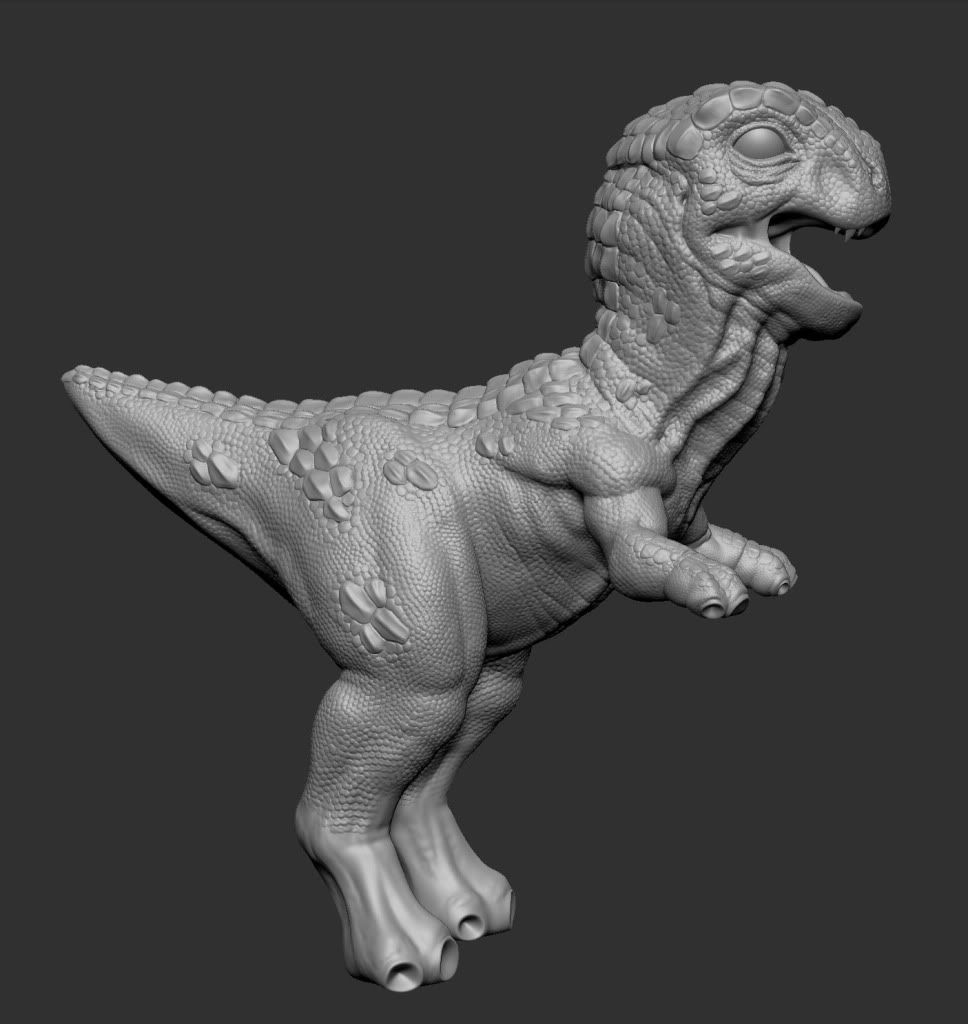
Sculpt
Render
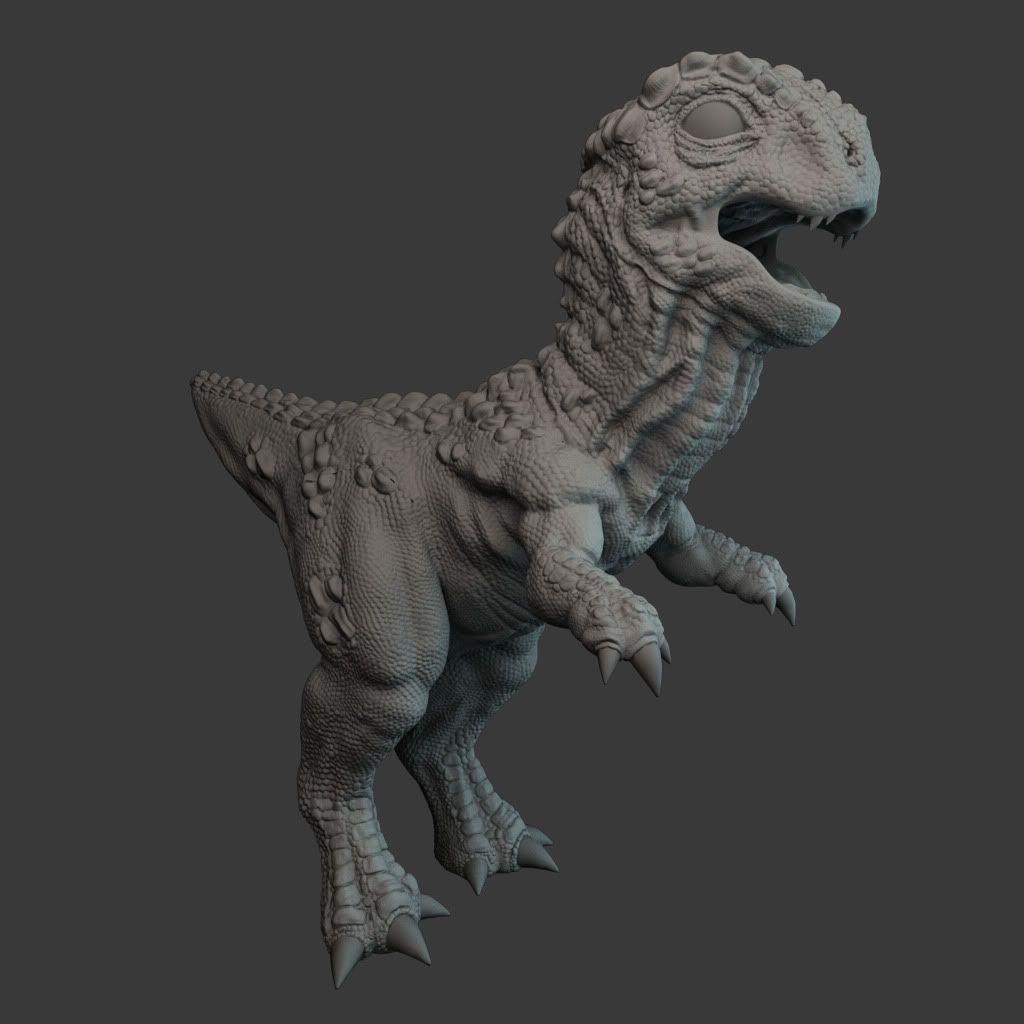
As you can see the bigger scales are too bubbly compared to the sculpt....i believe this to be a result of a low rez displacement. I've tweaked the alpha gain, offset, scale, filter...etc etc in maya 2012.
HALP!
I'm of course trying to get tv/film quality work out of this little dino so to do that i need to have a higher displacement map than 4k.
My problem. Zbrush is only 32 bit meaning that it only uses 4 out of the 18g of ram that i have on my current pc. Everytime i try to export an 8k displacement map i get an "insufficient RAM" error and have NO CLUE how to work around this.
His body is just one whole sculpt, breaking up his limbs would create nasty seams that i dont want.
Sculpt
Render
As you can see the bigger scales are too bubbly compared to the sculpt....i believe this to be a result of a low rez displacement. I've tweaked the alpha gain, offset, scale, filter...etc etc in maya 2012.
HALP!
Replies
actually with hires textures they don't do it like that, one big map. and you can have upwards of 400k of texture space on a film creature. that would be one big ass map
what you want to do is take a shot at using multiple uv tiles. the first uv tile is the distance from 0 to 1 in u and 0 to 1 in v. thats the normal square map. you can move uv islands to the next tile and so on. ie 1 to 2 in u or 1 to 2 in v. take a look at the bottom pic in the link to see a layout in multiple tiles.
http://download.autodesk.com/global/docs/mudbox2012/en_us/index.html
thats how you layout uvs for high res texture space to be rendered in prman, mr, vray etc. 2k or 4k is the normal size per map. set up one shader per map is the easiest way to render it out. there are other ways but its more work to setup.
i did a quick paint over.
also you need to render out your maps as 32bit float and do your displacement in world space. that means the value in the map captures the actual distance from your low res to highres and saves it as a float value then the renderer knows exactly how far to push things to make it exactly the same as your sculpt. you should NEVER have to adjust any values on a displacement map. just set up your displacement in world space and render the raw map. altho you may have to paint out some spots if you get some spikes etc.
its been a while since i pulled maps in zb i use mudbox and some other tools now for displacement. but if you dig around all the settings should be in there for multiple tiles 32bit float etc. you should be able to render in mr no problem. read the docs on the various displacement settings. i think there was some pdf about the workflow at zbc.
setting up your creature with 8 4k maps will give you some nice results. displacement detail needs lots of uv space. so do textures. when your working with a renderer that does subpixel filtering at 2k+ image sizes you really do need that much texture space even tho it sounds a little crazy.
edit:
also if you want to break your mesh up for what ever reason thats totally doable.
take a look at my post in this thread for a quick explanation
http://www.polycount.com/forum/showthread.php?t=93970
How would this work in Unreal, though, when you're trying to get something to tessellate/displace well?
What if you really need to say with one big map?
With your dinosaur sculpt, if the players will only see it head-on, you could proportion the head to be larger in the UV map than the rest of the body.
I'm not sure what to do in Unreal if you really do need large maps like that. Maybe someone else can answer that.
AND this is a perfect time to try out bodypaint or mari as it's something i've wanted to do for awhile.
Here he is at displacement=2k normal=8k. Thanks again gray! You are my savior!
you specifically asked about the displacement/film workflow. and you seem to have the patients to sculpt some nice detail. so i assume you have the patients to do the rest of the work correctly in the highres workflow for your portfolio. what i outlined is what people would expect to see in a portfolio for film.
there are lots of things that are the same between game and film modeling but uv layout and texture space is NOT one of them. your just going to have to choose one output for your final model and stick to that workflow. or do 2 versions one for the game engine and one for the software renderer.
this is somthing i am involved with at the moment. trying to devise a workflow that works for game and film output with the highest amount of consistency with the least amount of re-working things. its easy in some areas but quite nasty in others. i would say for textures and uvs make a clear distinction which output you want and stay with that workflow. or in your case try to learn each workflow and the differences, quite a task. if i come up with a magic button that switches a model from game to film i will be sure to let you know
in this last render you should not mix a normal map and a displacement map with the same detail and use a software renderer. if you take the time to set up your uvs and textures correctly you will capture all the detail in your displacement and it will look correct in mental ray. an exact approximation of your sculpture. if you add a normalmap on top fo that displacement your shading result will not light correctly. you are essentially adding a surface that is not there on top of a displaced surface which is an approximation. which will never give you a correctly lit surface approximating your sculpture. if you want to render bump or normal it would be extremely fine detail. close up face pores, bumps and such. that would be another level of sculpting on top of your base sculpture which would not capture any of the major sculpture detail.