Noob question on 3DSMax (please help)

triangle
I've been working with max for about 2 weeks now, I'm used to work with Rhinoceros 3D where I could easily made solids from splines. But now, it's been three times and 4 hours kinda waisted because I cannot figure out how to work cleanly with splines in Edit Poly. I know that it must be really dumb errors, but since I'm a noob, I just don't know how to repair the error that I can only see later in the process. So I must be working the wrong way.
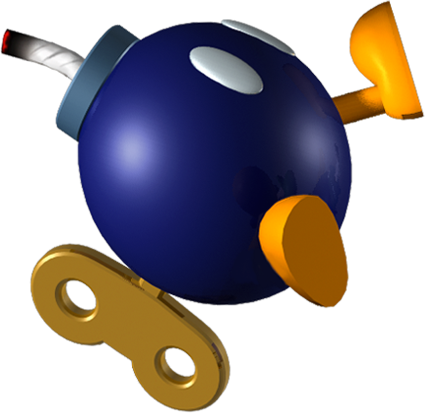
My questions are simples : How would you go to create the handle of a Bobomb ? And how would you go to create the handle but starting with lines ?
My last attempt was by creating lines and circle on a plane and then attach and weld everything together. But it creates thoses errors :


What am I doing wrong..? It feels like it's suppose to be way simplier than that...
My questions are simples : How would you go to create the handle of a Bobomb ? And how would you go to create the handle but starting with lines ?
My last attempt was by creating lines and circle on a plane and then attach and weld everything together. But it creates thoses errors :
What am I doing wrong..? It feels like it's suppose to be way simplier than that...
Replies
This is the unfortunate result from converting splines to poly.
You can connect the verts from the outside to the inside, might be a bit tedious and hopefully they all line up.
Maybe this will be simpler, try grabbing all the faces that make up that flat surface side - from the picture, it looks like there are 6 faces to select - then try Inset with a small amount. That should give you a loop that runs inside the perimeter of those faces.
You can also reduce some time by working on half and using a Symmetry modifer for the other half.
Making an Inset seems to make stuff even worst :
I think it would be simplier for me to do it again. how would you go to make the back if the splines>editpoly cannot be used..?
The Inset solution gets lines created on the surface, but yes, they are not connected across, you can delete those faces that are selected in the image and target weld the rest of the vertecies.
I'm not sure what your desired geometry is for in the end (if you plan on turbosmoothing or something) or maybe it's an aesthetic with the geo itself.
I made 2 pipes (cylinders with holes), with the faces of each (the one's selected in red) I bridge them. That gets me the final shape on the end.
@NoRank What do you mean? I tried to connect some of them but the whole solid didn't seem right. I coudn't really work anything around.
Those "invisible edges" is something that happens when you let the program create the topology for you, you can't just put one mesh inside another without having a proper topology, otherwise this will happen. You can get rid of this by using one turn to poly modifier and then start to connect stuff and clean your topology. This is probably why you couldn't connect your vertices.
Tbh, I wouldn't start with that many segments, it will just make your job harder.
When you convert it, max only tries to keep the mesh solid and convex. The triangulation can be messy and seem random as Max tries to keep them as short as possible (for the win). Sometimes the result is good, sometimes it's bad. When you cut holes in an ngon, the results are always bad.
If I got a result like yours on such a simple object, I'd go back and redo the model like Butthair did. He shows that a simple, properly planned out mesh gives a solid, clean and reliable result that you can with ease go back and edit if you find it lacking. There's also a bunch of advantages in having a lower polycount on the base mesh.
However, sometimes your model is complicated, you've spent a long time on it and you're almost done, so redoing it is just too much of a hassle cause you've only got this one tiny bit left. Here the worse method is applicable:
If you were happy with the silhouette of the last image you posted, there's a really easy method to merge these inconsistently dense parts you get from converting splines to editable poly or just not planning your model out properly.
I made an alteration to your image implying that you selected the entire flat plane before insetting, and I'm gonna go from there.
1. In edge mode, Connect the top-, bottom-, left- and right-most vertices of the cylinders to their closest counterpart to force Max's triangulation to stay within these new polygons. (drawn in green)
2. Go back to the polygon selection and inset a tiny amount again for a double-edgelooped result, then hit 're-triangulate'. re-triangulate forces max to re-evaluate how the model is triangulated. It will again try and keep the model as convex as possible, and the triangles as short as possible.
3. Hold ctrl, and click on the vertex-selection icon under the modifier list to convert your polygon selection to a vertex selection, then hit connect. This will leave you with a bunch of ugly-assed triangles that will smooth 100% nicely because you have a flat plane supported by double edgeloops. Triangulating those ngons is very important on concave shapes, or the outer rim of the circular hole will sometimes be 'stretched' over itself due to how turbosmooth calculates the smoothing of the mesh.
@Butthair, Thanks for showing the preferred method, and having that username. It made my morning