Malaysian City Breakdown

Concept/Overview
While I was trying to find inspiration for my next scene, I became fascinated by the works of Chong Fei Giap. They held so much life and color, and the feel of the textures and colors was fantastic. I wanted to see if I could recreate that look in 3D.

Modeling
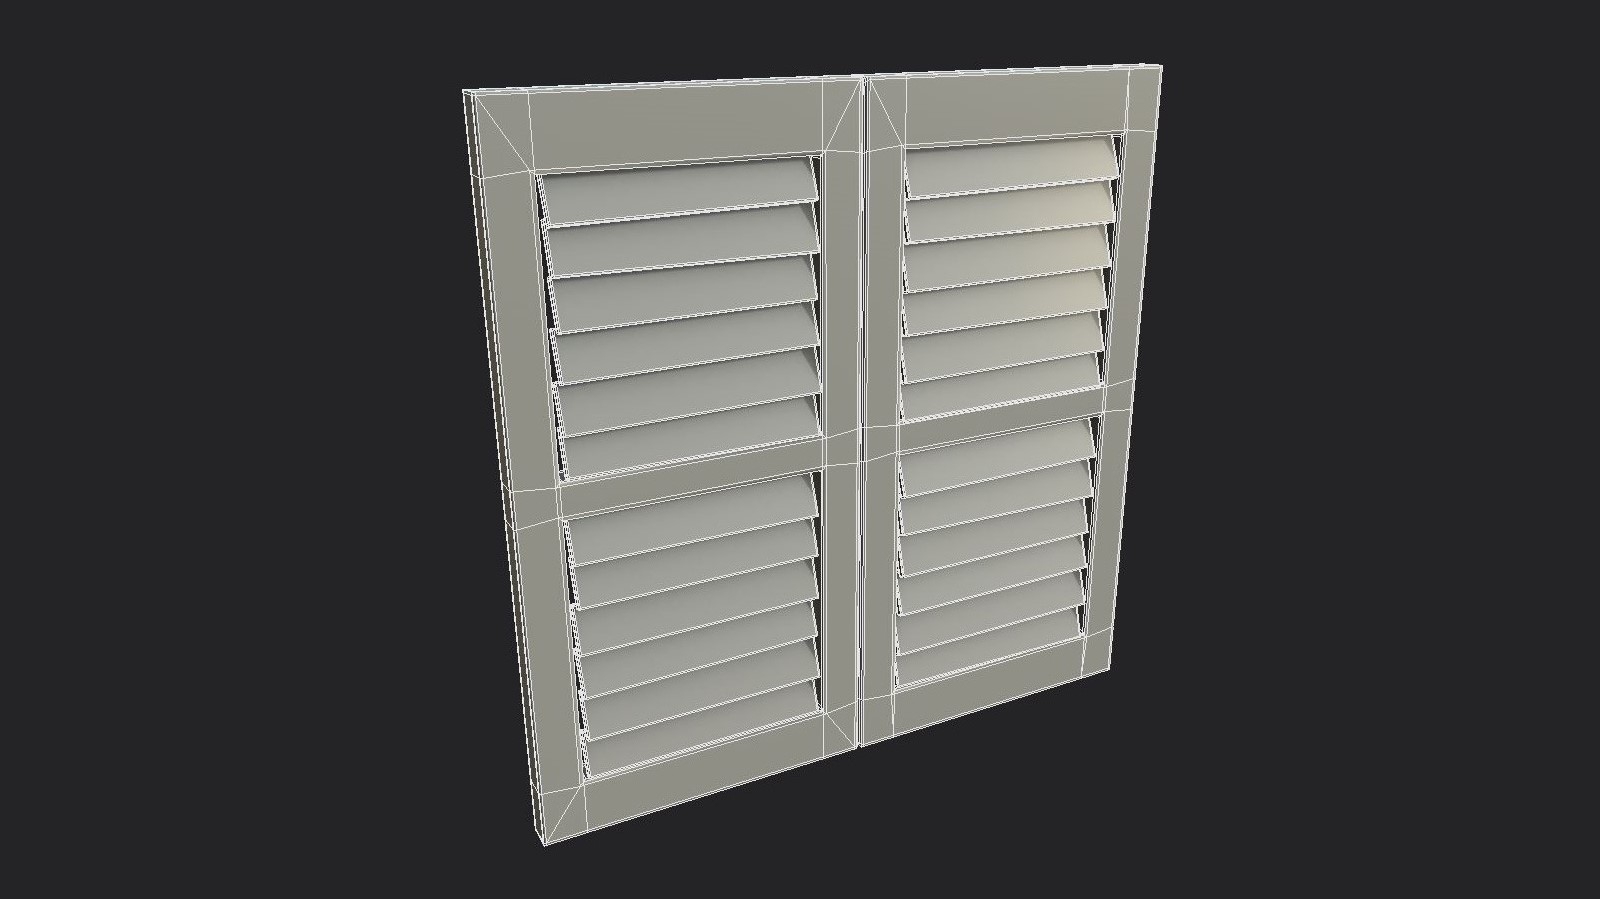
From the beginning, I knew I wanted to create a modular set of assets so I could expand the scene in engine. I blocked out and modeled the 3 buildings in the reference, and broke them apart into re-usable pieces. The scene is mostly made of simple shapes, so the modeling was pretty straightforward. The biggest challenge was finding way to add in imperfections. The tin overhangs specifically benefited from a lot of dents and irregularities. Looking back, I think I could have pushed the imperfections a little further than I did.
To avoid hard edges I flat beveled most of my hard surfaces, and only did high/low bakes only on curved surfaces. Also I planned on vertex painting the walls to add some variety, so on a couple specific pieces I added in some extra geometry to give myself more precision.
I ended up with a decent sized asset kit to build the scene that would give me a lot of variety and options in the engine to build the scene out further. Along the way I would find a small prop or asset I needed and add it in.
Assets:

Example of flat beveling: 3570 Tris
Texturing
Textures were going to make or break this project. I experimented with a couple of options, from hand painted to a high level of realism. Nothing really gave me the feel I was looking for. I wanted to capture that patchy painted look, but I also wanted to bring it into real life a bit more, as if you were seeing the environment as the artist did. I made a simple patchy texture in Substance Designer, and liked the feel. That patchy texture became the base for almost all of my textures.
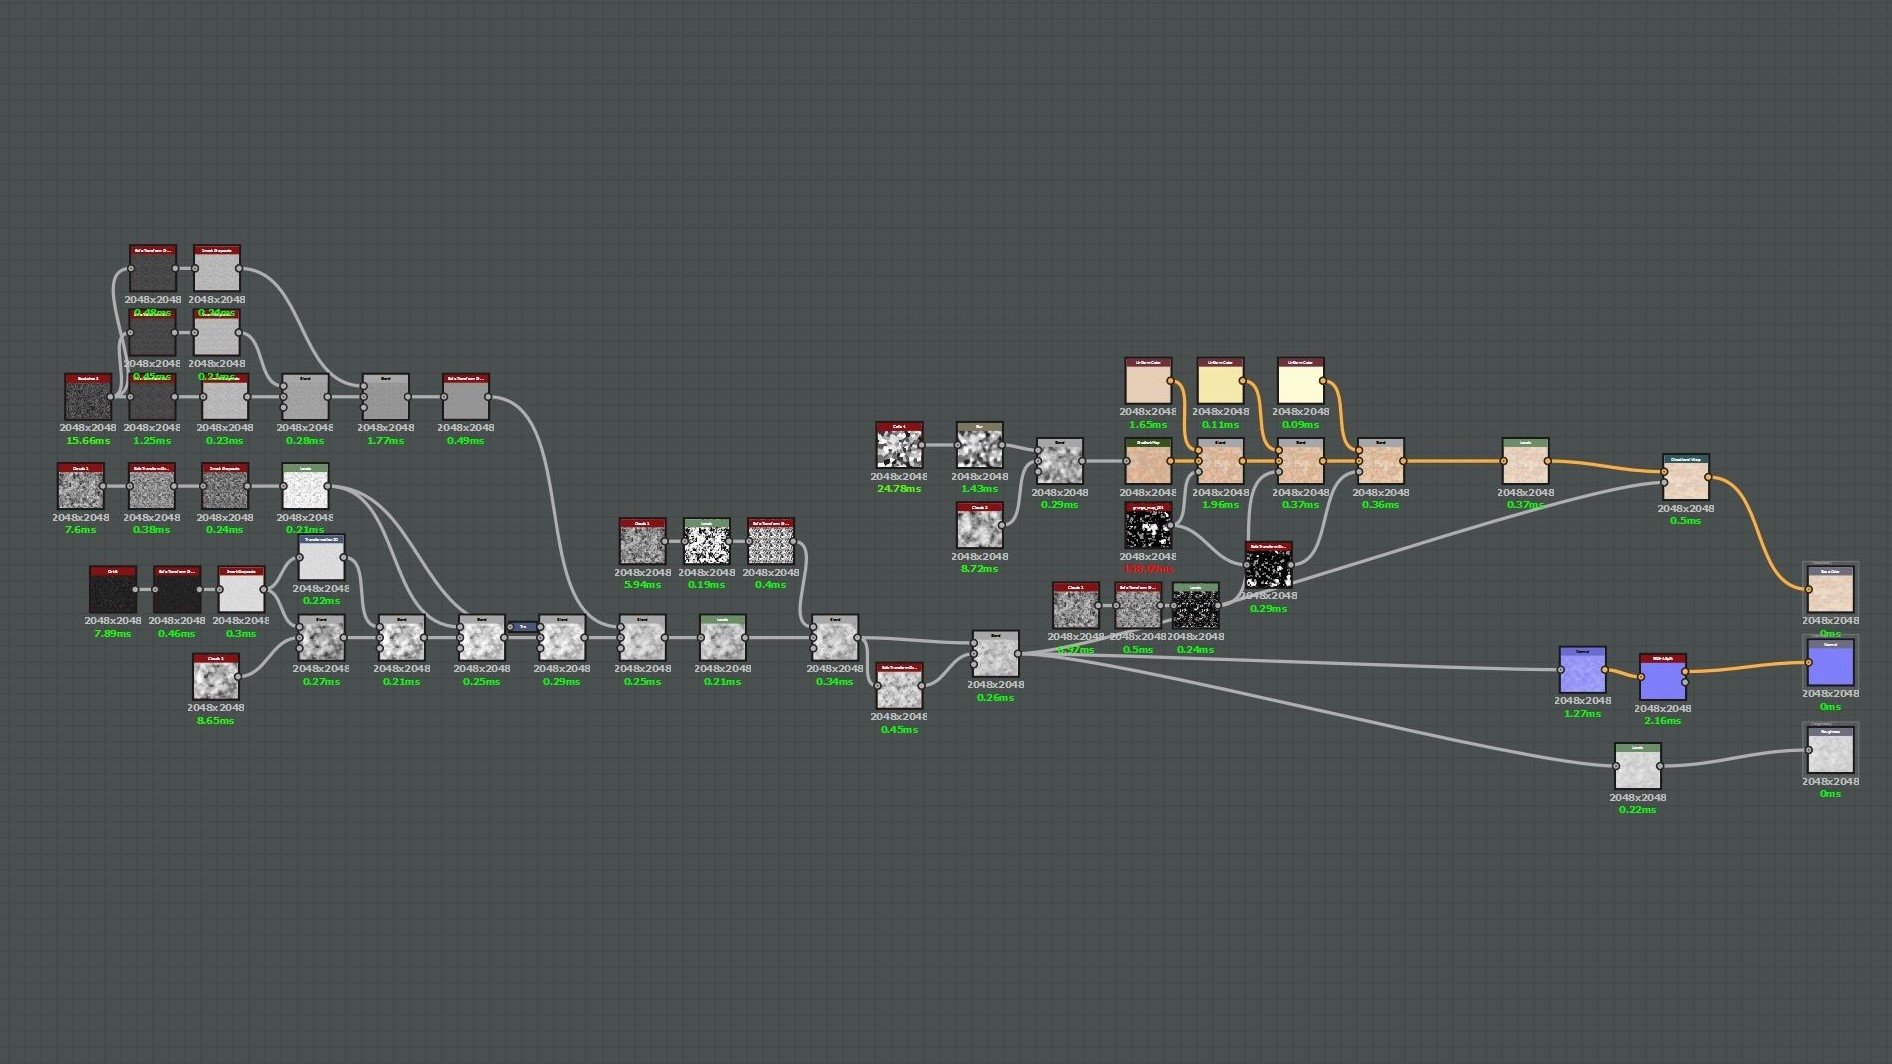

From there I built a master material that allowed me to change the color, roughness, normal intensity, and metallic. The correct normal intensity actually made a big difference. Too strong of a normal made it feel too realistic, but too flat betrayed the simplicity of the texture and looked unrealistic. I added in a detail normal to giving it some jazz, and hooked it all up to Texture Cords multiplied by a Parameter so I could keep my texel density exactly the same in case my UV's were slighly off. I also made use of the Detail Texturing node, which added an extra pop.
The last thing I added to my master material was vertex deformation. The perfectly straight lines of my walls were clashing with the rest of the look, but I noticed this pretty late in the process. Rather than remodel everything, I used vertex painting for deformation to give a subtle wobble along the edges. It was just enough to break up the cleanness of my edges.
Wall Master Material:
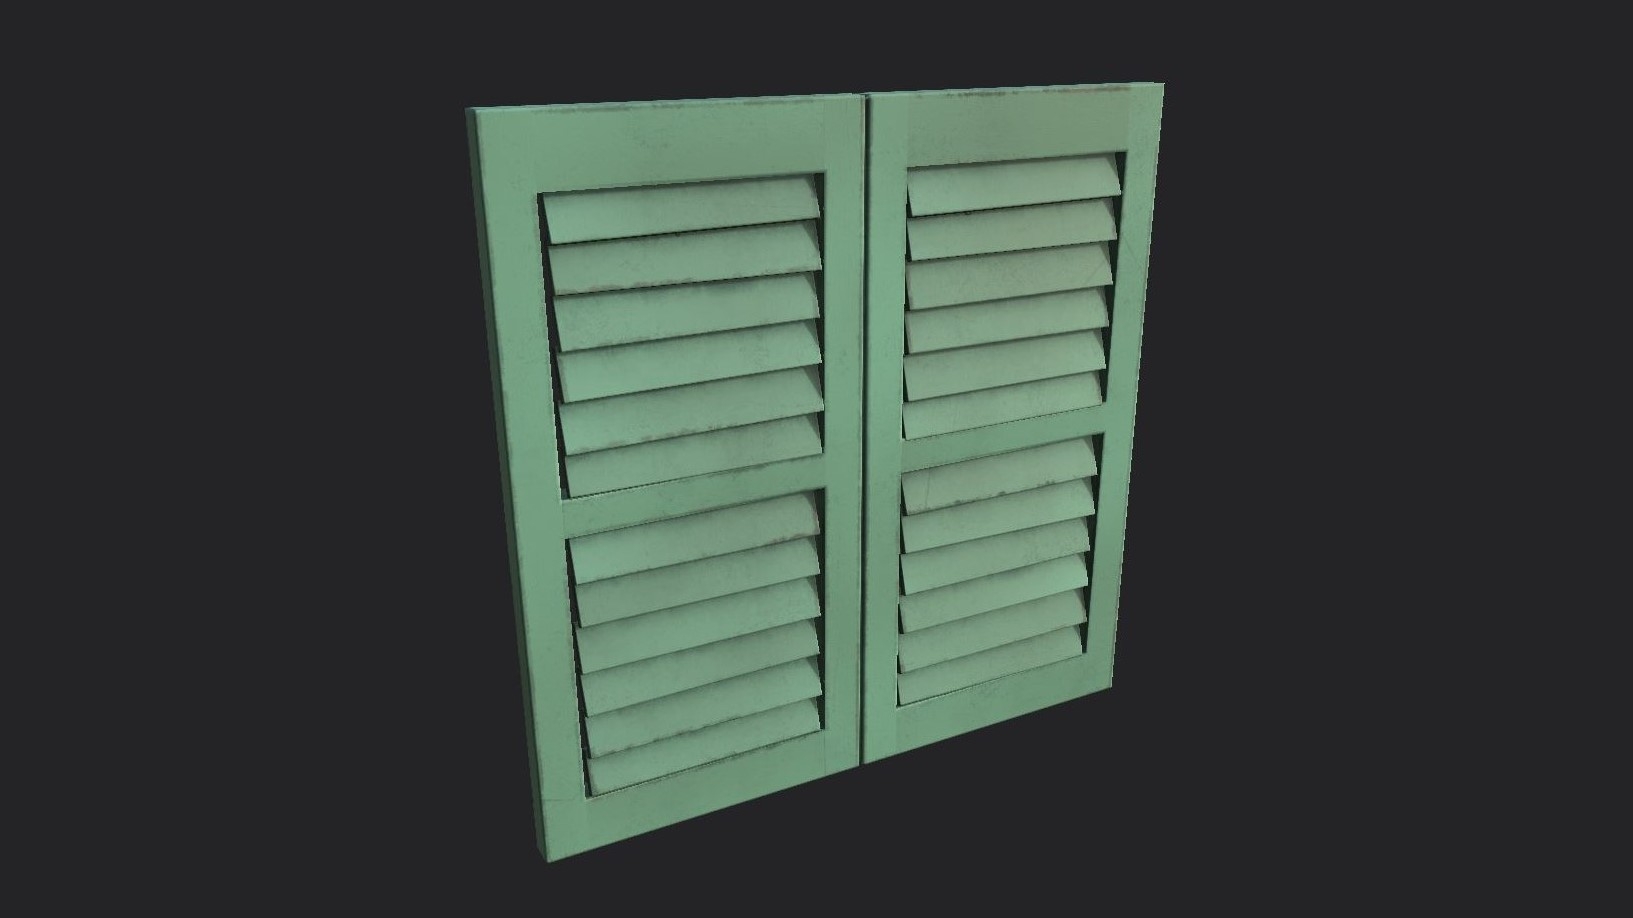
Having a master material like this significantly sped up my texturing process, as I could change nearly every attribute in the Material Instances and texture my pipes with the same material as my walls. This made things look a bit uniform, so I brought the shutters and blinds into Substance Painter so I could add a more unique texture and get some good aging and dirt.
To be honest, I got a little lazy on the wood texture. I used the Pine texture from Unreal's starter content as a placeholder early on, and in the end I just overlay my patchy texture in the material and added vertex painting. It looked decent so I just left it.
For the plants and cloth I used World Position Offset to get some fluttering and swaying movement. This worked great for the foliage, but for the towels hanging over the rails I needed a way to have the top of the towel stationary and only the bottom flutter. To accomplish this I used a second UV channel with a front projection, and a gradient so the offset only affected the bottom of the model. World Position Offset isn't something I'd worked with much before, so I had to do some research to get what I needed. The plans were actually textured in Procreate (a painting app for the iPad Pro), and then I export my Albedo and Mask.
Cloth Master Material:

The signs were interesting. I don't speak Malay or Chinese, so I hand drew the letters in Procreate as best as I could, and made those into alpha masks for Substance Painter. I sincerely hope I haven't written anything rude in Malay, Chinese, or Japanese.
Signs (Normal, RMA, Albdeo)

Lighting
As soon as I started placing assets, I added a skylight, a directional light, and atmospheric fog. I try to get them pretty close to where I want them in the end so I get the idea of the final look as I'm setting up my composition. I knew static lighting would give me the nice soft look I wanted, but after a couple tests, I felt like the shadows were a bit too soft. I ended up baking everything but my directional light, which I left dynamic to get some nice crisp shadows. I also placed several point and spot lights where I thought the directional light needed a little help. As I neared the end of the project, I placed my reflection spheres and re-did my lighting to fit with the final composition. One small adjustment I made was changing the shadow radius threshold to get nice shadows a bit further from the camera since I was using the dynamic directional light. At the very end I wanted to push the softness a bit further, so I added a bloom on a very low threshold that gave the lighting more spread and texture.
Unlit:

Detail Lighting:

Post
I usually start playing with Post Processing pretty early as well. The more time you have to iterate on any element of a scene the better. I made a couple LUTs in Photoshop and messed with some settings. For my final pass, I re-did my LUT to be a little more accurate to the reference image, but still wasn't happy with the results I was getting. I did some research and ended up switching the engine tonemapper to Film rather than its default. This change of tonemapper and the more detailed Post options it opened up were just what I needed.
No Post:

With Post:
Thanks and Notes
I'm getting around 85 fps on the scene.
Special thanks to Luos, who whether he realizes it or not, has become my game dev mentor, the Unreal Discord and Polycount communities, and Daedalus for his amazing tutorials on lighting (https://forums.unrealengine.com/showthread.php?134195-Unreal-4-Lighting-Academy-or-something-like-that-).
Link to my ArtStation: https://www.artstation.com/artist/mcgillchris