The BRAWL² Tournament Challenge has been announced!
It starts May 12, and ends Oct 17. Let's see what you got!
https://polycount.com/discussion/237047/the-brawl²-tournament
It starts May 12, and ends Oct 17. Let's see what you got!
https://polycount.com/discussion/237047/the-brawl²-tournament
Is this a bad UV unwrap? Baking Problems
Having some real difficulty here.
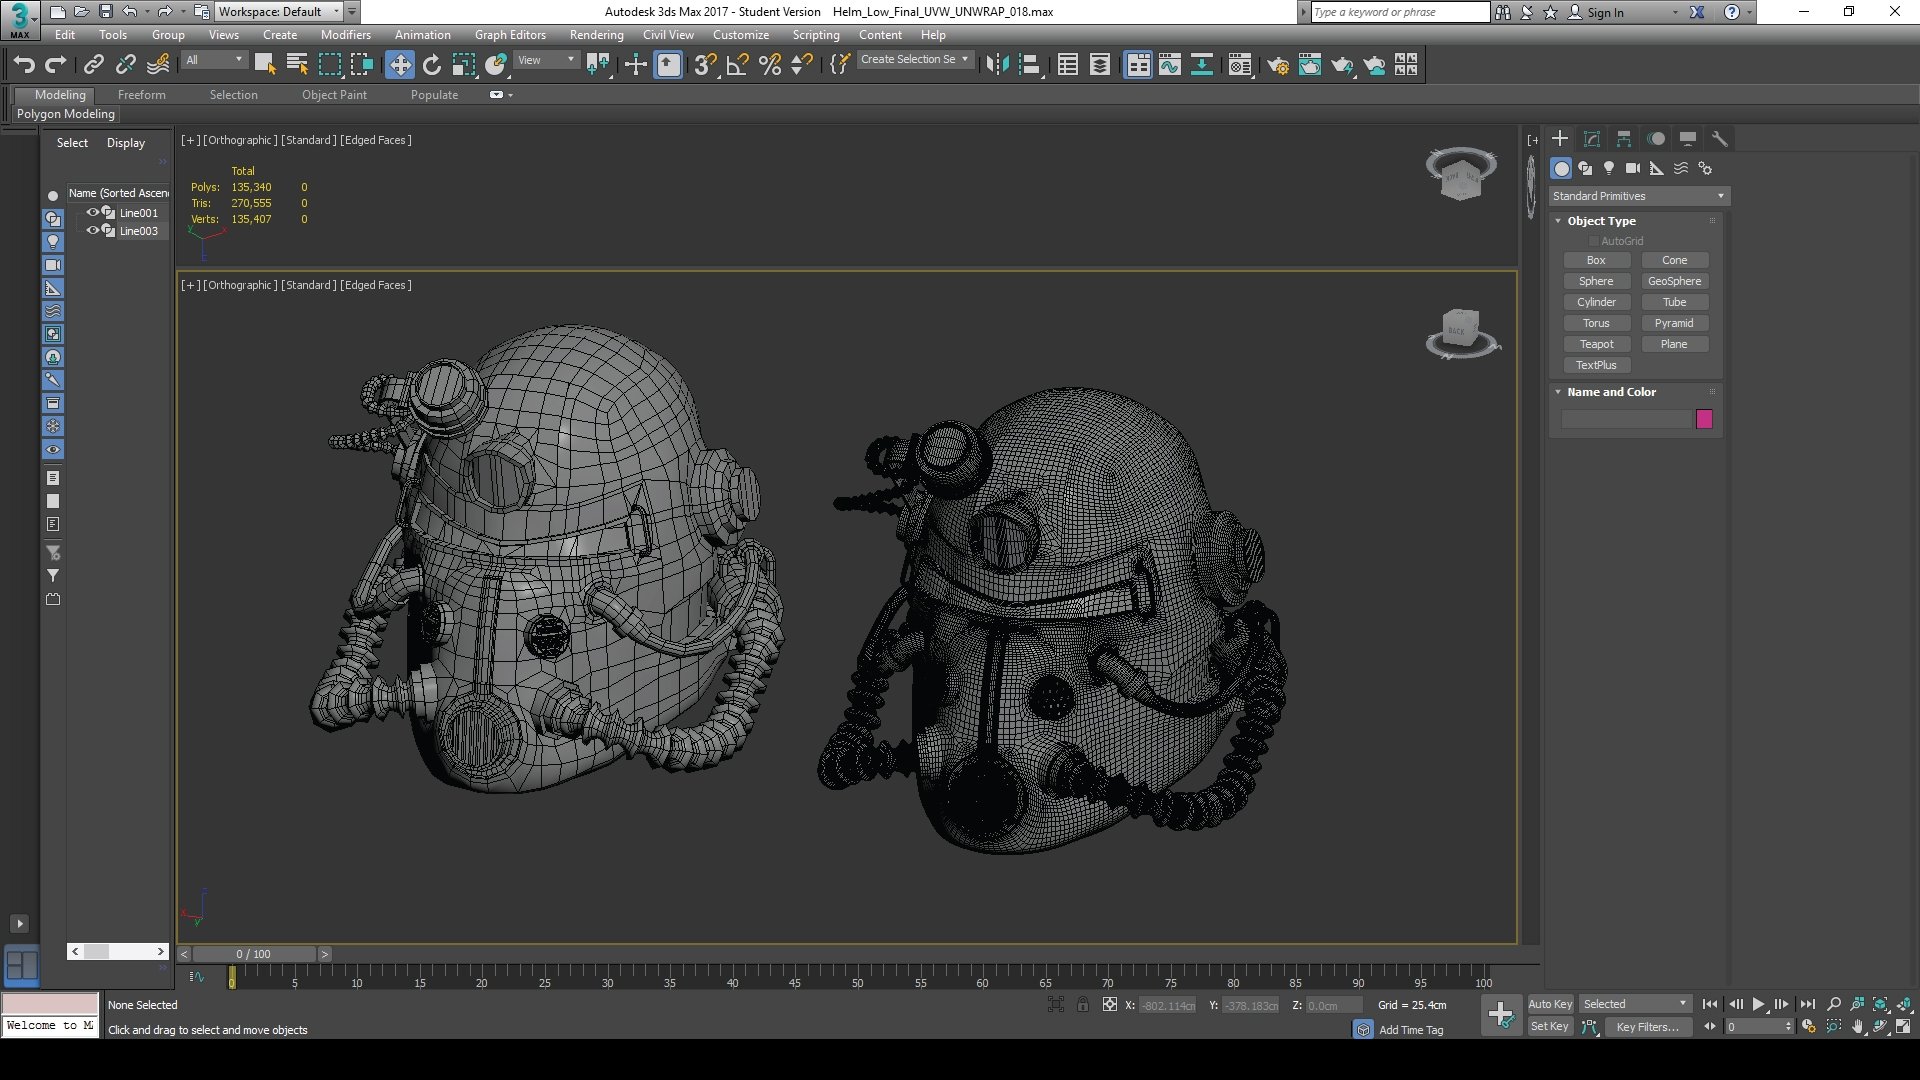
I have modeled a power armour helmet from Fallout with some complex elements to it (the two tubes on either side for example). I unwrapped it as accurately as possible but it's now giving me hell with baking a decent looking normal map and with using it in Substance Painter.
I have a high poly which needs some additional details on it but I don't want to touch it until I know what's going wrong and if I need to make my original model more low poly and then unwrap it again.
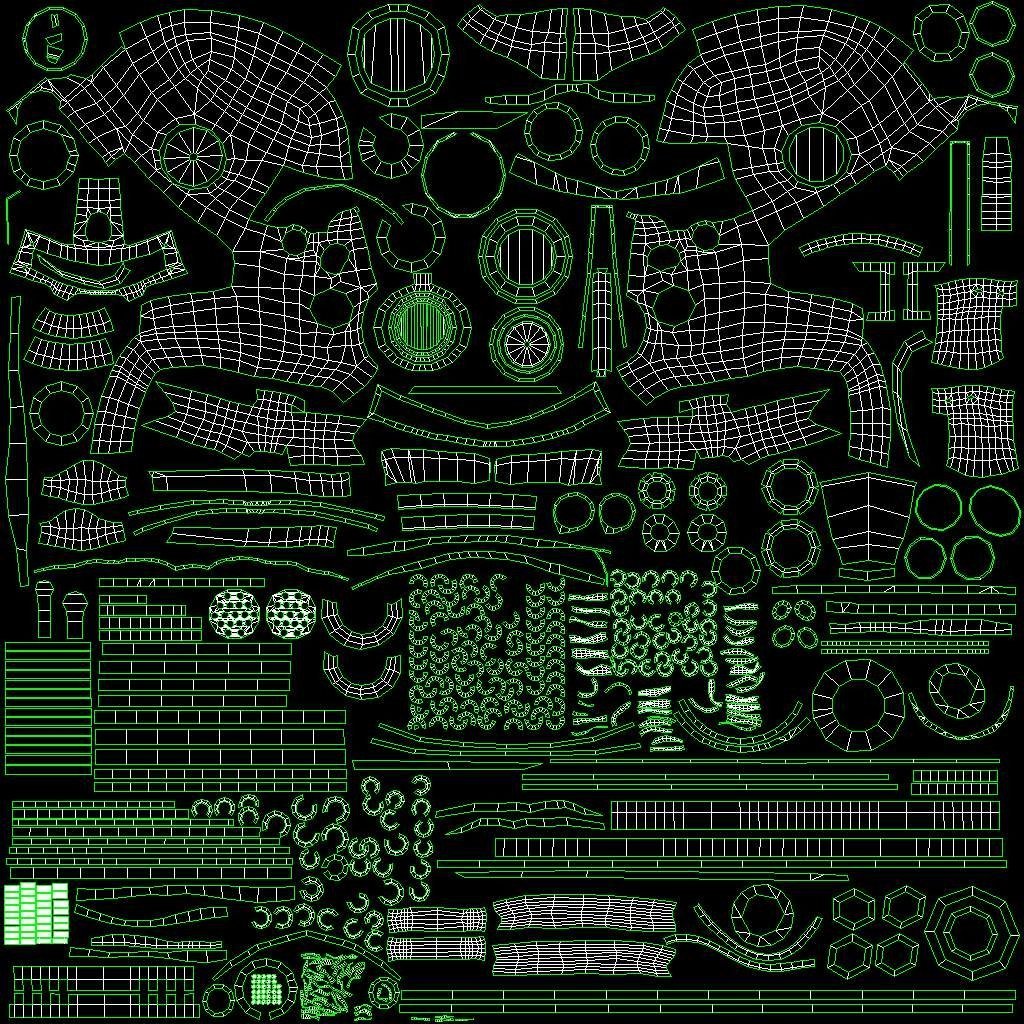
The unwrap at the moment. Tried my best to fit everything on there but I'm afraid some elements are too small to give a good looking result.
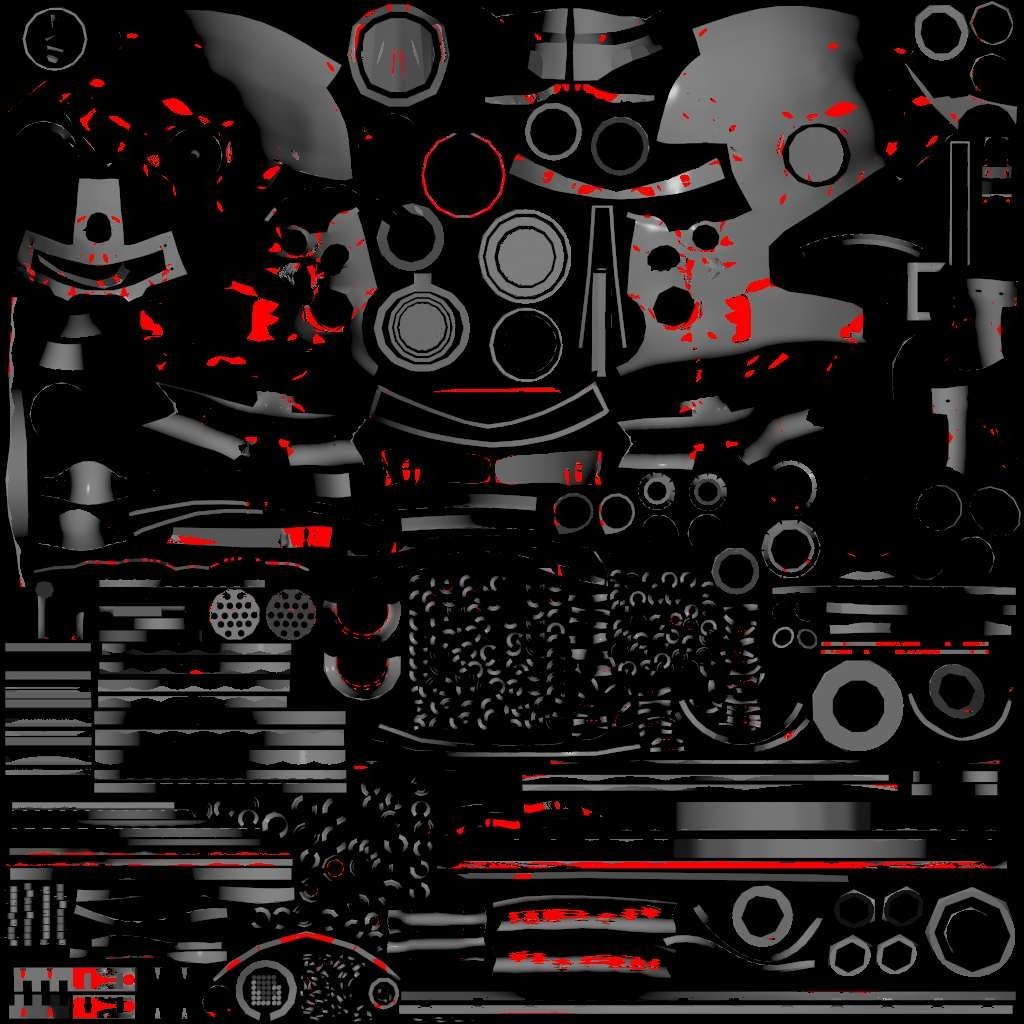
This is the normal map I'm getting from 3ds Max. Any ways to stop the cage from intersecting like that? And why are certain areas completely black?
Should I continue with the high poly then make a new low poly using retopology? Should I separate the UV's onto separate grids to give them a higher resolution?
Any help would be greatly appreciated!
(Ps. Smoothing groups are applied to the low poly and the unwrap has a seam on each hard edge).
I have modeled a power armour helmet from Fallout with some complex elements to it (the two tubes on either side for example). I unwrapped it as accurately as possible but it's now giving me hell with baking a decent looking normal map and with using it in Substance Painter.
I have a high poly which needs some additional details on it but I don't want to touch it until I know what's going wrong and if I need to make my original model more low poly and then unwrap it again.


The unwrap at the moment. Tried my best to fit everything on there but I'm afraid some elements are too small to give a good looking result.

This is the normal map I'm getting from 3ds Max. Any ways to stop the cage from intersecting like that? And why are certain areas completely black?
Should I continue with the high poly then make a new low poly using retopology? Should I separate the UV's onto separate grids to give them a higher resolution?
Any help would be greatly appreciated!
(Ps. Smoothing groups are applied to the low poly and the unwrap has a seam on each hard edge).
Replies
Any advice for getting rid of the red areas? There's a lot of geometry that intersects quite easily on this model, could I separate it to avoid this problem then compile it into one normal map?
About the red color it's a ray miss, means your cage is not pushed high enough the encompass all your highpoly mesh. You can try to set the cage push value slightly higher and test render that again. Also, if you haven't aware there's a 'shaded' option on projection modifier that you can turn on to better preview the cage distance from your lowpoly to highpoly.
About the black area, well that's just preview so don't worry about that.
Personally I'll stay away from mental ray to bake texture. But that's just me, scanline give a better result with less setting as far as I know.
- if cages are intersecting, you should explode the meshes (high and low together), so there are no pieces touching each other
Thanks for that advice. I didn't realise the render was just a preview. Learning as I go!
I've experimented with pushing the cage but the problem is if it goes too far then it interferes with the cage from another section. Meaning the ray miss is fixed in one area but reappears in another. What are your thoughts on the unwrap? Could it be less crowded perhaps?
Actually I think you could solve this rather easily. Set your timeline to 2 frames. Have frame 0 be the origin with all meshes/elements set to how you would like them to appear in-game (so high poly on one layer set at origin and low poly on another layer and set to origin). Then, activate auto key and key for frame 0 on all elements. Afterwards, move your time slider to the second frame, separate the meshes/elements so that they are still paired between high poly and low poly (same position), but not put together as a game ready mesh (you are exploding the mesh for an "exploded bake"). Set the second frame key for all elements. Turn off keying (and save). Now - go to frame 2 and try pushing your cage again. There should be little (if any) cage overlaps occurring. Keeping your time slider set to frame 2, go ahead and do a bake. See what kind of results that gives. No messing with vertices position, no messing with UV's. http://wiki.polycount.com/wiki/Texture_Baking#Solving_Intersections has some info on this for you.
If I made those two complicated tubes on the sides cylinders, could a normal map give it the impression of having that segmented sort of shape?
Thanks for all your help, check it out at:
http://polycount.com/discussion/182394/t-51b-helmet-fallout/p1?new=1