The BRAWL² Tournament Challenge has been announced!
It starts May 12, and ends Oct 17. Let's see what you got!
https://polycount.com/discussion/237047/the-brawl²-tournament
It starts May 12, and ends Oct 17. Let's see what you got!
https://polycount.com/discussion/237047/the-brawl²-tournament
Tutorial: Easy way to make welding seams in Photoshop.

greentooth
Hello polycounters!
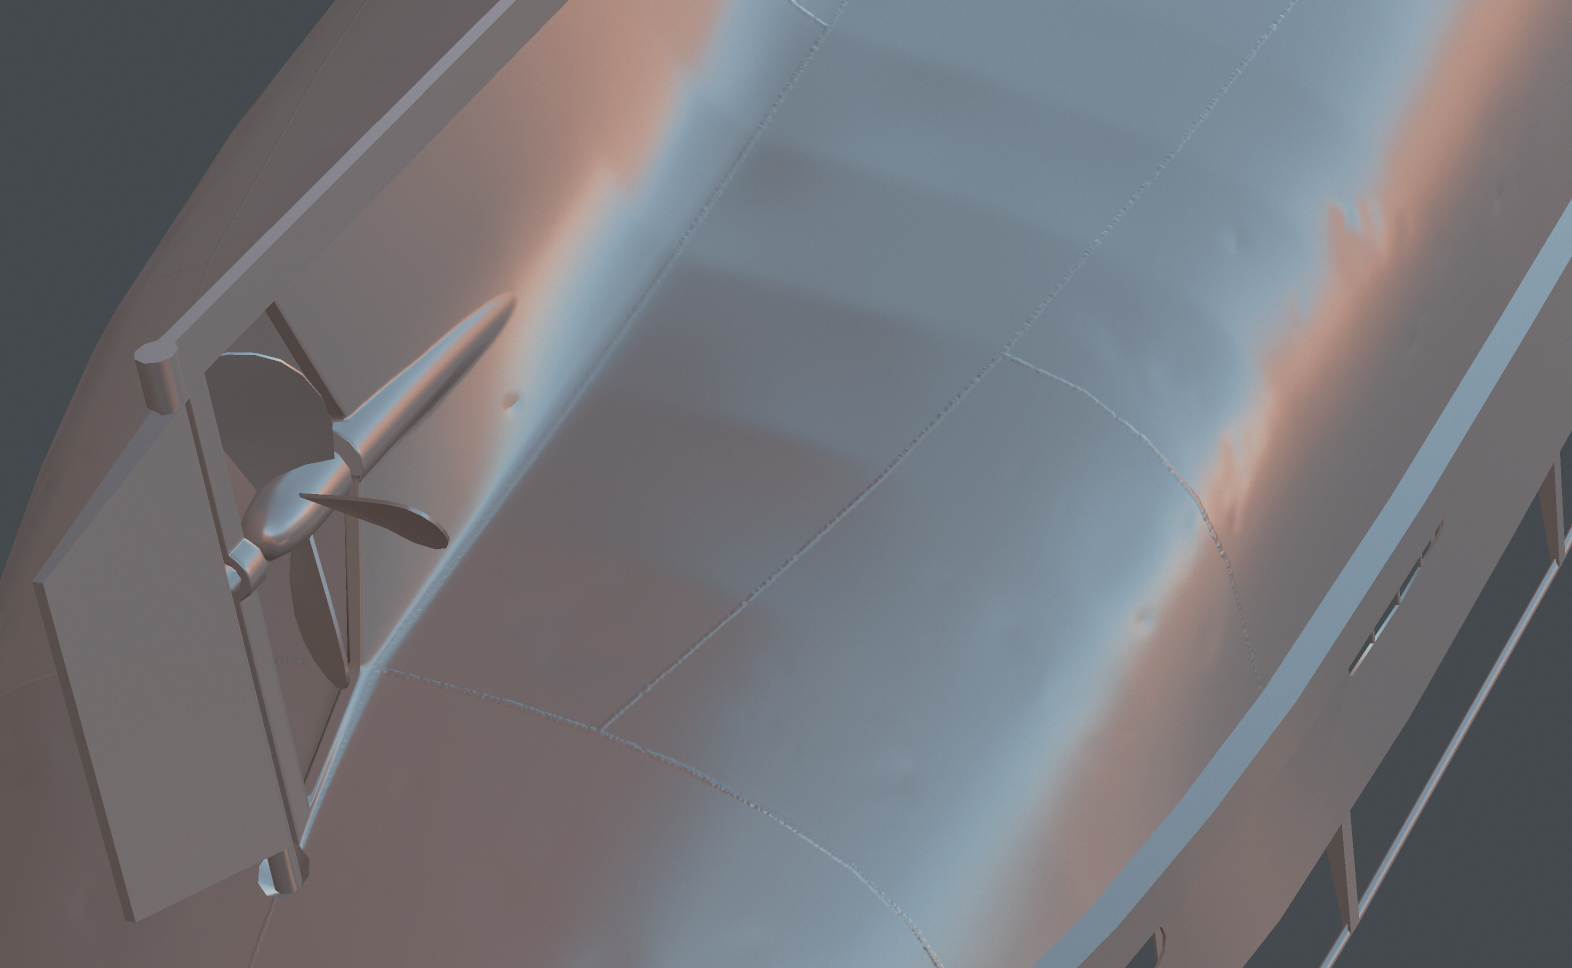
I’m making normal maps for my tugboat model. And I just found super-quick-easy way to make small welding seams on normal map in Photoshop. May be everyone know this method, maybe it too simple, but i think it can be usefull for beginners.
Pros:
- Very fast
- You can erase or paint new welding seams anytime.
- No need to bake.
Cons:
- … May be there is a better way to do welding. In Substance Painter for example.
Result:
You need:
- Photoshop
- XNormal plugin. Download here: http://www.xnormal.net/downloads.aspx
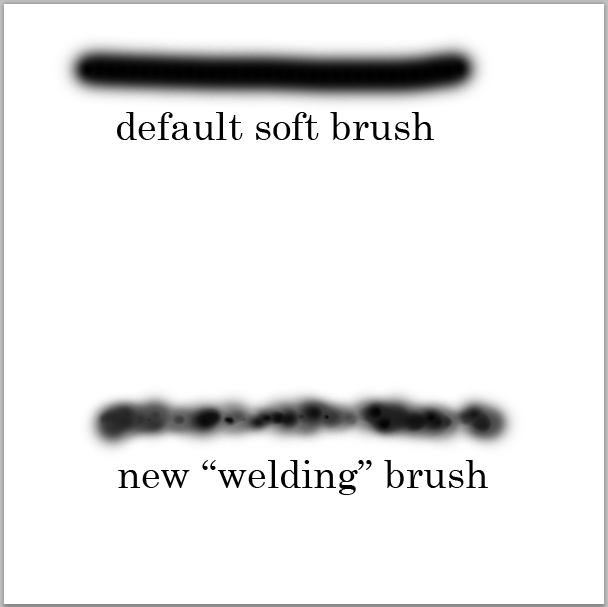
1. First step: New Brush. Open your normal map. Select Brush tool and select default “Soft Brush”.
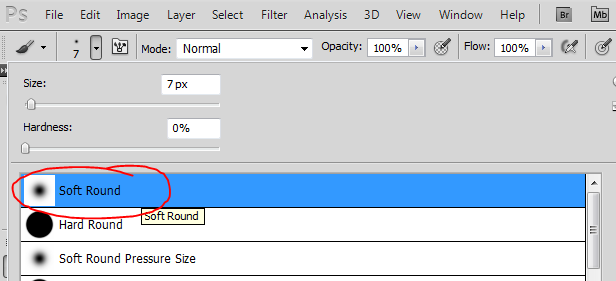
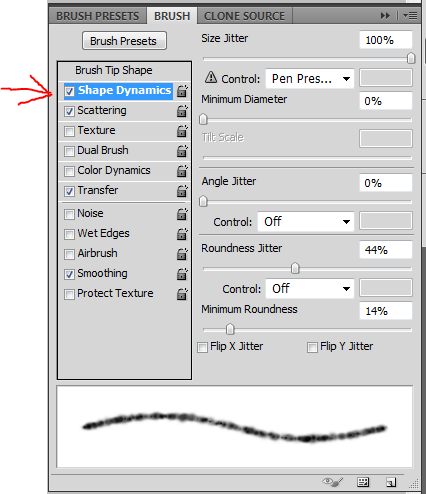
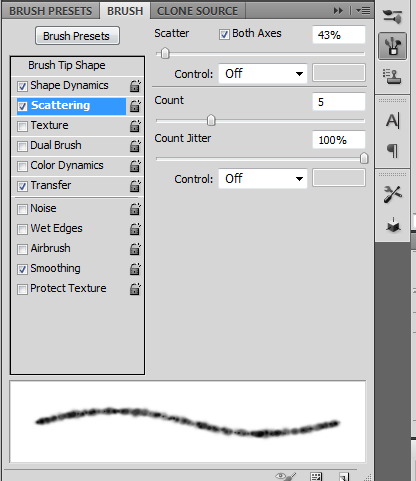
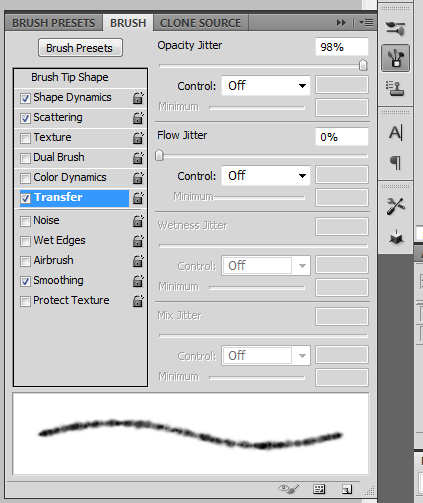
2. Go to brush settings and change settings like this:
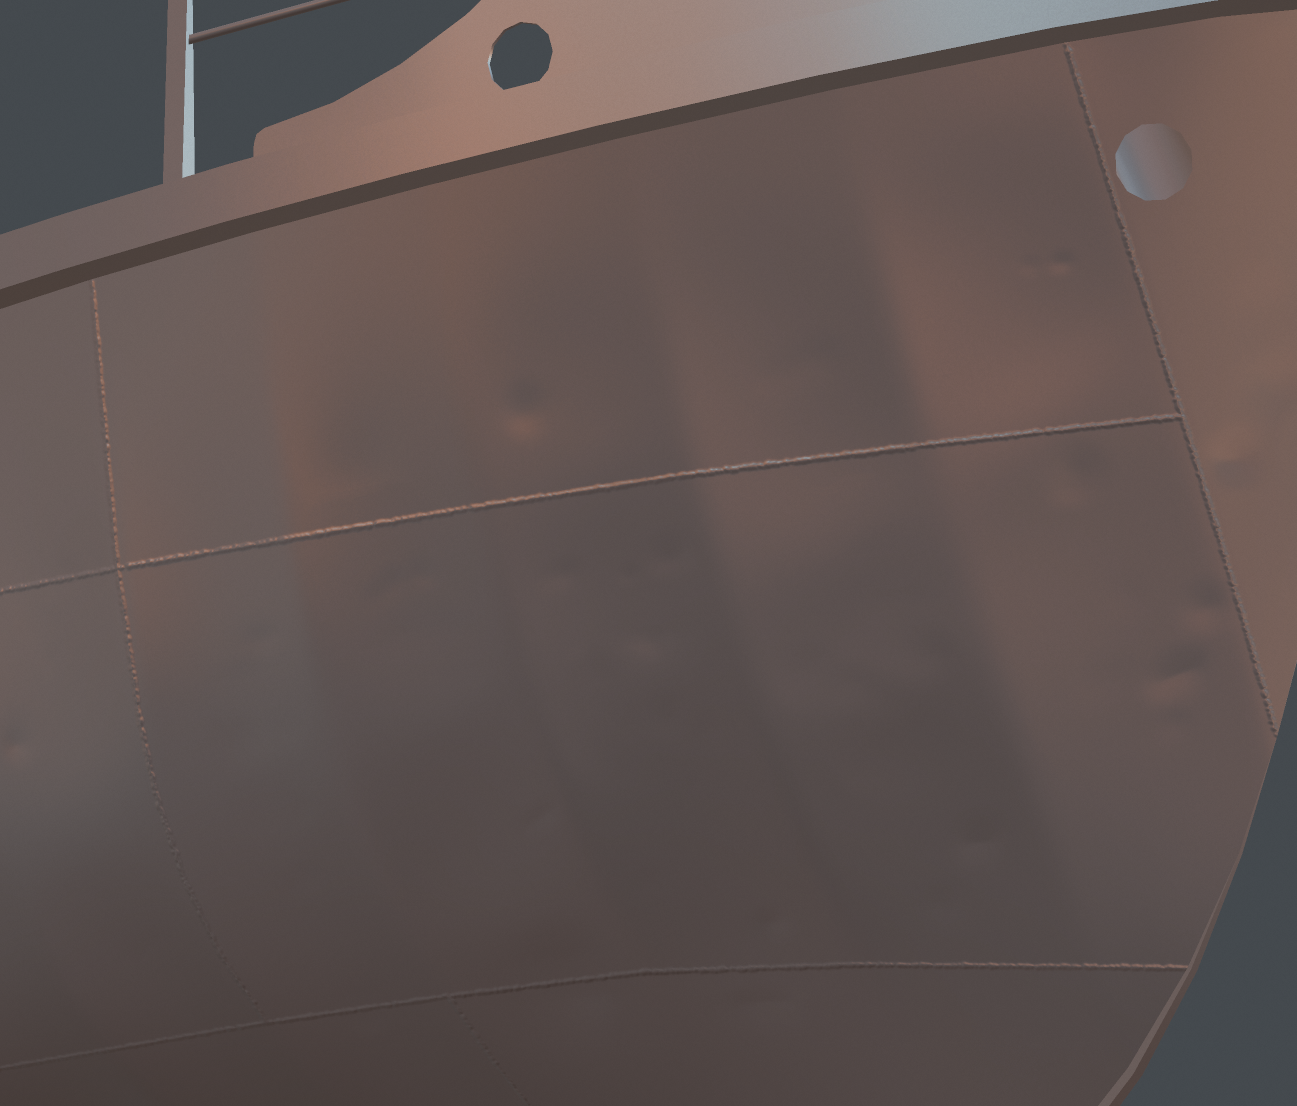
3. Now test new brush. You’ll get something like this:
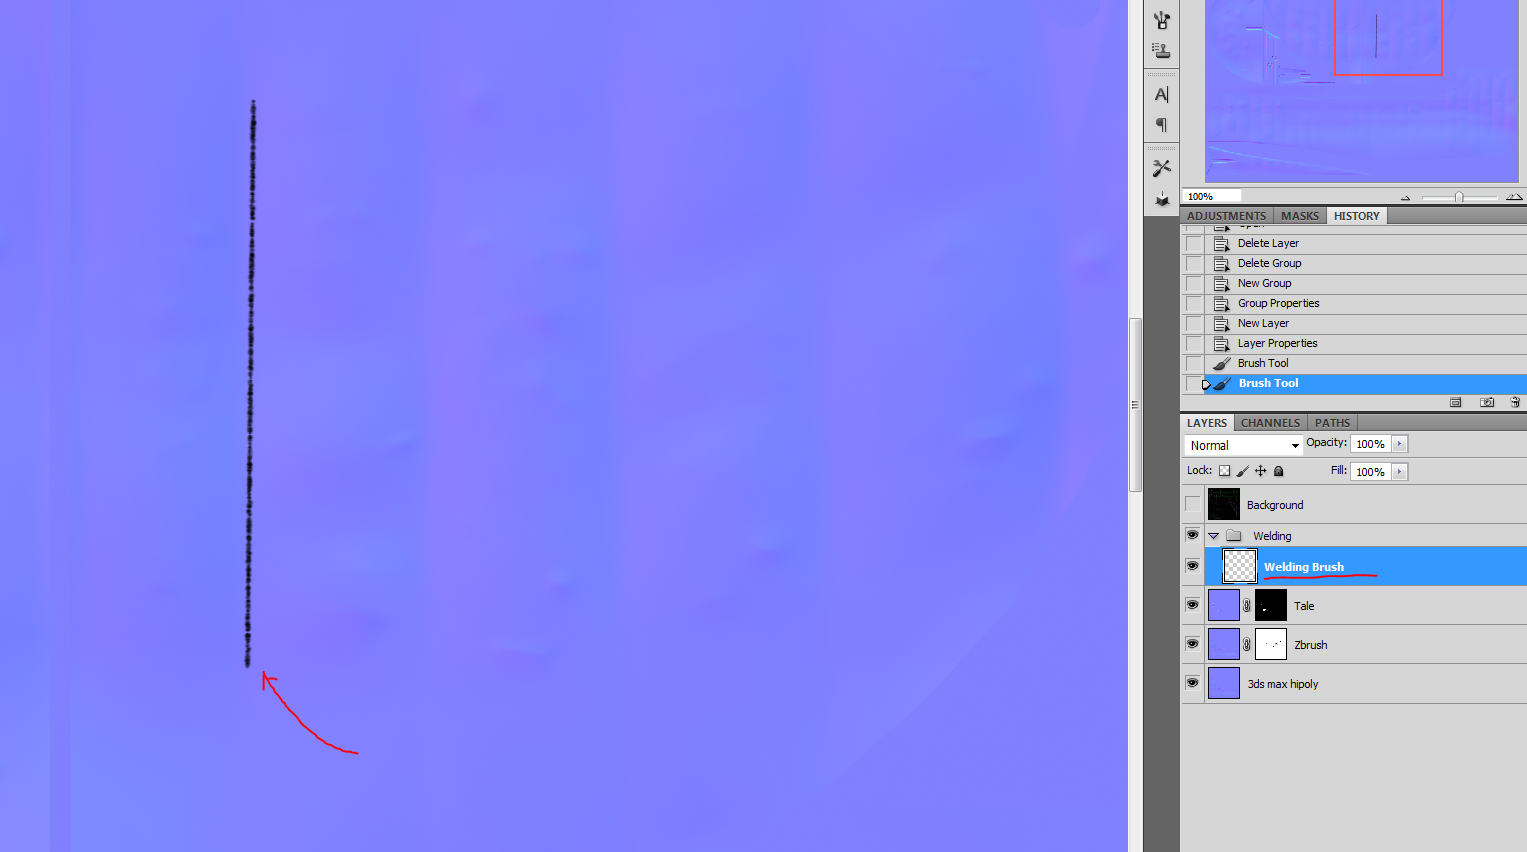
4. Create a new layer, name it “Welding Brush”. Start painting welding seams right on your normal map.
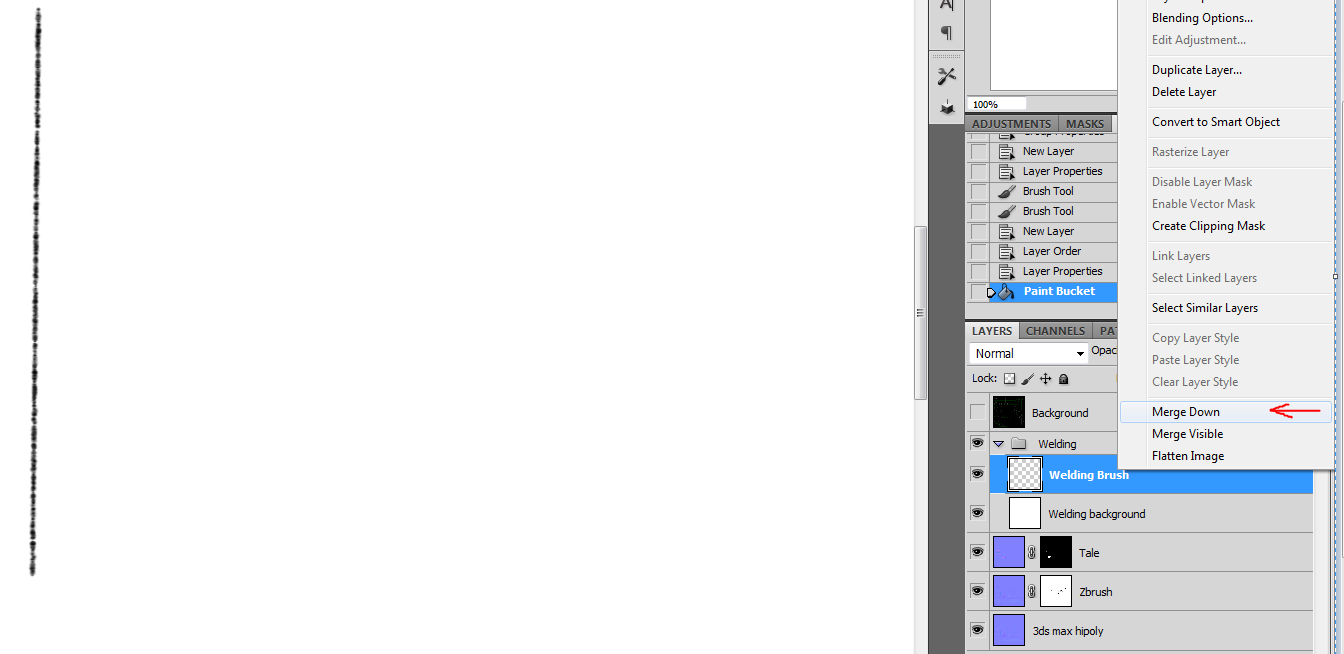
5. Now create white layer under “Welding Brush”. Name it "Welding background". And collapse this two layers.
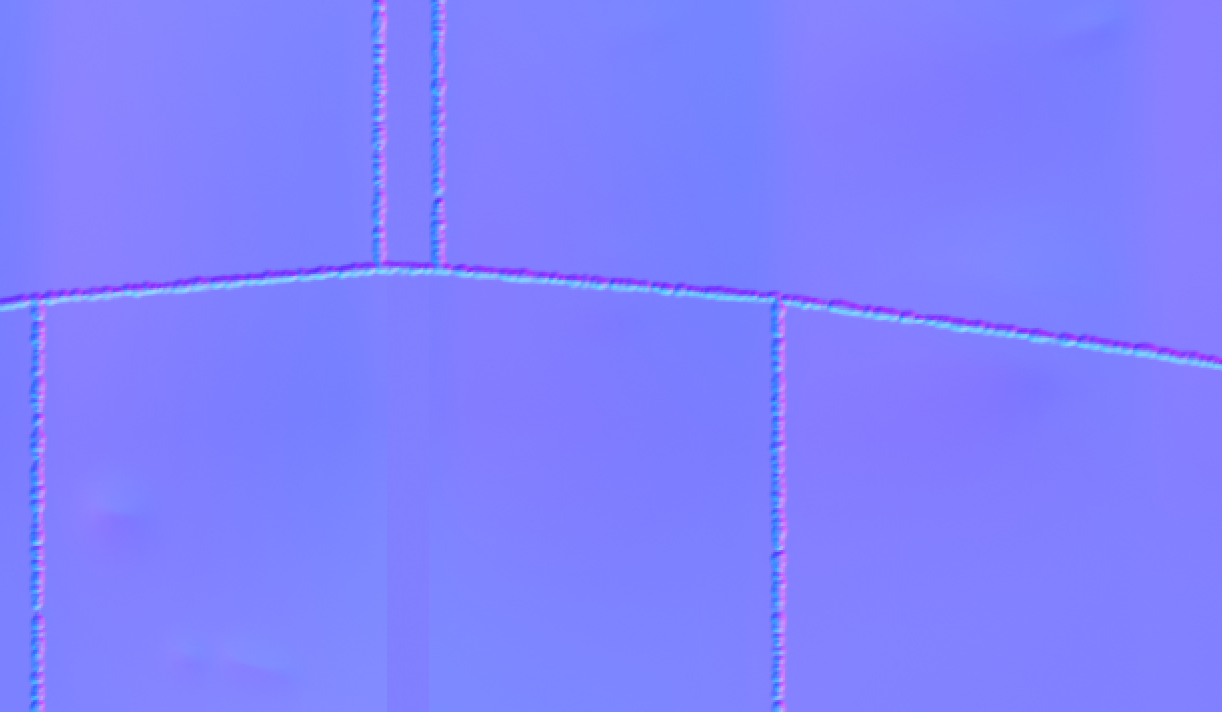
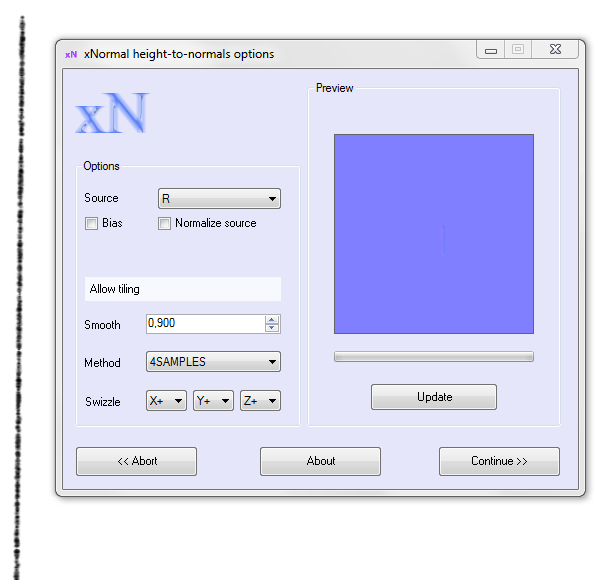
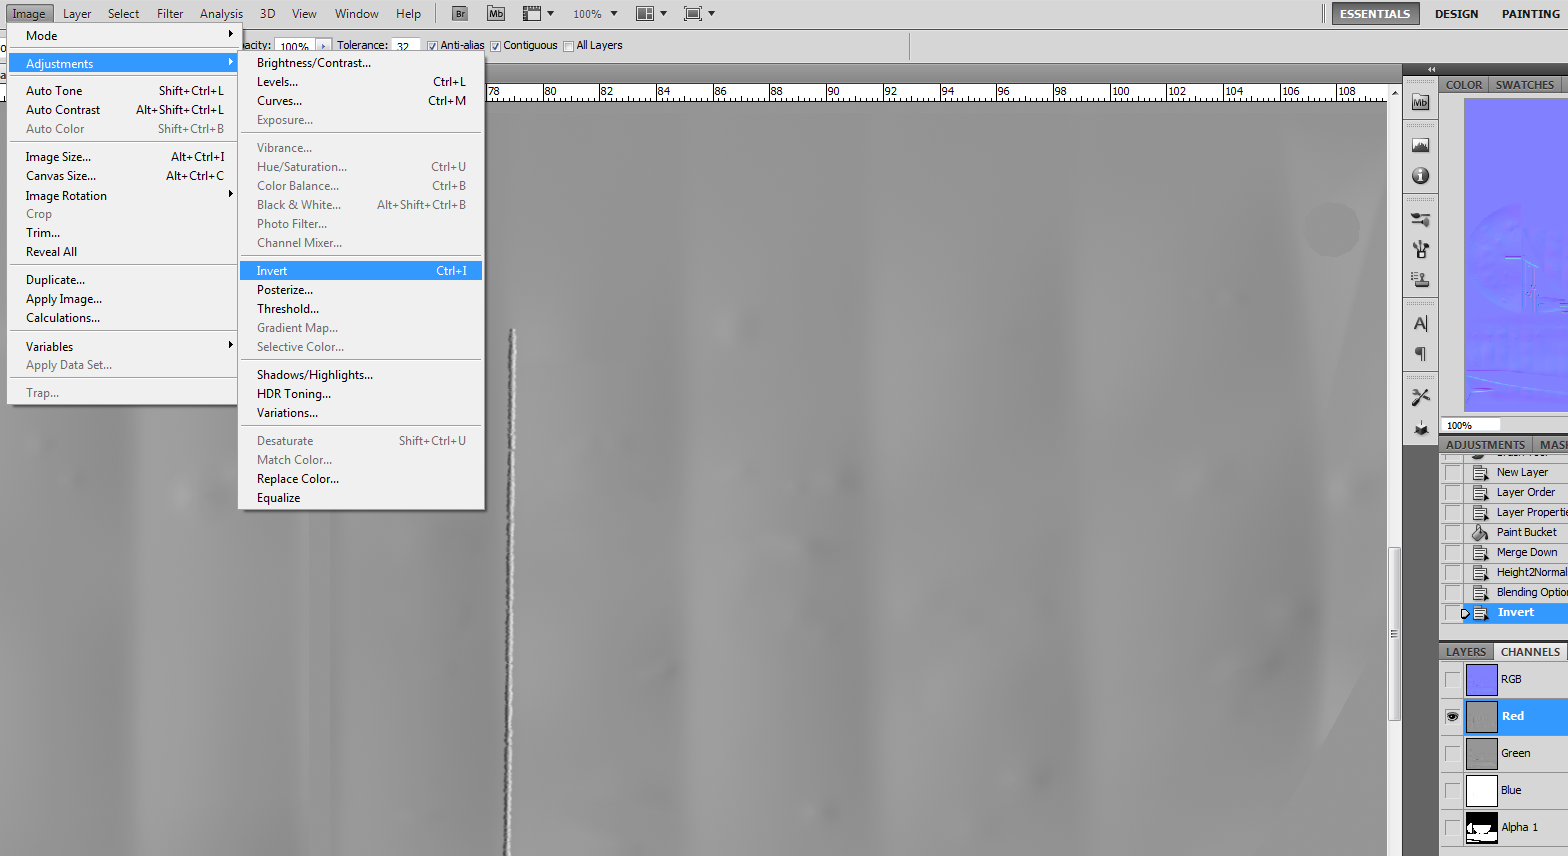
6. Go to Filters menu. Go to "xNormal" and press "Height2Normal".

7. Don’t change anything. It’s doing all right by default.
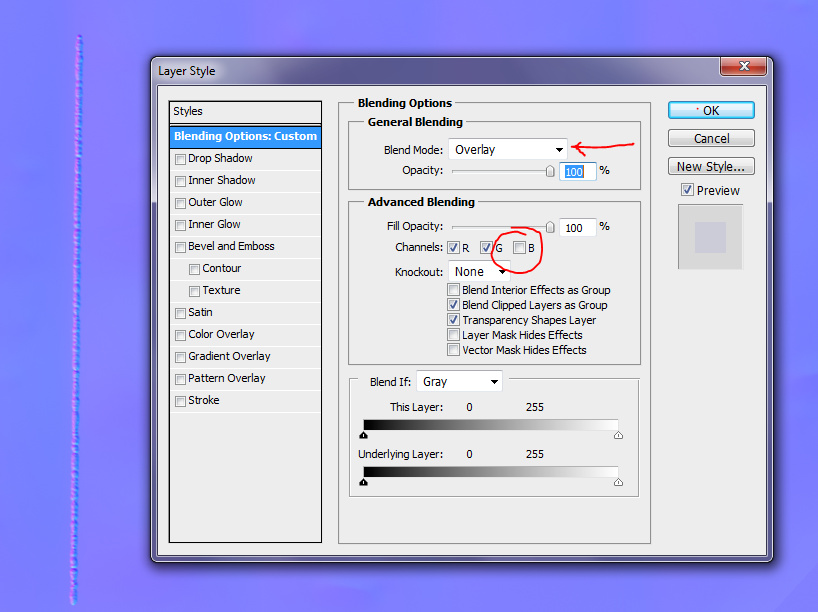
8. After that your black&white layer turns into “normal” layer. Next step – blend welding layer with your normal map. Open “Layer Style” and change Blend Mode to Overlay. Disable the blue channel.
9. Last step: May be you need to invert one or two channels (only R. Or R&G. Or only G). Depends on software you use to bake normal map. I bake normals in 3Ds Max. So in my case I flipped Red channel. Don’t touch Blue channel, it’s disabled anyway.
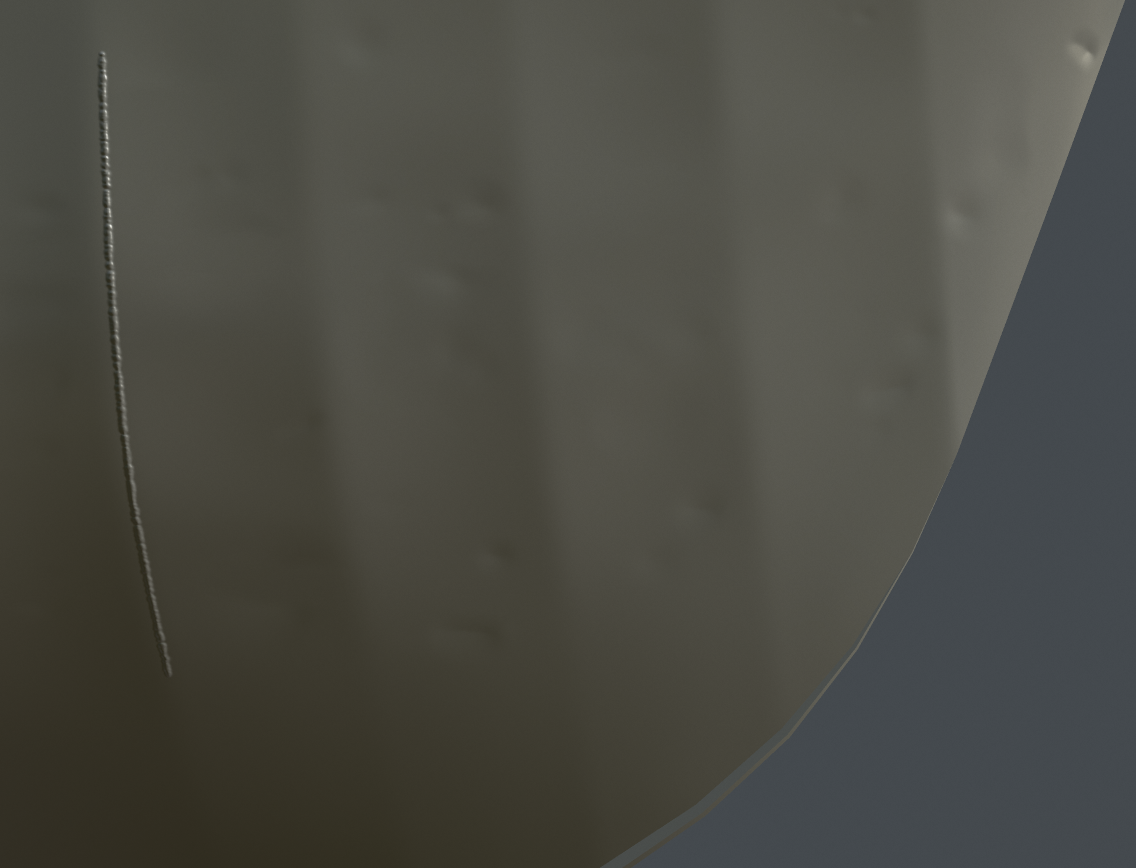
10. Result:
Thanks for watching!
Replies