The BRAWL² Tournament Challenge has been announced!
It starts May 12, and ends Sept 12. Let's see what you got!
https://polycount.com/discussion/237047/the-brawl²-tournament
It starts May 12, and ends Sept 12. Let's see what you got!
https://polycount.com/discussion/237047/the-brawl²-tournament
Normal map problems in Unreal Engine
Hey guys!
For the past couple of months I've been working on and off with a wall kit. I've been trying out a new workflow, I'm using the ultimate trim-technique from sunset overdrive ( for more info on the subject, check out http://www.gdcvault.com/play/1022324/The-Ultimate-Trim-Texturing-Techniques ) which is a way of avoiding baking high poly bevel edges to a low poly.
Anyway, at first I was going to present the wall kit in unity, but due to my limitations with programming and a slow computer (takes forever to bake lights and get SSAO) etc I decided to try out Unreal. But for some reason my normal maps and trims doesnt look good at all in Unreal. I'll show you some examples.
This is what my normal map looks like, with edge trims where I put the edges on my shells that I want to have nice edges.
and this is one of my meshes in Maya, with wireframe turned on.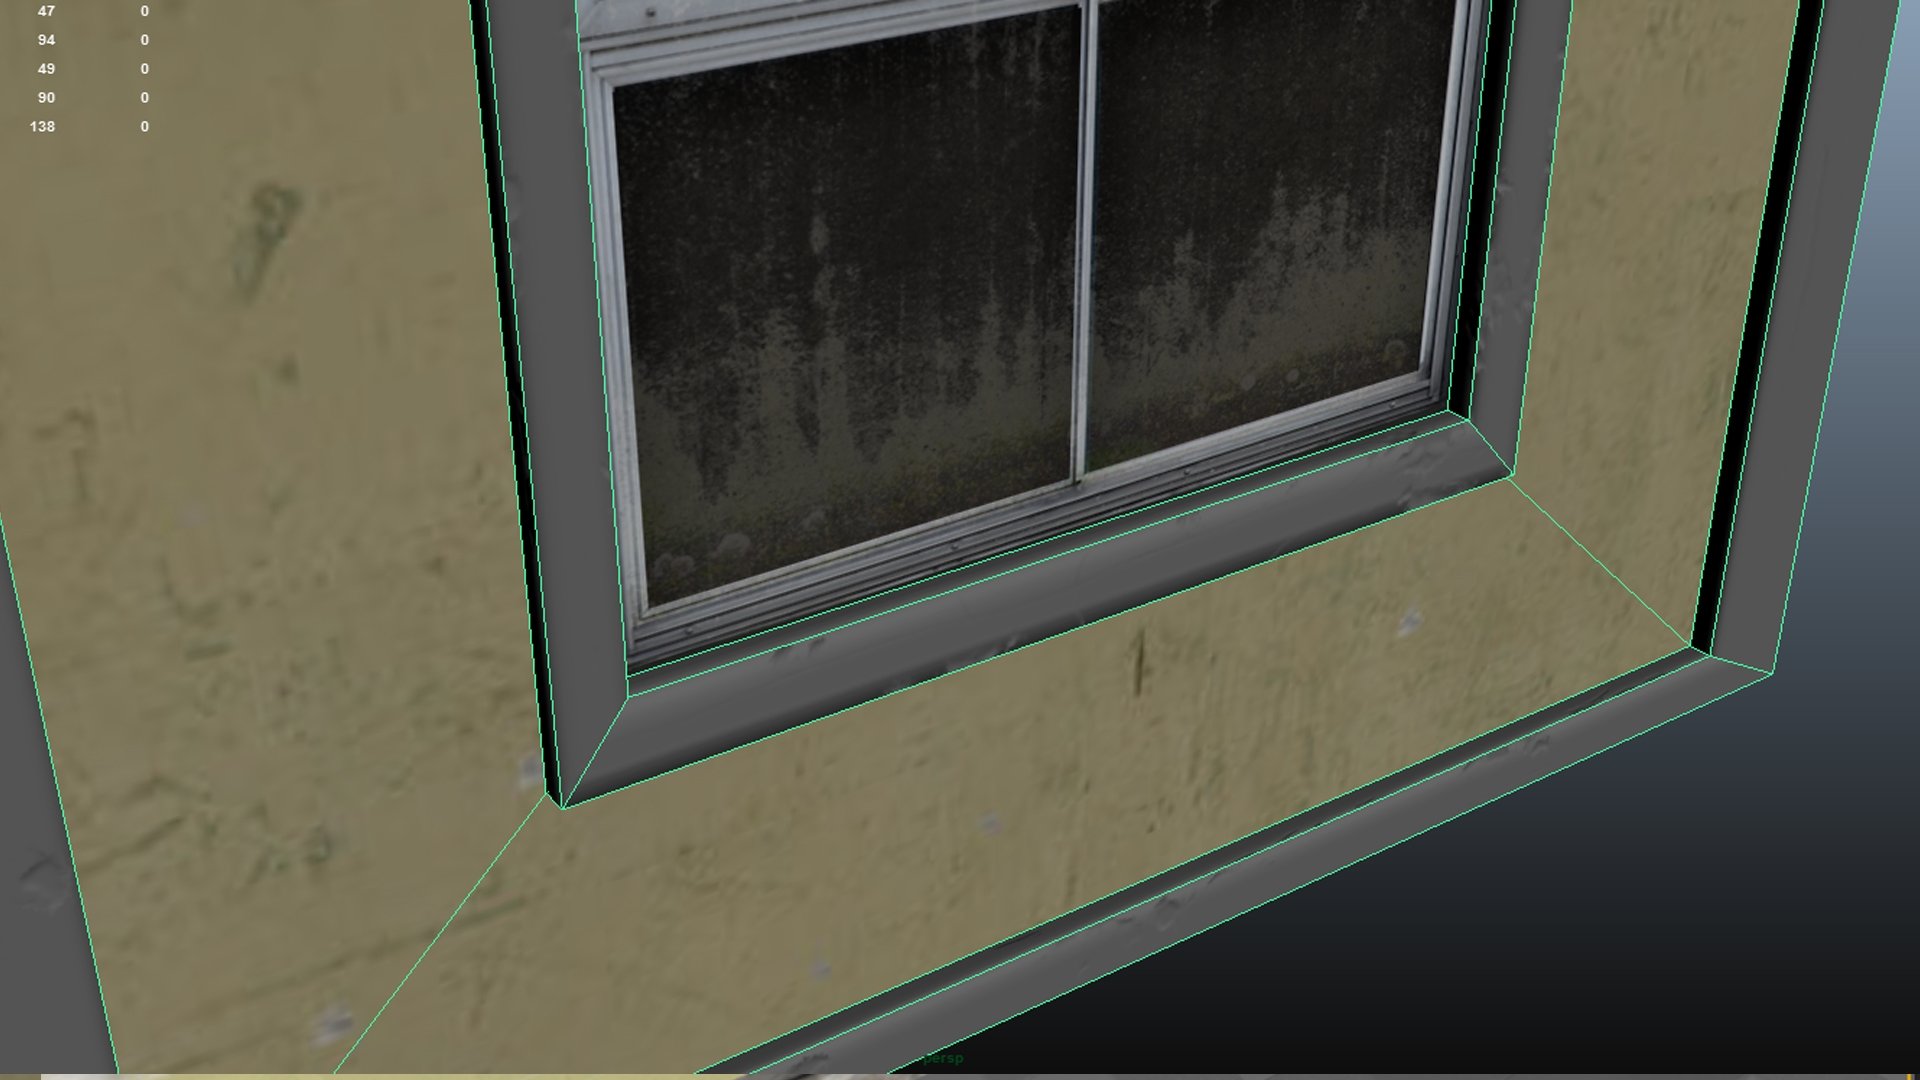
This is what the trims look like in maya. Pretty good.
For the past couple of months I've been working on and off with a wall kit. I've been trying out a new workflow, I'm using the ultimate trim-technique from sunset overdrive ( for more info on the subject, check out http://www.gdcvault.com/play/1022324/The-Ultimate-Trim-Texturing-Techniques ) which is a way of avoiding baking high poly bevel edges to a low poly.
Anyway, at first I was going to present the wall kit in unity, but due to my limitations with programming and a slow computer (takes forever to bake lights and get SSAO) etc I decided to try out Unreal. But for some reason my normal maps and trims doesnt look good at all in Unreal. I'll show you some examples.
This is what my normal map looks like, with edge trims where I put the edges on my shells that I want to have nice edges.

and this is one of my meshes in Maya, with wireframe turned on.

This is what the trims look like in maya. Pretty good.
This is what the trims look like in marmoset. still pretty good.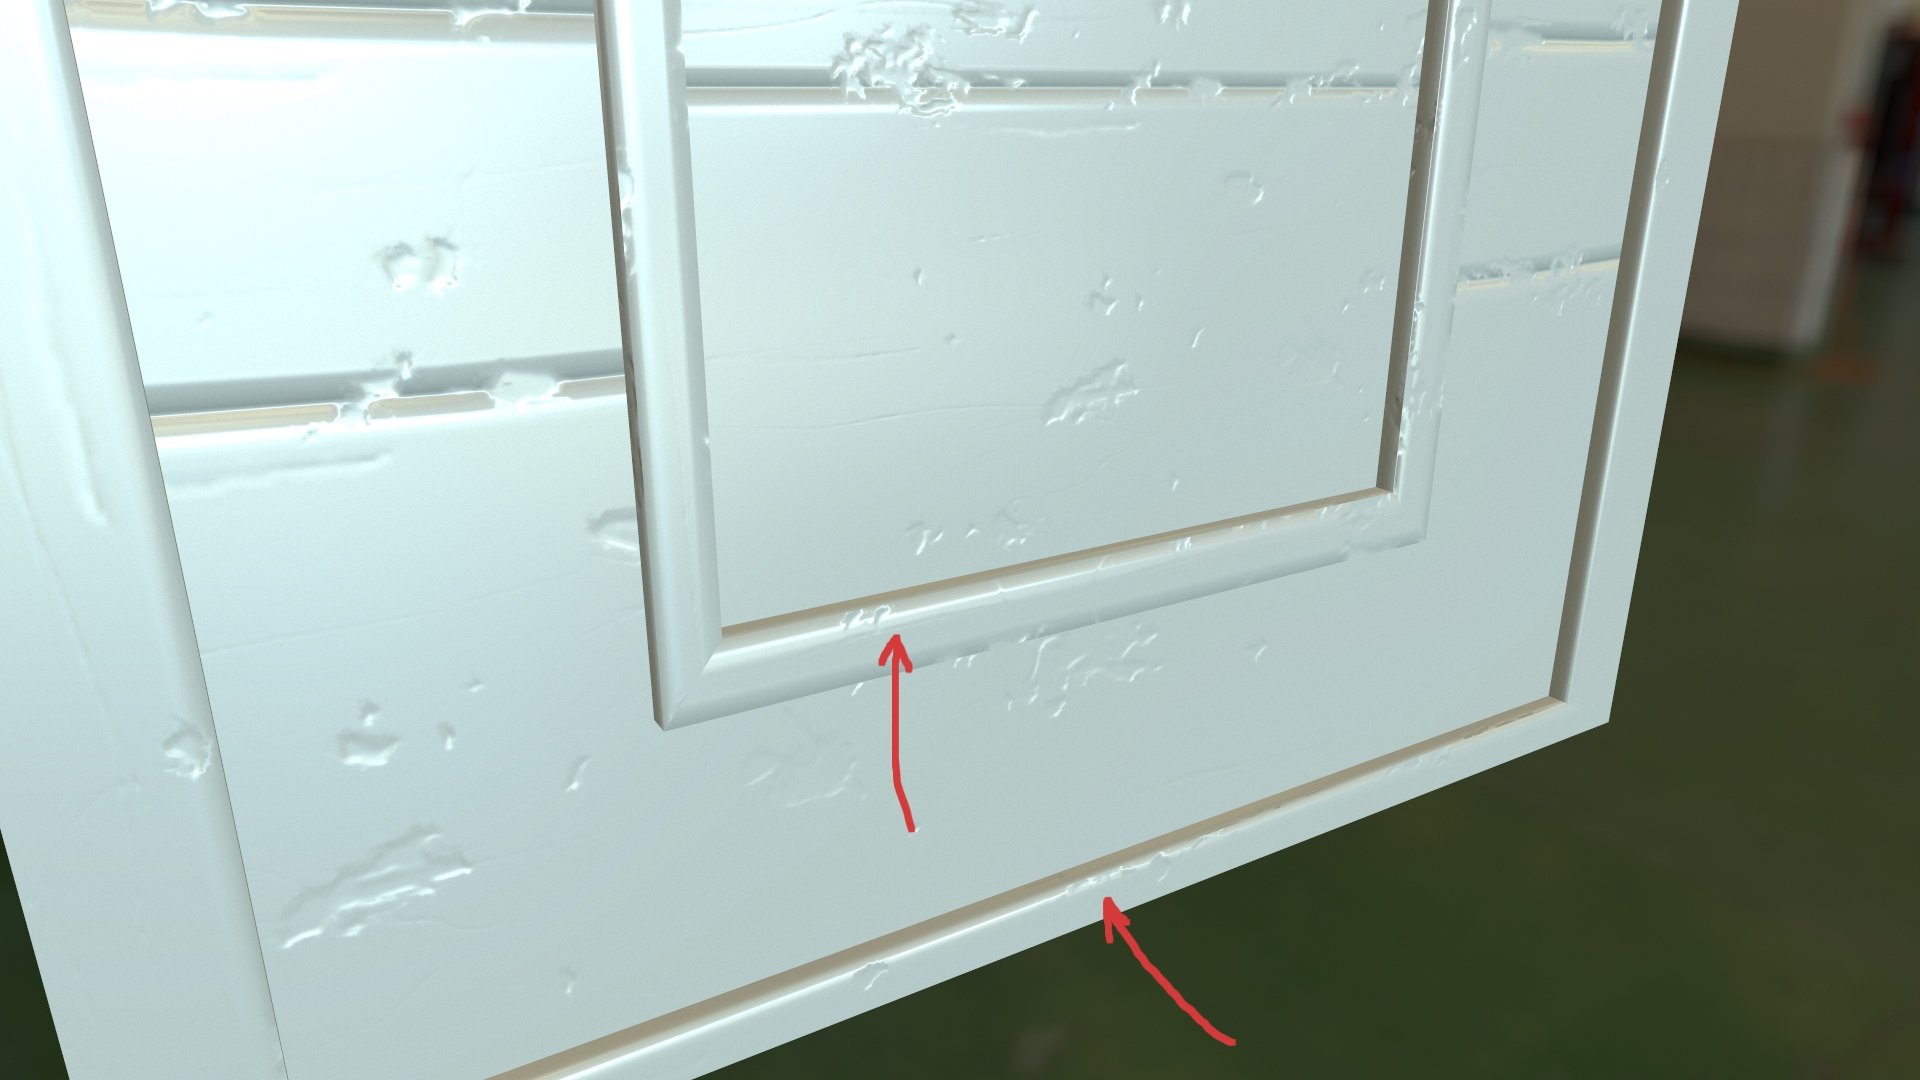
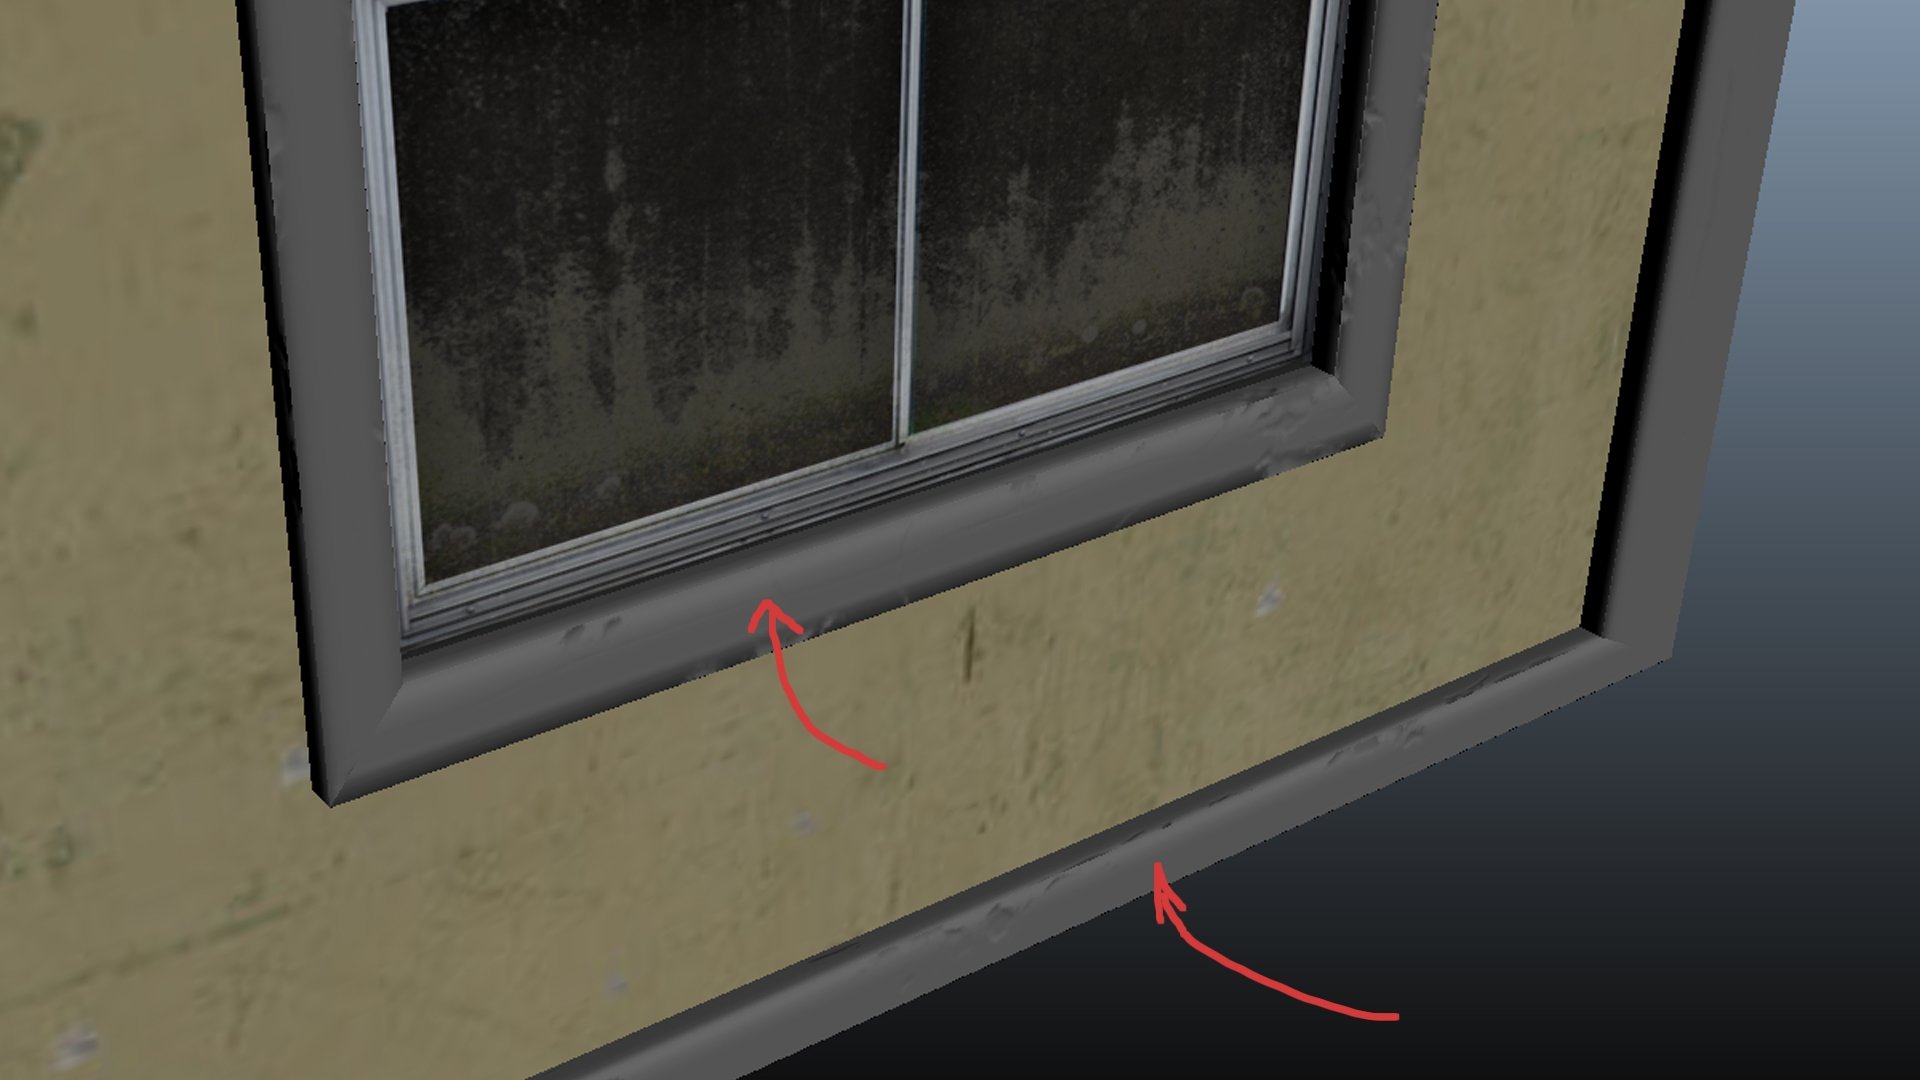
.. and this is how they look in Unreal. Not so good.
I've tried different lightings, I've messed around in the different materials, textures, settings, etc. All the normal maps are set to behave as normal maps. Does anyone have any idea why my trims show up like this in Unreal? Any tips would help me. Im totally stuck and can't get this project done.
Thanks in advance! ![]()

Replies
Altough, I noticed that the normal maps on the rest of the mesh doesn't seem to work either. The window-parts are supposed to have a normal map that makes the non-glass parts stand out. So it must be something else than the lightmaps?
I removed the albedo from the windows and its clear that there is a normal map under there so I guess for that part it just needs some tweaking in the lighting etc in the scene.
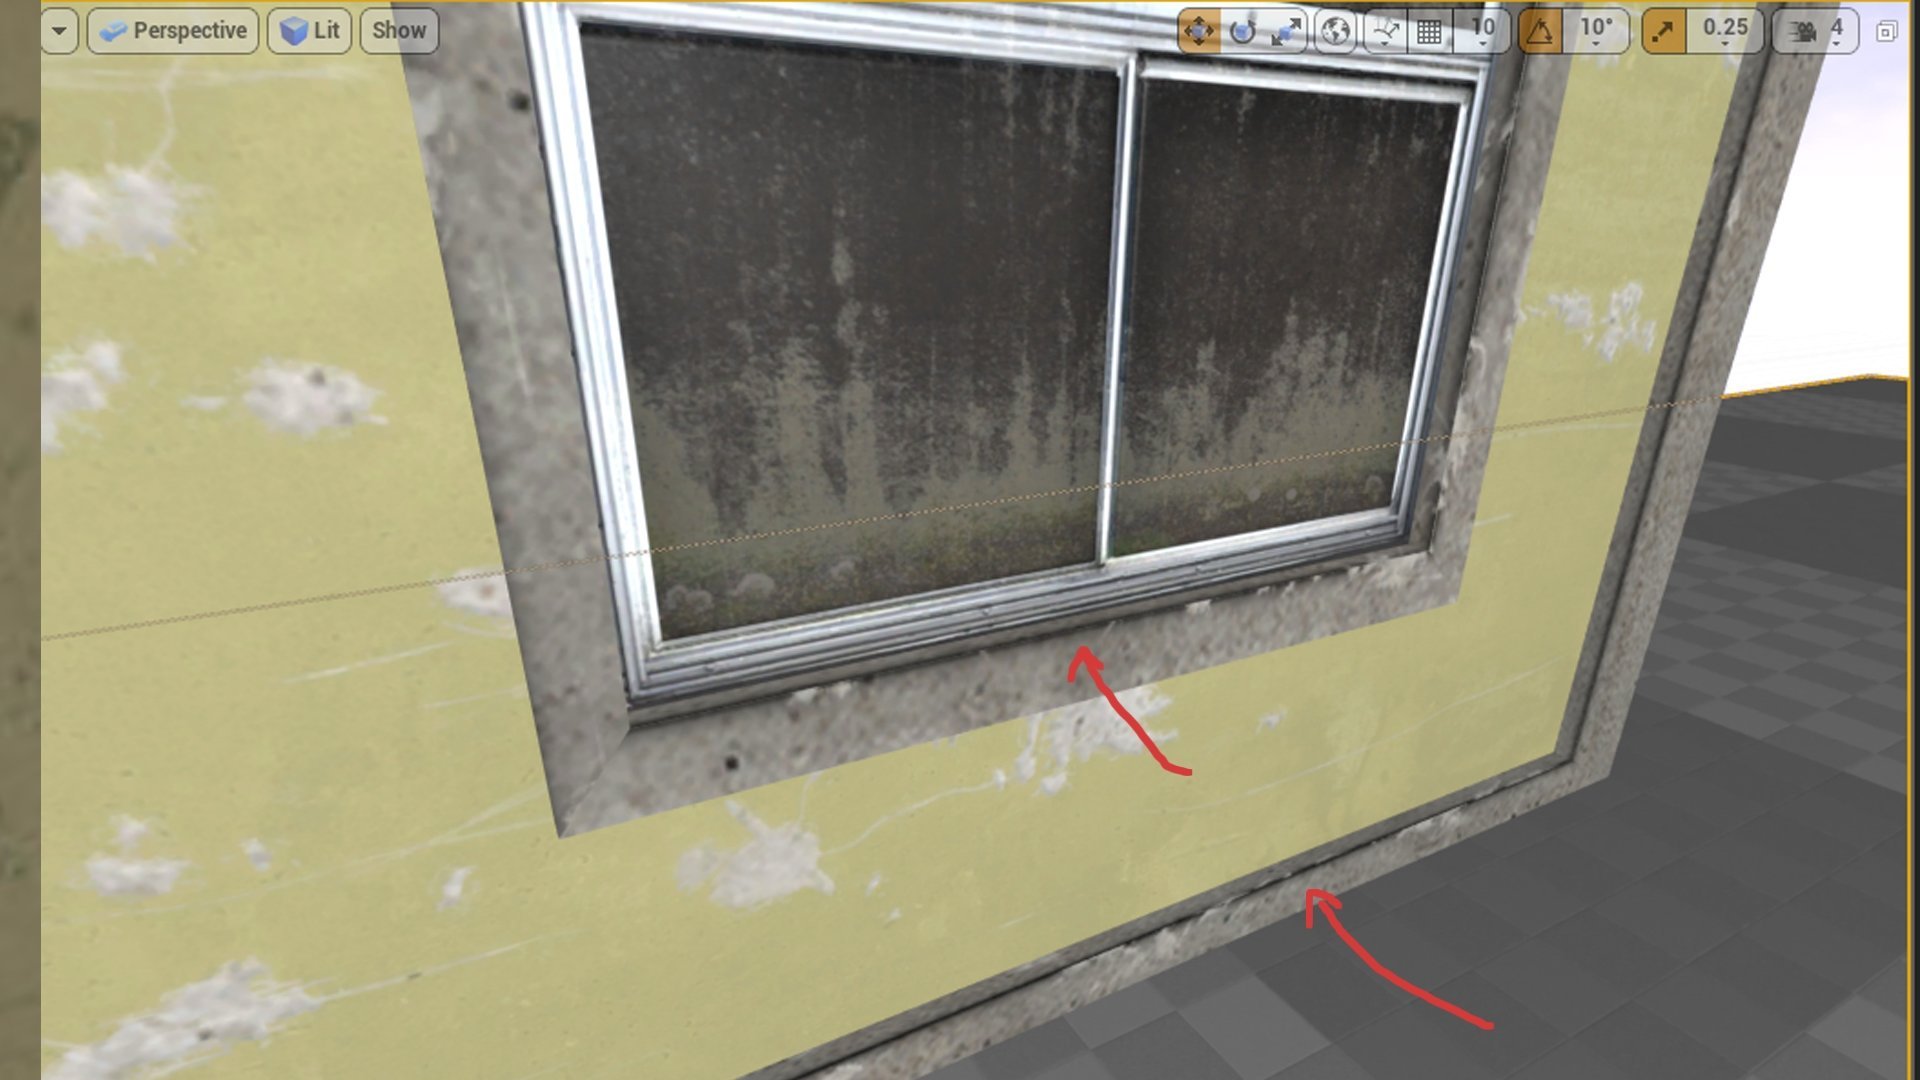
as for the trim edges, there is obv something wrong. In this pic, I only have the trim normal map and a grey base color applied to all the bare-concrete parts. The trims are still looking funky af.
any ideas?
Also did you try flipping the green channel of your maps as advised? You can do it in engine by opening the normal map, display Advanced options there's a checkbox for that.
However, the trims still don't look good. And I don't really know why. I've messed around in Unreal for hours total, with lighting, settings, meshes, countless google searches and tutorials. Its such a downer when it doesn't look decent with all the time I've put in this project.
As you can see on the pic, there are still black lines on some places, and where there isn't black lines, the trims show almost no bevel information. which makes the trims worthless.