Environmental Tile Strip Brick Corners.. Easy Right?

polycounter lvl 18
Brick comers, simplest thing in the world right? Except I can figure out how to do the offset so it matches an existing tile without adding tons of extra vertices.
I'm not an environmental artist, but someone has to do this. How do I offset the corner blocks/strips without a ton of extra geometry?
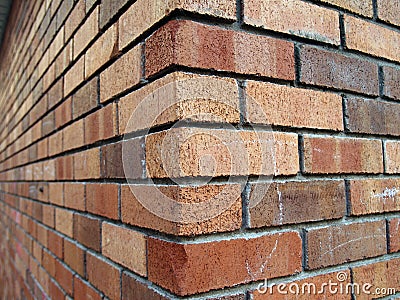
I'm talking about this type of corner. http://thumbs.dreamstime.com/x/brick-corner-1770232.jpg
Attached is the original tile, and after hours of screwing around, thought would have worked.
Made 1/8th longer,
added corner to other end,
offset ends to middle.
Collapsed ends back to 1:1.
But one side still wont tile.
Also maybe this is on the Polycount wiki, but I didn't find an exact match for this situation. Its probably a "duh" moment Im in for.
I'm not an environmental artist, but someone has to do this. How do I offset the corner blocks/strips without a ton of extra geometry?
I'm talking about this type of corner. http://thumbs.dreamstime.com/x/brick-corner-1770232.jpg
Attached is the original tile, and after hours of screwing around, thought would have worked.
Made 1/8th longer,
added corner to other end,
offset ends to middle.
Collapsed ends back to 1:1.
But one side still wont tile.
Also maybe this is on the Polycount wiki, but I didn't find an exact match for this situation. Its probably a "duh" moment Im in for.
Replies
Yea, thats what I did with the second image. I figured it out sorta. I had to cut another 1/8th into the main tile on one side of the corner. Cow, I know many do this, and I notice it.
Actually maybe that didn't work on second thought. Edit, no, that did actually work. Man this is going to be complicated to tile in substance!
I would make two sets of textures.
One would be your regular texture, where each brick has the same length.
Second one, would have the slightly longer bricks positioned right in the middle.
Next, I would make sure that my mesh is made on a specific grid as seen on the image. I would want the dimensions of my corner to add up to the same value as the flat section of the wall. Finally, I'd unwrap the corner, so the longer bricks fold at 90 degree angle like on your ref.
This way, you only have to worry if your texture tiles at its edges. As long as you cut up your mesh into even slices it should always connect properly.
Alternatively, there's always an option of creating a corner decal that floats slightly above the surface. It's a bit more difficult to match up, but can be handy if you are not able to use an even grid for some reason.
Interesting. Ill show you what I currently came up with. And why trying to get this to work in substance is going to be complicated. Because the object must tile off the 1:1 area, even if I offset to the middle at the end, the substance procedural wont align the right side of image to the left side. As far as the procedurals tiling noises and such, they are based on 1:1. Thus extended right end would repeat the begginging of the left end. Thus the substance would show a seam.
I decided to stretch the bricks out a bit and tile them only along the edges of the whole texture. The downside is that you would need to offset the uv's along the whole mesh as the corner is no longer in the middle of the texture.
That's the closest thing I could come up with.
Not sure if that will help you with your particular problem and I'm not sure if it will work with your substance setup, but perhaps you will find it useful.