Transitioning to environment/prop art

polycounter lvl 11
I am making the transition to prop and environment art. I'll be posting my progress in this thread along the way.
I originally did mainly character art, but after much feedback from a previous post here on polycount it was advised to me to consider branching out to environments and props in order to more quickly reach my career goals of working in-house as a 3D artist.
You can find the discussion at the following link if interested: http://www.polycount.com/forum/showthread.php?t=134547
I'll be posting everything I do, even the stuff that I don't like.
Replies
I am playing around with some composition of the overall shot atm, here is what I have so far.
I personally enjoy fairly saturated grass, but I am not sure if it's too much given how unsaturated the terrain in the distance is.
One thing that stands out to me is the lighting, it is really flat and I think you are losing some detail out of that. You could also try adding some dirt to the ground and on the rocks.
At present it looks like you've sculpted a semi-photoreal rock with almost cartoony features, some definitely cartoon-like flowers and cartoon-like grass. The backdrop is rather empty yet it takes up almost 50% of the canvas. Don't get me wrong here, it's fine making elements but there's no cohesion: it's a mix of cartoon/photo and the composition could do with some work. Completely agree with Ssjtroll regarding the lighting, it is flat so it may with worth experimenting with the brightness and angle of the light.
Before you get too far, I recommend checking out the many "NOOB Challenge" threads posted on Polycount that would serve as a great basis to produce some nice portfolio pieces. In particular it'll be good to read through the various stages of the challenge and see how people interpreted the concept and how they light it in the engine.
Good luck on your move into Environment Art.
Here is an update, and also a photo-reference of the flower that I created to illustrate what I mean that the flower is not cartoon-like.
Edit: Just to elaborate further on referencing. While I do reference environments heavily for this project I decided early on to concentrate more on learning the program than creating a very specific type of look for the scene.
After further consideration for what whw said, I decided to look through some of the noob challenges and found one of the old ones where the concept art that was used motivated me to try my hands at creating the same scene. To ensure I am not working in a bubble I feel like I am at a good stage to start showing off some of the progress.
Here are all of the relevant images below:
A flat texture can only get you so far.
Regarding the props so far, they're on track. Keep in mind any wear and tear that may occur in a basement storage, especially where items are thrown around, kicked or have water damage.
As for workflow, it depends where you want to go with the overall look. If your aim is to handpaint/stylised, then you may not need the high poly -> low poly bake approach. Though you will need to put more lighting information into your textures than you have at the moment. If you're aiming for something akin to The Darkness 2 (which would fit with the concept you've chosen), then creating a high-poly would help, then just add some dings and scratches on top of the diffuse. Check out Jason Lavoie's awesome "The Darkness 2" stuff for some inspiration: http://www.artstation.com/artwork/the-darkness-2
The panels, diagonal lines and screws and wood detail and the mail slot on the door is all in the normals (baked from the highpoly) and not only represented in the color map. Also as far as the water-heater is concerned everything but the spout is through baking the highpoly information onto a lowpoly cylinder. Perhaps I am misunderstanding some terminologies that are being used. I assume by flat textures you mean the detail in the color map is not represented on the actual normals that is baked down from the highpoly mesh to the low poly mesh?
whw: Right now the aim is to stay moderately close to the concept, but there are some color choices that I don't really dig but I can easily adjust later on if I decide to get closer to the actual color pallete of the concept. An example of this would be the door, I really don't like the green wood.
edit: for clarity here is the normals that were baked from highpoly.
There's nothing wrong with the normal map or the textures themselves.
What I was really getting at was that you are relying too much on your textures to do the work that should be accomplished with geometry in your low poly. Your normal map can only do so much for you, and while it does a good job of mimicking high poly information on less extruded objects (bolts, screws, etc.) the more pronounced extruded parts of an object still need to have geometry supporting it.
For example, the only other geometry you have on your hot water heater besides the actual cylinder base is the faucet. I am merely suggesting that you should define more of your shapes with actual geometry in your low poly.
In my opinion, the cylinder connecting the faucet to the hot water heater should have been accomplished with geometry just as the faucet was. The middle band going around the heater looks like it sticks out far enough that it could use some extruded geometry on the low poly as well. You have all of the shapes baked onto just a cylinder and it's making the silhouette and object seem very flat (even with a normal map).
Normal maps cannot replace actual silhouette defining geometry.
I hope this clears things up a little better. I apologize for not being as clear as I should have been in my earlier post. That was my fault.
Would you mind posting some pictures of your high poly meshes?
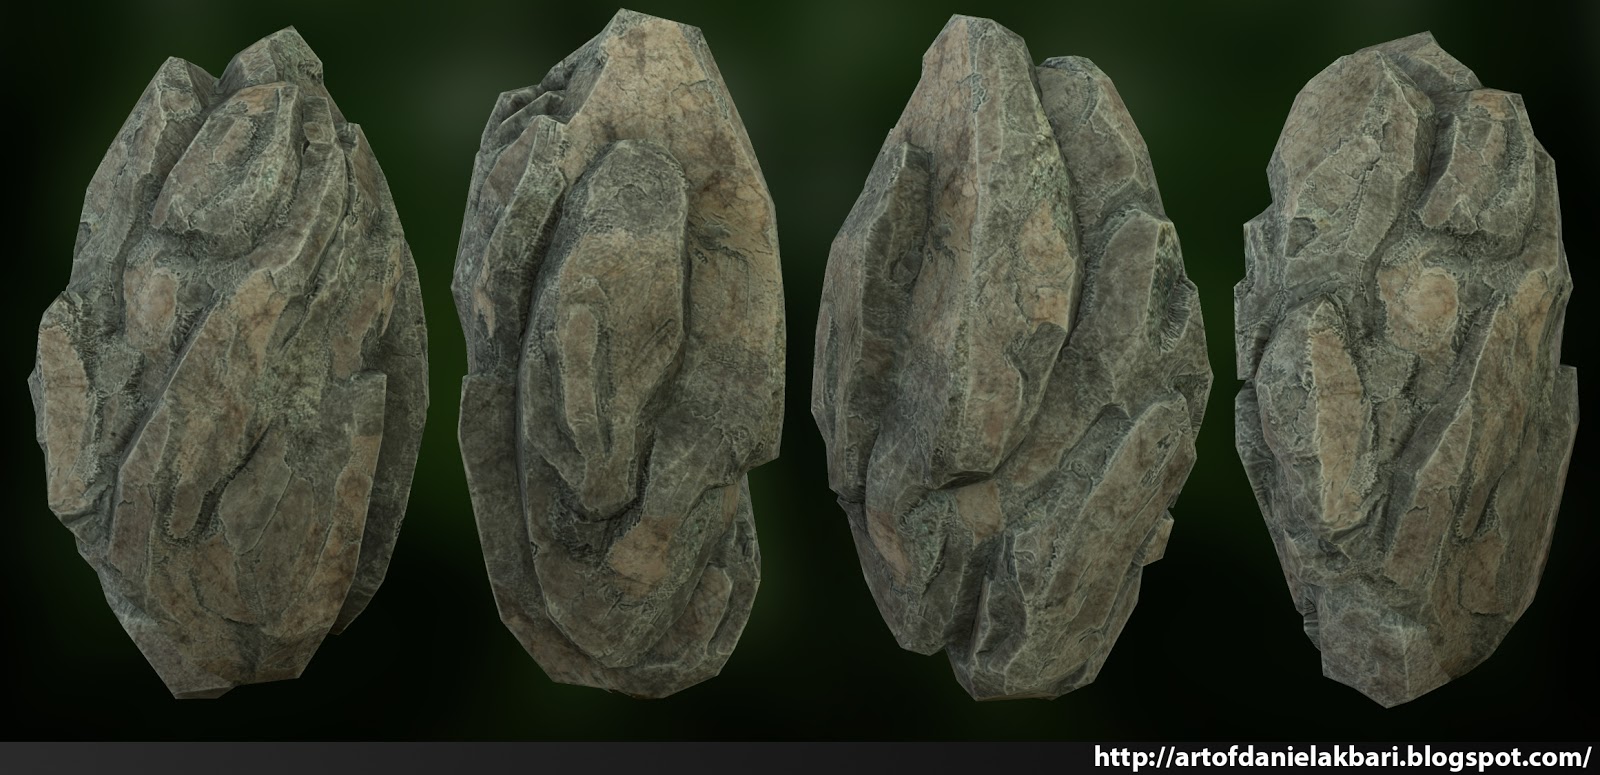
I'm in a love hate relationship when ever it comes to making rocks. Somedays they look like rocks, other days they turn into mud.
Deathstick: Thanks! I know what you mean, most of what I do is a love hate relationship, a constant struggle between success and failure... One trick I have is that I work on a few things concurrently so that when I get that feeling when everything I am doing isn't working I take a break by working on a different model. It helps break it up, I just try to get 1 positive feeling at a time and keep that feeling coming in as long as possible and try to avoid the crappy ones =P
It hasn't been easy, I started off pretty good, but slowed down dramatically once the major shapes were created. Here is what I have so far. I feel like given the nature of the creation process sometimes taking a break to share the progress would help refuel my enthusiasm for the project.
It's a lamborghini aventador.
This is more character/prop work rather than environment, it was quite fun to do =P
In the last image with the tree, your sky is SUPER saturated blue, and a very strong medium value blue at that. The green and blue also are strongly saturated and dark - and the whole thing clashes, with the background (least important part) of your image dominating the picture.
Lets apply this to the grass and rocks environment - The biggest reason it looks cartoony to me is the bright green grass. Two reasons here: again very saturated, medium value green , and no colour variation among the grass. It comes across as a solid block of colour, and a very dominating colour at that. These two features both contrast heavily with the rocks that have nice variation in tone and texture, and also use a desaturated palette.
Palette is the key word here. try and look at the scene as a whole while you are texturing these assets. You will need to make back and forth adjustments - or you can set up a shader in UDK that will let you make colour adjustments in the game engine while viewing your scene.
You clearly have a background in painting so I've probably gone overboard on the colour explainations :P But the difference is that while you can see the whole canvas as you paint, you can't really see the lighting and environment as you paint textures.
I would recommend taking screenshots of your 3d models and doing paint-overs, and/or make levels adjustments in Photoshop.
Take a look at all the tutorial you can find on lighting and colour composition too - you might have to go back to the books as you find your feet.
Thank you so much for the feedback Fearian, I hope this is a step in the right direction. Outside of the color issues I was seeing there were also some really bad composition issues that I couldn't really figure out easily. For now, I feel like this is a step in the right direction. I basically just added a really basic environment for the character to exist in. The composition feels a bit more balanced. I basically toned down the saturation like crazy, I get a bit overboard with that. Again, thank you so much for the feedback!
Here is the current update:
you can find that post here: http://www.polycount.com/forum/showthread.php?t=139641
One of the biggest criticism was that all of my old characters were in a t-pose.
Even though I am focused on environments and props at the moment, I didnt want to remove all of the work Ive done on characters. So I am currently making my way back and doing some quick poses. I apologize for it not being an environment, I just want to keep all of my progress in one area so it's not scattered in different threads.
So here is a simple pose I did today, nothing too crazy, but it did help bring the character to life.
The tiling textures have been made using Substance Designer and Zbrush.
I am most likely going to need to create a couch, plants/flowers, and some shelves to fill up the scene. This is mainly a project to get me comfortable with making tiling textures and becoming more familiar with UE4.
One thing I've had a hard time finding is a tutorial on how to do a proper mirror reflection in UE4. Right now I have a scene capture 2d texture but it acts like a TV screen rather than a mirror. I was looking for a tutorial on how to set up a blueprint to camera rotate based on player angle but surprisingly I haven't been able to find one.
EDIT: Juding from the reflections on the floor it looks like you have already enabled screen space reflections? In that case I would try using maximum metalness/minimum roughness values for the mirror.
Searching online I found the scene capture 2d which is basically a texture that is attached to a camera. The problem I am having is if I do end up going with the capture version I'd need to use blueprint to adjust the rotation according to the players view point. But, I haven't been able to find a tutorial on how to go about doing that. Still trying to figure out what's the best way to go on about making a mirror that reflects properly.
For now I am moving onto filling up the room, hopefully I'll run into a mirror tutorial along the way so that I can swap the current placeholder.
Here is the scene capture 2d version from the same angle
Still have a lot of placeholders (like the fireplace) to swap out, just making slow and steady progress as I figure out UE4.
Eventually I'll remove some of the vases, I threw a few around just to see which areas of the room were giving me the kind of reflections I was hoping for.
I emptied out the scene and just started with walls till the lighting looked similar to the scene I was referencing. I've been looking at the materials in the referenced scene trying to understand what's going on, it's a bit confusing at times.
The main issues I am trying to solve right now, is getting a simple realistic chrome inside of unreal (it is not as simple as creating one in marmoset) and proper cloth.
The cloth fabric on the curtains is not mine, it's currently placeholder while I try to understand how to make one of my own where the light passes through.
I think that is a perspective issue (I may move the sockets closer to the wall regardless since it did throw me off earlier as well). Here is a better perspective to illustrate it.
I've been slowly chipping away at a new gun model and wanted to take a quick break to learn substance painter. I chose to revisit an old model and try to improve the old texture, I've struggled with it for a while but I think I've finally did something decent with it.
below I've posted the old gun, followed by the updated version.
I did not design the gun, the original concept was done by an artist from WETA studios.
Here is the old veriosn
Here is the new version
I recently finished a new gun, I figured it would be appropriate to post it here as well. I am trying to get in the habit of keeping most of the WIP separate from this thread so it doesn't get too cluttered.
Right now I am trying to be a bit more focused on hard-surfaced modeling and seeing what I can fill up my portfolio with.
On my previous post there was this one too sharp edge in the bottom right hand of the screen (the gun in first person view) that was really bothering me since it was causing some artifacts. I went back into the normals and softened the edges a bit. I can now call it "finished"... At least for now =P