Wrapping fabric/Duct Tape around an object

polycounter lvl 9
So, I've come to polycount in light of my attempts to wrap cloth around the handle of my pistol I'm modeling.
This is the effect I would like to create, preferably within Max.
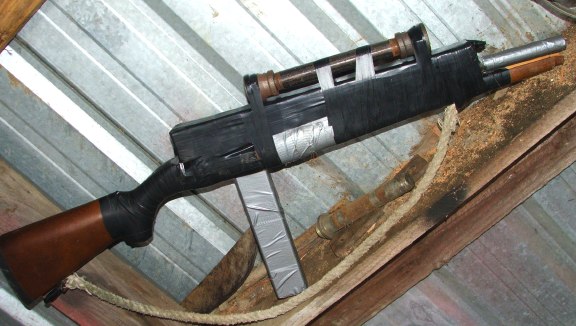
Obviously not to the extreme extent of this but a few turns, like 5 or 6
One tutorial on polycount showed an effect like this

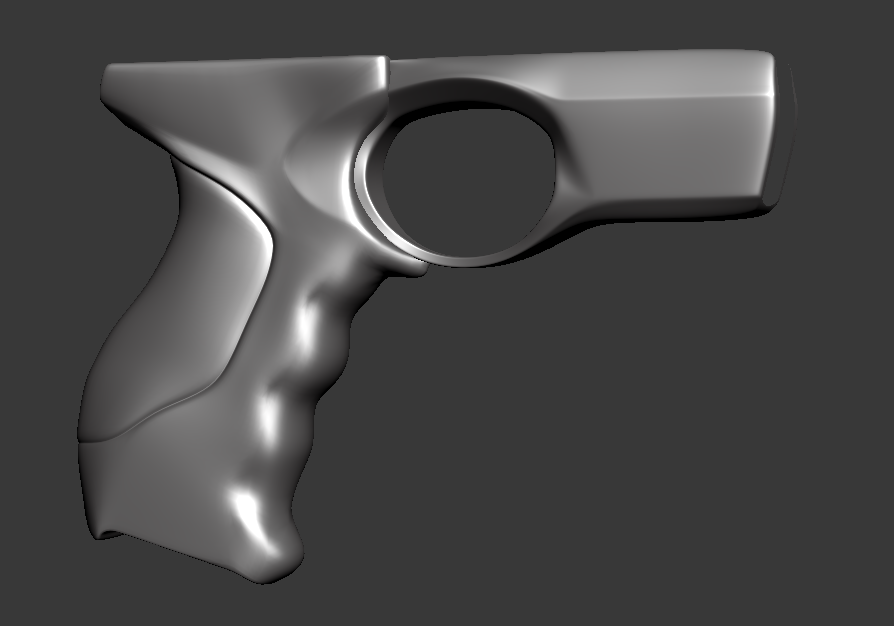
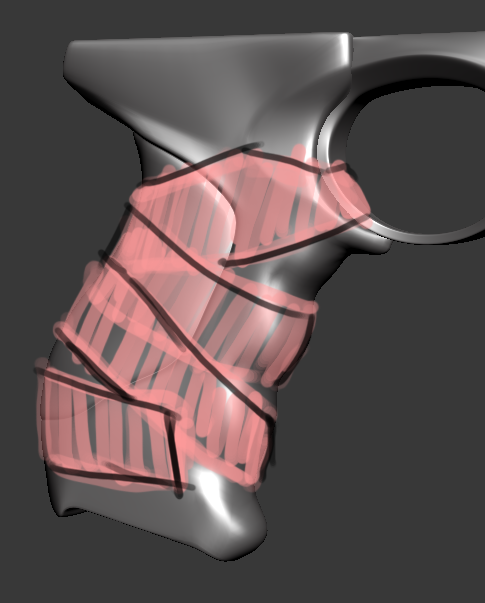
But the geometry I want to wrap isn't as simple ass cylinder.
I've searched the forums and only found three posts relevant to this predicament I find myself in, The first shows someone using splines to create a shape around the object.
When I do this all I end up with is a mess, I also can't use the geo from below to create a bezier spline as my mesh doesn't conform to the flow I want the wrap to go in.
Another one is using cloth simulation, I've really tried to use this but I don't know much about the modifier and I always get messed up results no matter what.
One of the other methods I've also tried is using Zbrush to fake it, but It doesn't give the result I need.
This is the geometry I would like to wrap
If someone could please show me how I could achieve the result I'm looking for without just trying to redirect me to search (I spent more than 7 hours looking for a relevant tutorial or information on it, and couldn't find anything to the extent I needed.)
I would be more than grateful.
This is the effect I would like to create, preferably within Max.
Obviously not to the extreme extent of this but a few turns, like 5 or 6
One tutorial on polycount showed an effect like this
But the geometry I want to wrap isn't as simple ass cylinder.
I've searched the forums and only found three posts relevant to this predicament I find myself in, The first shows someone using splines to create a shape around the object.
When I do this all I end up with is a mess, I also can't use the geo from below to create a bezier spline as my mesh doesn't conform to the flow I want the wrap to go in.
Another one is using cloth simulation, I've really tried to use this but I don't know much about the modifier and I always get messed up results no matter what.
One of the other methods I've also tried is using Zbrush to fake it, but It doesn't give the result I need.
This is the geometry I would like to wrap
If someone could please show me how I could achieve the result I'm looking for without just trying to redirect me to search (I spent more than 7 hours looking for a relevant tutorial or information on it, and couldn't find anything to the extent I needed.)
I would be more than grateful.
Replies
Using max, use poly draw with the gun as the target object. OR roughly model some strips or rectangles around the gun and use the conform brush to make it fit the surface. You can also look into WrapIt or MaxRetopo script that allow you to model and have it align to the surface of another mesh.
Other than that, while I'm all for workflow optimization and learning new tools, sometimes it's best to use an approach you are already familiar with.
Here is how I would handle it (pun totally intended) /rimshot
Take a box, delete the top and bottom and size it roughly to your handle, relax it a bit so the corners aren't so sharp. This isn't necessary but it does save you some hassle later.
Optional: Unwrap it, just in case you want to apply a tape material to it (bumps bake into normal maps, you can get a diffuse too from this high poly object).
Subdivide it so it will conform pretty well, it can be pretty dense, its high poly tape.
Copy it a few times like in the cylinder example, make sure they are separate objects.
Select all of the tape objects and apply a shell modifier, this will give you one place to control the thickness of all the tape while still operating on them as separate objects. You'll see the thickness as you conform, but it won't crumple, which will be nice went figuring out the offset values.
Select the first tape object, go into edit poly, poly mode and use the conform brush with a low offset value of .1
Use the relax and shift brushes as needed, then conform it again.
Do the same for the next piece of tape but ratchet up the offset value to .2 so it is on top of the first piece.
Bounce back and forth between various offset values to layer the tape.
At this point I think you're ready to take it into a sculpting app and finish it off.
It doesn't work well if you adjust the offset value with the brush active. SO turn off the brush (right click or deactivate the button), adjust the offset value, then turn it on again after the value is set.