Nufftalon Zbrush Techniques!

polycounter lvl 11
Hey guys I love zbrush I mean who doesn't? I wanted to share some techniques I taught myself that could help you also in your workflow!
I will write in explanation when I have time for now I will like to introduce:
Nufftalon Presents Creating Custom Alphas In Illustrator, Using Zbrush Shadowbox, and Match Maker to create Complex Shapes
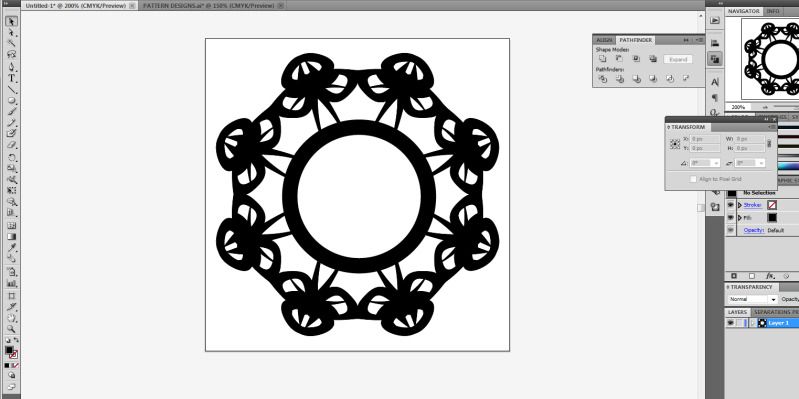
In Illustrator create shapes use pathfinder and mirror tools, or you can make actual patterns
[ame="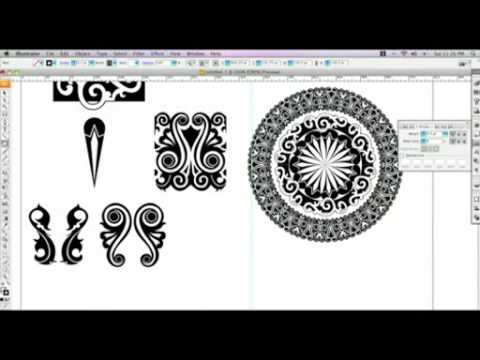 http://www.youtube.com/watch?v=BI90SIEiiWs"]Create Intricate Patterns in Illustrator - YouTube[/ame]
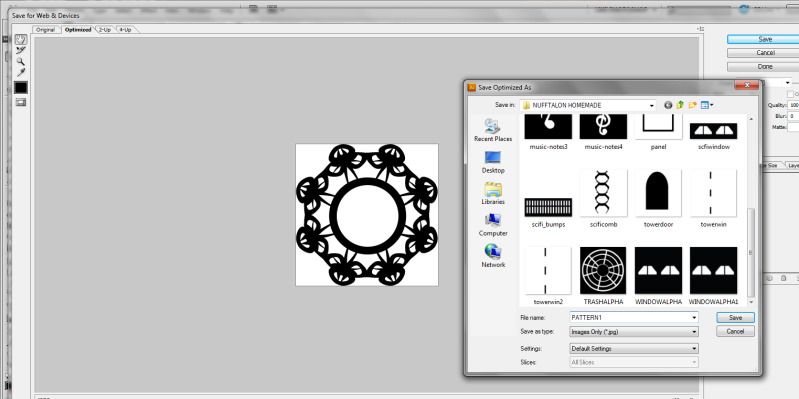
When you are done you just choose file save for web save with your other alphas as a .jpg file.
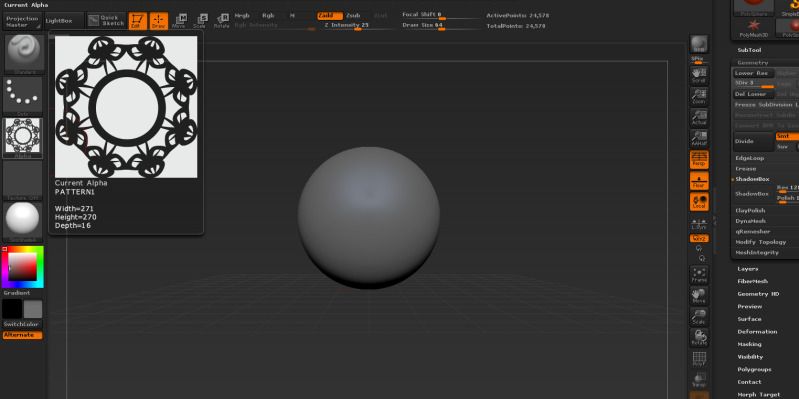
Select a default sphere it doesn't matter just as long as you have at least one subtool.
Holding control click on alphas choose import and select the alpha we made from illustrator.
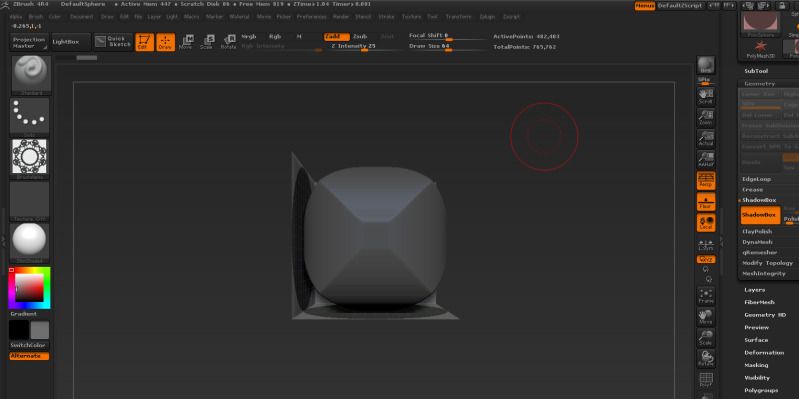
In the geometry palette select shadow box but before you do bump up the res slider to at least 400.
Holding ctrl off the canvas and dragging will clear the mask.
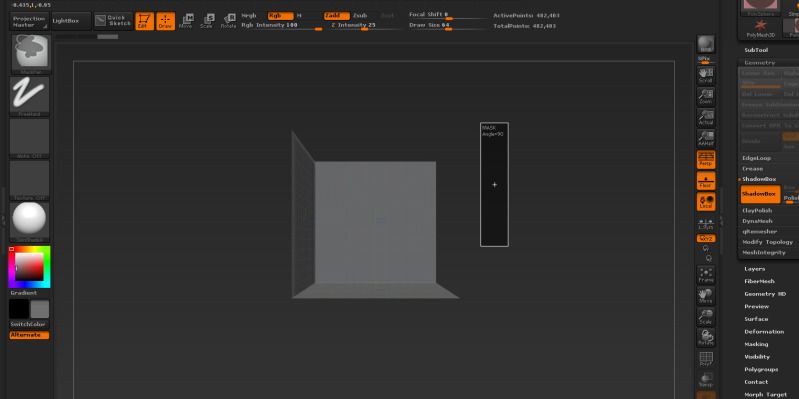
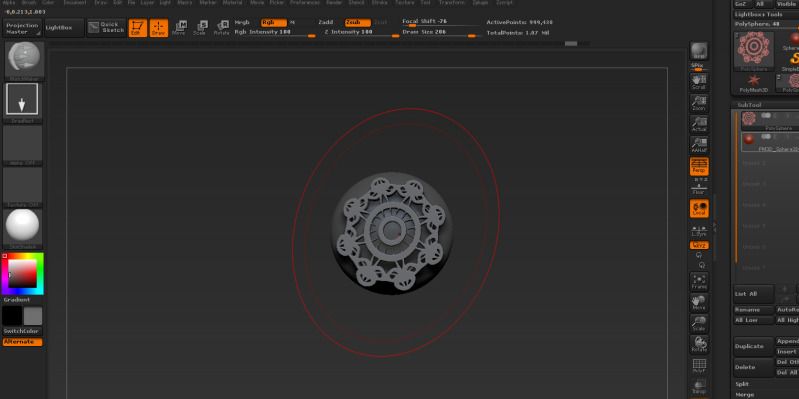
Holding ctrl select alpha choose square and see to drag rectangle. Square will constrain our alpha so it won't get distorted. Now in the box holding ctrl and dragging will drag the alpha to move it hold space bar and drag while still holding ctrl, once its positioned let go of all keys.
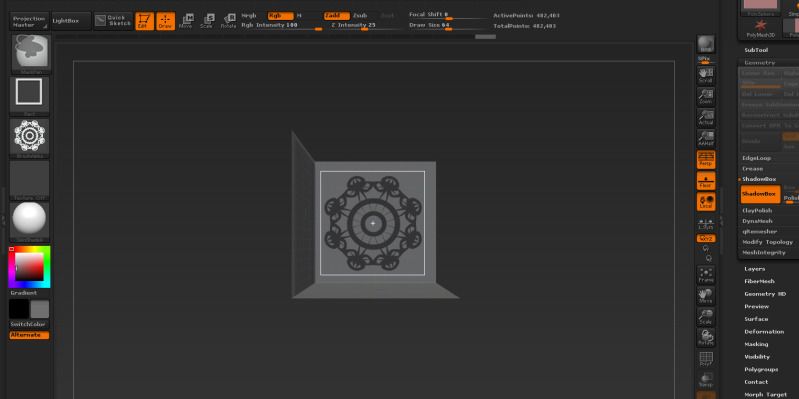
Look at how clean our result is!
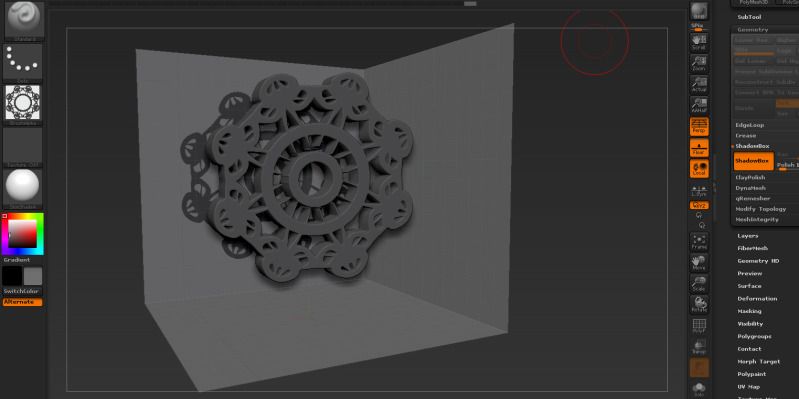
Click shadow box again to exit out of shadow box and select the matchmaker brush. The trick is that the size of the brush needs to be bigger then model. Make sure you have pattern subtool selected and brush by dragging down until the pattern subtools is wrapped onto the sphere.
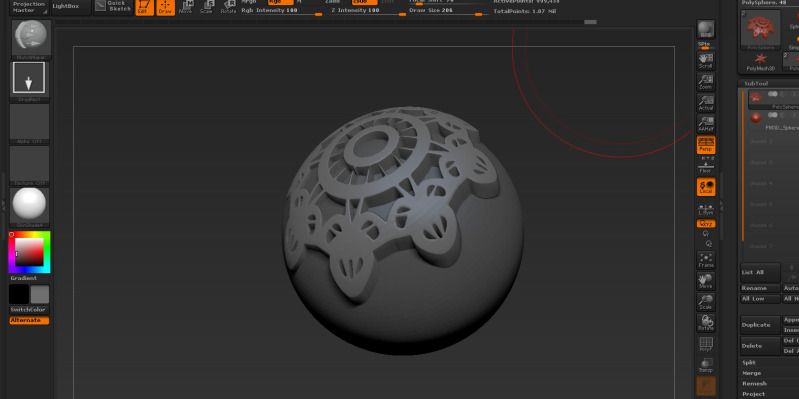
The results so far..
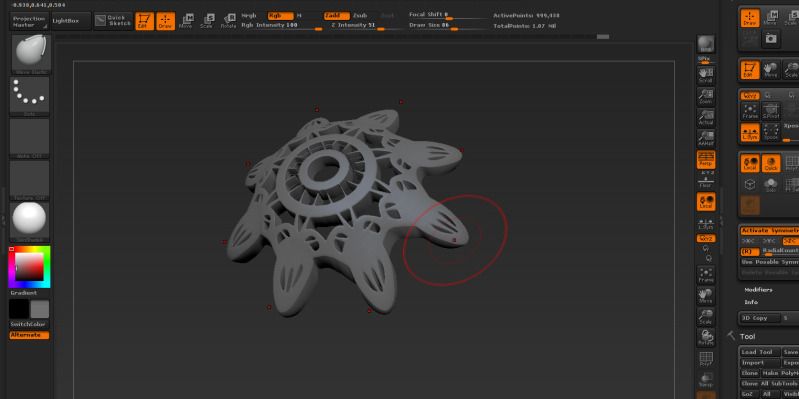
Finally activate radial symmetry in z axis and select the move elastic brush and pull down a little on the ends.
This is moreless a technique not really demonstrating it on a final product but just think of that unique emblem you wanna make on your characters armor and need it to conform to your model. You don't have to use illustrator similar results can be achieved with photoshop. You could also use a free program like alchemy to make a cool design and save it as an alpha. As you probably noticed alphas can be black and white, if you were to use this alpha multiple times as a pattern on your model you may want to feather the edges so you don't get a harsh square on the alpha. I could also enhace this by using inflat or bring in yet another pattern that has less shapes as means to make a quick mask and deformation palette choose inflat. Zbrush tends to give us alot of possibilities. I hope this first tutorial is helpful more to come soon.
I will write in explanation when I have time for now I will like to introduce:
Nufftalon Presents Creating Custom Alphas In Illustrator, Using Zbrush Shadowbox, and Match Maker to create Complex Shapes
In Illustrator create shapes use pathfinder and mirror tools, or you can make actual patterns
[ame="
http://www.youtube.com/watch?v=BI90SIEiiWs"]Create Intricate Patterns in Illustrator - YouTube[/ame]When you are done you just choose file save for web save with your other alphas as a .jpg file.
Select a default sphere it doesn't matter just as long as you have at least one subtool.
Holding control click on alphas choose import and select the alpha we made from illustrator.
In the geometry palette select shadow box but before you do bump up the res slider to at least 400.
Holding ctrl off the canvas and dragging will clear the mask.
Holding ctrl select alpha choose square and see to drag rectangle. Square will constrain our alpha so it won't get distorted. Now in the box holding ctrl and dragging will drag the alpha to move it hold space bar and drag while still holding ctrl, once its positioned let go of all keys.
Look at how clean our result is!
Click shadow box again to exit out of shadow box and select the matchmaker brush. The trick is that the size of the brush needs to be bigger then model. Make sure you have pattern subtool selected and brush by dragging down until the pattern subtools is wrapped onto the sphere.
The results so far..
Finally activate radial symmetry in z axis and select the move elastic brush and pull down a little on the ends.
This is moreless a technique not really demonstrating it on a final product but just think of that unique emblem you wanna make on your characters armor and need it to conform to your model. You don't have to use illustrator similar results can be achieved with photoshop. You could also use a free program like alchemy to make a cool design and save it as an alpha. As you probably noticed alphas can be black and white, if you were to use this alpha multiple times as a pattern on your model you may want to feather the edges so you don't get a harsh square on the alpha. I could also enhace this by using inflat or bring in yet another pattern that has less shapes as means to make a quick mask and deformation palette choose inflat. Zbrush tends to give us alot of possibilities. I hope this first tutorial is helpful more to come soon.
Replies
Mistersande: I hope what I wrote helps if not I will try to make a step by step but really if you watch that youtube video on making patterns in illustrator you will understand.
Cryid: Thats a great idea I haven't tried it myself. Gonna have to check it out thanks.