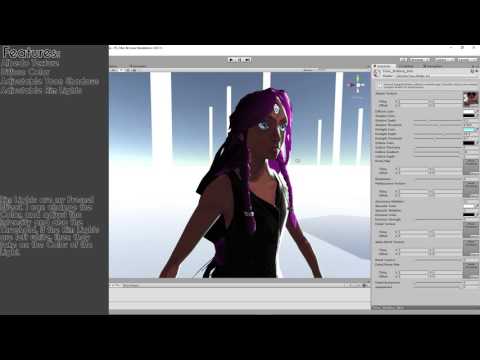
Anime Process + Shader Techniques

vertex
Been doing lots of studying lately on making shaders and have decided to go the route of making an anime shader for Unity in the style of both 2D anime (in order to achieve a particular look) and also a shader in the style of Zelda Botw (in order to learn how to do fancy lighting stuff with ramp shaders.)
Here's 2 examples, one of each style I'm going for:
 https://www.youtube.com/watch?v=difliSBnnU8
and
 https://www.youtube.com/watch?v=dcErKLeqGhw
There are two issues I'm finding hard to deal with though.
1) I'm using totally free tools (i.e. Blender) and I'm having a hard time figuring out an artist-friendly way to paint normal directions for portions of the model where I want to control lighting more easily to attain the anime look. I was considering something they said in the GDC talk with "Guilty Gear Xrd" about using an Occlusion Map to indicate areas on the model that they want lighting to go, but I'm wondering if (and how well) this might work as a replacement for normal editing, especially if I only want the model to be seen from one camera angle (but I would like to turn him toward the camera from the front and sides too, something akin to the SNES Zelda overhead view, so I'm wondering if I'd have to swap Occlusion Maps for this).
2) The actual ramp shading looks like total garbage in most shaders I've seen due to them highlighting or shading parts of a model that clearly shouldn't be shaded until at a certain angle. What's the best way to go about this, say, for the 4 views I mentioned in issue #1, for example. Is it possible to draw maps where you want the shadows to exist and interpolate between the different angles?
I saw something like this in the Zelda Botw where you see the pencil strokes at certain angles shading the clothing, but I'm wondering how they did this since I've got no idea how to do things with shaders at different angles code-wise. Any help in this area would be appreciated too!
Here's 2 examples, one of each style I'm going for:
https://www.youtube.com/watch?v=difliSBnnU8and
https://www.youtube.com/watch?v=dcErKLeqGhwThere are two issues I'm finding hard to deal with though.
1) I'm using totally free tools (i.e. Blender) and I'm having a hard time figuring out an artist-friendly way to paint normal directions for portions of the model where I want to control lighting more easily to attain the anime look. I was considering something they said in the GDC talk with "Guilty Gear Xrd" about using an Occlusion Map to indicate areas on the model that they want lighting to go, but I'm wondering if (and how well) this might work as a replacement for normal editing, especially if I only want the model to be seen from one camera angle (but I would like to turn him toward the camera from the front and sides too, something akin to the SNES Zelda overhead view, so I'm wondering if I'd have to swap Occlusion Maps for this).
2) The actual ramp shading looks like total garbage in most shaders I've seen due to them highlighting or shading parts of a model that clearly shouldn't be shaded until at a certain angle. What's the best way to go about this, say, for the 4 views I mentioned in issue #1, for example. Is it possible to draw maps where you want the shadows to exist and interpolate between the different angles?
I saw something like this in the Zelda Botw where you see the pencil strokes at certain angles shading the clothing, but I'm wondering how they did this since I've got no idea how to do things with shaders at different angles code-wise. Any help in this area would be appreciated too!
Replies
An occlusion map (a texture) is going to be sampled throughout the faces (unique values at each texel), so you'll always have more room for detail when using textures. A way to visualise this is when comparing a mesh lit by vertex-normals vs. lit by normal-map.
So if your mesh is not dense enough for you to rely on normals \ vertex colours to precisely define the shadow information you want, you'll have to use textures.
You need to start from somewhere. Post your shader network and people will give feedback.
Wow, good point there @RN !! -- I felt like it should work on a low-poly character, but I didn't quite realize the inherent power of pixel shaders until that image. Thanks!
I agree I should tackle these issues one by one -- so the first issue I want to tackle is the occlusion map.
Because this sprite gave me lots of lulz, I tried to spoiler it (can't seem to do it though), but as you can see, there are certain areas on the, erhm, "geometry" where the light pools and areas where it pools shadows of slightly darker tones:
What I am going for is being able to rotate a 3D version of this 'sprite' in a few different directions, but having the light only pool in certain areas such as the face or upper body and in some places on the hair. I also want to make the back leg have shadows something like what you see here.
From what I saw in the Guilty Gear Xrd GDC notes, they did this using a combination of occlusion and normal editing, but I'm thinking you could get something almost as good using occlusion maps alone. On the other hand, would I have to swap out my occlusion maps if I were to need a different view of the character?
From what I see here, I'm thinking a simple ramp shader would have a hard time replicating the look in this sprite -- especially when movement is applied.
Additionally, if editing normals is a necessary part of the process, does anyone know if it's feasable for Unity to load different sets of normals for a model depending upon what direction is pressed? Or would it be better to interpolate the occlusion maps themselves somehow through the shader?
They mention a few things in there, maybe this helps:
- They preferred to use vertex attributes (colours and normals) instead of textures to store information because it was easier to edit (instant feedback) and these don't suffer from pixelation like textures would. So what I said about textures giving more details is incorrect, in this case. For a cel-shaded look vertex attributes will give cleaner results because of interpolation.
- They used vertex colours as a factor for forcing parts of the model to become shadowed more easily.
- They edited vertex normals only on some parts of the models, like the heads, to make sure that they had clean areas of only shadow or light, no messy patches.
- Each character has its own light vector (a 3D direction that defines where the light is coming from). The light vector can be animated along with the character to adjust for the best results at every frame. Vertex colours and normals are not animated.
- They didn't use a ramp, they used a single diffuse texture with flat colours that represent the lit state, and a "shade texture" with all colours as factors that will be used on the shadowed state, blended in a special way.
On lit parts of the model, you just output the diffuse texture. On shadowed parts of the model, the diffuse and shade texture are blended with multiply: diffuse.rgb * shade.rgb.
Mesh.VertexNormals = normalize(lerp(Mesh.VertexNormals, Mesh.VertexColor[x], alpha));
Despite remembering them saying that stuff, apparently I still really needed an experienced eye on that video to help me see what I was missing/overlooking in shader terms (still very new to shader design), so thank you!
I forgot to mention I'm trying for a lower-poly version of this technique (so your initial advice was still very helpful!) The GGXRD characters are *very* high poly in general, and this was considered okay since there were only 2 on screen at once. I, however, am looking for a way to make a shader like this useful for many characters on-screen at once, so any advice you can offer on this would be especially appreciated!
@kodde
So, basically, I never even considered using the color channel for normal editing and then just changing its use in the actual shader lol. No idea why since I've seen it done for other stuff a thousand times. Thanks for the reminder! Also, that's a great idea about storing multiple normals. Could I make the shader lerp between them potentially, depending on an east/west/north/south camera-facing direction?
--
@anyone
To clarify, I'm trying to create a GGXRD-like shader for a model who's resolution is something along the lines of the following model (but with a higher-res texture and only slightly more polys to *just* offset the pixely/sharp look):
My biggest concern now is that using the normals approach may not be as effective on this sort of model as it is on a higher-res one. Perhaps a higher-res-texture-based shader would be better-served here?
Also, I noted that in the GGXRD models, they do have an occlusion map, possibly to help with light pooling, but I don't understand the reason why since they edited the normals on the face to cover for the pixel-blur issue. Would a model this low-poly need/benefit from any sort of occlusion map, and if so, why or why not?
Lastly, what would I need to do to make the highlight speculars like in the GG shader? Maybe that's actually the main purpose of the occlusion map in their shader setup?
Or, does that mean that you want to achieve something similar to the many examples shown in this thread, and are looking for an already working solution that you could just use straight away ?
For instance, regarding this question :
- - - - - - - - - -
Is it possible to draw maps where you want the shadows to exist and interpolate between the different angles?
- - - - - - - - - -
The answer is yes ... if you have access to a shader that does exactly that.
Exact same technique in Megaman Legends 2 on the PS1, as shown here :
Sorry, I didn't realize -- yes, exactly that -- I know enough that I can make rudimentary shader code, I'm just looking for operations/math/advice/direction/etc that might help me to achieve something like the above images/examples, especially with the constraints I've mentioned (performant enough for many onscreen chars / works with low-ish-poly).
And thanks for your Fear Effect example -- (I loved that game btw) -- I chose not to do that because I wanted to see if there was a way to use some modern techniques that would allow one to use real lighting in order to attain something that doesn't look too "painted-on" and can potentially still be a little dynamic, but I was looking for guidance on how or what might be used to achieve a look like that.
A good example is just about any top-down Capcom sprite, but all I have to show is this guy:
As you can see, he's got a top-down light source, but just as much of it is in the front also.
The way Capcom style sprites work is that, when they turn around and you see their backs, the light is still from the top, but it lights up less of their back than it would if their front were exposed. Also, as with Psylocke in my previous post, sometimes these sprites have both speculars in particular places (such as Psylocke's hair and, erhrm, "geometry") and pools of dark shadow in other places, such as the back leg of Psylocke and *most* of Link's back leg there (except he *doesn't* have that extra shade or two of shadow like Psylocke has, which I *do* want).
So basically, I'm trying to figure out how to pool light only in the places I want, add speculars only in particular areas, and how to, perhaps, define a particular "plane" or something that lets shadows pool if they exist behind that area (for example, Psylocke's back leg is on a totally different 2D 'plane' of shadow so perhaps I can find a way to use this to my advantage in replicating that look.)
Any pointers on any of this would be greatly appreciated!!
Thanks for everything guys -- I hope that clears some stuff up!
You've shown the Link model example, but not the *actual* model you are building. I don't think there's much point worrying about advanced shader effects without also working on the actual model these effects will be used on.
So if you really want to have a anime look shader you have to look closely at your reference and break down your shader in smaller steps to handle all those exceptions.
In GuiltyGear there's a lot of masks that try to correct the lighting : one is mean to add shadows that won't be affected by the light (for the neck and armpits). Two of them handles where and how much specular will be shown. On top of that there's a hand painted AO information and normal editing.
I've put a pdf which is mainly the Guilty Gear talk (and you can ask me the .blend by message) on that subject : https://www.dropbox.com/s/65cwf6kjuezhwdl/GuilltyGearXrd_shader.pdf?dl=0
Granted, if this were a simple rendering, that would be easy enough, but since this is for multiple-characters in-game, and since my goal is to make this look right with any model of the sort of geometry Link has (lots of round volumes, few angles), I can't really give an exact model. Additionally, I'm also in the middle of a prototyping phase, so Link is all I have to work with for now.
Thank you so much for this man! That is awesome advice.
I think what's getting me the most is that I don't know the gist of what's needed for controlling stuff such as the movement/placement of specular/shadows/ramps by way of using texture-channel-data to do so (though I do understand the concept of multiplying colors together). That writeup of the GGXRD does help me understand necessary techniques in handling shadow control though, which is half the battle, so I'm not a lost cause.
There are three things I dont yet understand about that writeup though:
I'm also having a hard time deciding whether the shader should be camera direction dependent or independent. I'm sure I'm going to have to define my own lighting model but I'm having difficulty understanding how to proceed with that because the only real place I'd need to control the lighting direction is in specular placement. Most other stuff I could control with normal painting and shadow-control.
I know these are dense questions, and it's a complex topic, but as said before, I'm just looking for some insight to give me an idea of what's going on inside a shader like this so that I may eventually program my own.
Thanks everyone for your time and patience with me! -- I'm learning a lot already!
It is still a little ways away from what I was going for.
First off, nice dark outlines done in the style to the left are hard to achieve on low-poly (there are angles where they appear broken, looking something akin to Okami) without the normals being smoothed. On the other hand, by smoothing the normals on the model in Unity, I lose the nice normals I've modeled that define how light should pool when exporting from my modeling program. In that case, I am forced to smooth the model in Unity, then, after the smoothing has taken place, I have to somehow get my nice light-pooling normals back in. Is this possible?
In addition to that, I am also worried this might require a second pass.
They mention it in the GDC presentation on this slide:
So you take the dot product (also called "scalar" product) between the vertex-to-light vector (going from the vertex to the light position) and the vertex normal vector and plug this dot into a step function which uses the vertex colour as the threshold, like in the image: step( threshold, dot( light, vertexNormal ) ).
If you're using nodes (like in Blender, or with node-based shader editors in game engines) then the step function can also be called "Math -> Greater Than", with the test being "is dot( light, vertexNormal ) greater than threshold?".
The result of this (either the step or greater-than functions) is always 0.0 or 1.0, and you can use it to turn shadowing on and off in this way:
The "return" line says: "if isLit is 1.0, output just the diffuse texture. If isLit is 0.0, output the multiply blend of shade texture and diffuse texture."
You can treat the R channel of the RGBA vertex colour as the threshold by subtracting 0.5 from it, so that 0.5 R means a threshold of 0.0 (default, good for most cases), 0.0 R means a -0.5 threshold (shadowed areas become lit), and 1.0 R means a +0.5 threshold (lit areas become shadowed).
It's easier to visualise this once you test it.
- - - - -
Forgot to add, because of the way it behaves, the dot product will only be in the range [-1.0, +1.0] if both vectors are normalised. The vertex normal is usually already normalised, but the vertex-to-light vector might not be yet, so make sure to normalise it before plugging it into the dot( light, vertexNormal ) call.
This dot product represents the lambert term, something used a lot in lighting for computer graphics. Read more about it in here: http://buildnewgames.com/lighting/
Yes, but I *was* actually coding my shader manually when I posted that, but I've since switched to learning shaderforge (because why not?). Even so, I was looking into a potential new way to make outlines than the standard 'upscaled-reversed-normals' approach used by most (including shaderforge) as I've got an idea carried over from my 2D sprite days I'm wanting to try out once I finally 'get' what all shaders can do.
Nope, I guess I did not -- I used this instead:
float nDotL = saturate(dot(input.normalDir, input.lightDir.xyz)); Seems to do something similar, but I'm wondering... am I really better off with step vs. saturate since step is a sort-of 'conditional'?
Also, speaking of outlines... I was thinking about that aspect a while ago and was wondering if there was any way to put an outline inside the silhouette of my model, for example just around the inside/internal edges only? Since I'm now using shaderforge, perhaps it would be easy to do this (but without post-processing?)
Thanks for your clear explanation @RN -- it really put a lot into perspective for me. Took me a good 45 mins to decode that simple 2 lines of code, but it was so worth it, so thank you again for that.
Still playing with shaderforge for now, but I'll update once I have something pretty to show.
you could use this method for the outlines
(btw, kudos to gonkichi, awesome model)
But if I were in your situation I would make both versions and compare them. Good luck.
the 1D texture idea could work so long as it's not interpolated on at all, but that's introducing another texture sample (and potential user error) when an intrinsic function is provided. it's virtually guaranteed to be the fastest method.
Great advice man! -- I sure did, and it supports all the toon-lighting I could ever want -- and more. The right Link is closest to what I wanted shade-wise, but left-Link's outline is still closer to what I want for that:
Other than the special outline, the only real problem I have now is that the shader doesn't support vertex-normal-maps from a painted RGBA channel.
Unfortunately I can't modify my model's normals in my modeling program since the internal shader outline (see Left-Link's outline) depends on the model's actual normals being perfectly smooth. I need the shader I use to have an alternate version of the normals for controlling where light pools (such as on the face). Although the shader is open-source, I can't for the life of me figure out where I might modify it to make it respect the vertex normals I painted into the R channel of the RGBA, so the shader source is unfortunately useless to me until I can understand at least that.
I know I must seem really dense here, but I can't seem to put the right node connections to achieve a basic diffuse/toon shade (i.e. telling SF what parts are lit using the step function + threshold), much less a way to setup the R channel to control the normal direction. In addition to that, after searching for days, I still can't seem to find a single hint of a toon shader to use as an example that's not in code, and translating that code into a node graph that works in shader forge is proving very difficult.
The only toon examples I've found using SF nodes so far are older and have a CubeMap for some reason, which is not at all how I did toon shading in my code.
I'm apparently very bad at translation here... I admit the math is my weak point, and abstraction by nodes isn't helping with that it seems... Is there some place I can look to understand this better?