Female Character wtih hoody

polycounter lvl 9
I thought it was about time I posted some work! This is a character I started as part of a CGWorkshop with Steven Stahlberg (which I highly recommend to anyone on a beginner to intermediate level).
I concepted my character and did most of the modelling during the workshop, and have spent the last 3weeks working on textures and fixing stuff.
This is my first attempt at photoreal textures and detailed spec maps, so any advice in these areas would be much appreciated!
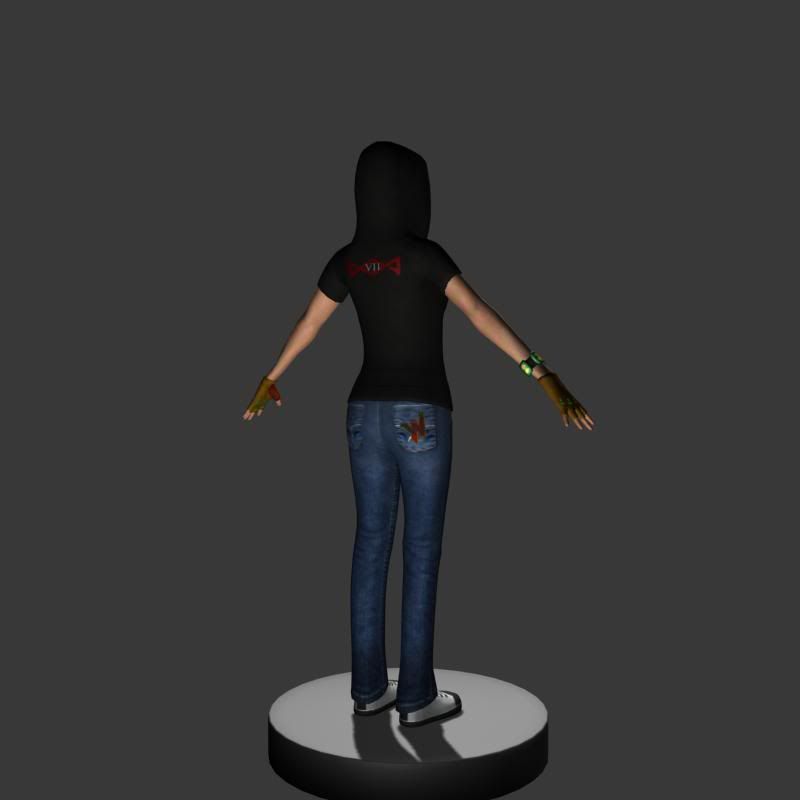
Anyway, here's the model as it is so far (still very much a WIP). Its using diffuse, normal, spec (level and colour), glow, and opacity maps. I've also set up a basic 3-point lighting to help work with the specular highlights.
Thanks for looking!")

I concepted my character and did most of the modelling during the workshop, and have spent the last 3weeks working on textures and fixing stuff.
This is my first attempt at photoreal textures and detailed spec maps, so any advice in these areas would be much appreciated!
Anyway, here's the model as it is so far (still very much a WIP). Its using diffuse, normal, spec (level and colour), glow, and opacity maps. I've also set up a basic 3-point lighting to help work with the specular highlights.
Thanks for looking!
Replies
you done anything with zbrush or mudbox?
Here is what stuck out to me, please understand this as critique if you need more detail on anything I say please ask:
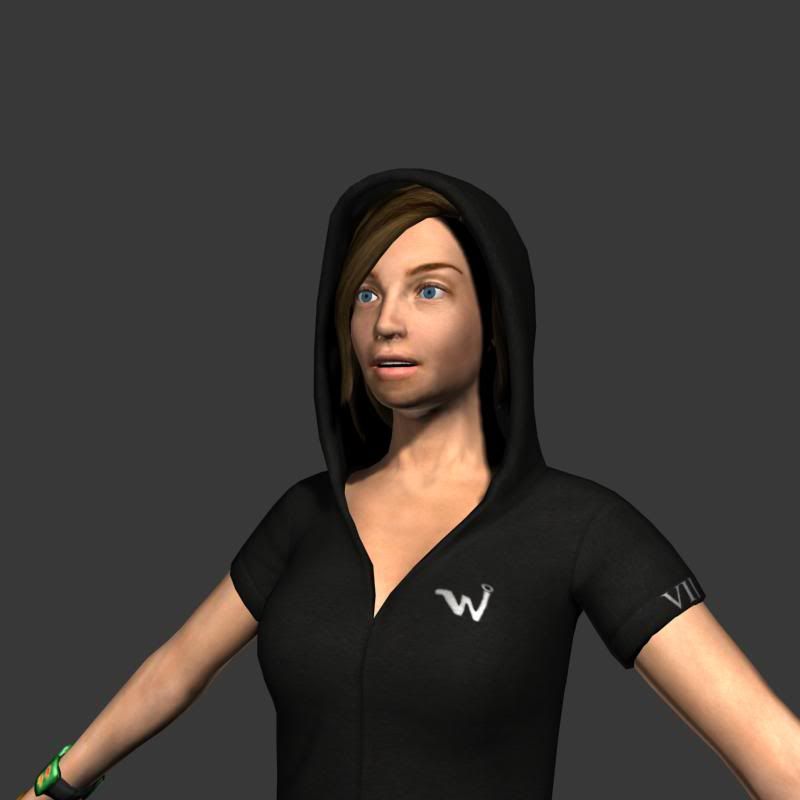
1) chin looks kind of dirty - I suggest a little texture lightening and smoothing
2) hair has opposite problem it's too uniform. some highlights and specularity would go a long way
3) Eye shape seems to work fine
4) lower lip shape is off not sure whether this is just the stage of modeling your at or not. suggest good side view of a real human face will help you see the issue with the lips.
5) jean texture is good but the wrinkles are not there again lots of reference will help you see where they need to be and how they flow. that is partly a modeling and normal_map/displacement_map issue so it may be you just haven't gotten to that yet. I don't know.
6) cleanlyness: there is dirt and then there is dirt. In life everything is either a little worn or a little torn or a little dirty or a little something that it didn't start as. in real life we react to a lot of cleanlyness and neatness positively, but to much uniformity and cleanness in art looks suspicious and appears like a lie to the eye. Even dirt that one never notices or helps add realism. If you want something to be clean think about making a layer of dirt that is so thin it's only visible when put the with and without version side by side.
oh and consider too where dirt gathers where sunlight bleaches and shade preserves. It all depends on how far you want to take it.
hope that was helpful
Happy rendering
With the chin (and other areas with similar problems) I've had some lighting issues where the shadows are coming out a bit weird, I will try and fix this.
I have created a ZBrush highpoly sculpt, but I think the details arn't coming out that well in all places. If I increase the normal intensity it adds more details to some areas, but over exaggerates the details in other areas. I'm not sure how to create a happy medium without creating a new material. This was my first time using xNormal, so thats probably why the intensity is coming out un-uniform.
I'll post some images of the HP from ZB, thanks again for your help
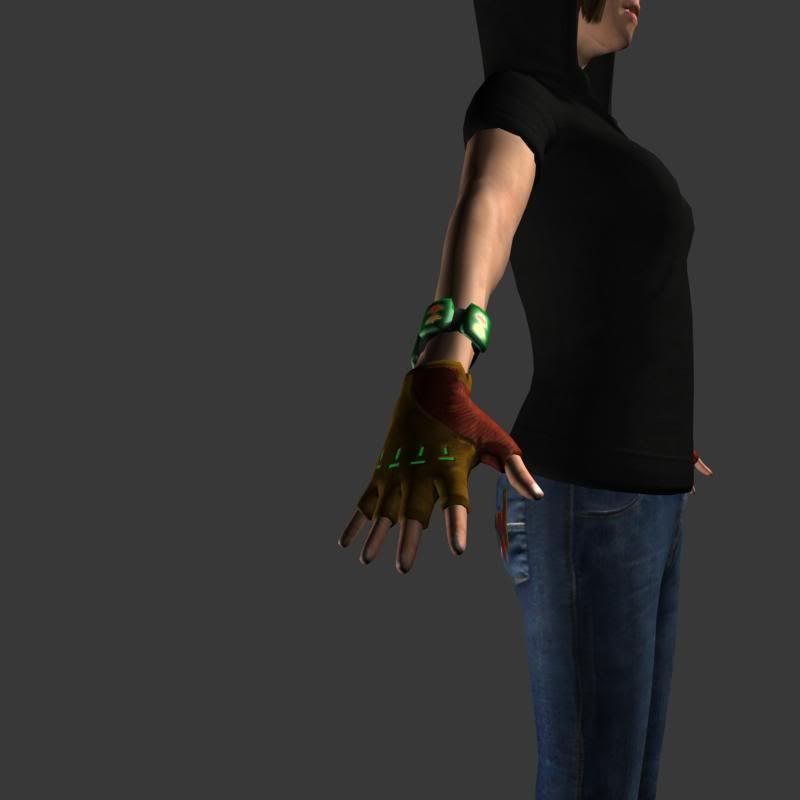
I've worked on all the suggestions and some extras, and ironed out some bugs. I've added some more detail to the jeans and hair in ZBrush, and adjusted the lips, and I've spent most of my time doing texture work (diffuse and spec), mostly around the face, hair, jeans, gloves, and shoes. I paid special attention to creating dirt and ware. I've taken a crash course on makeup, and given her some eyeliner, eyeshadow, blush, bronzer, lipstick, etc (she's got to look presentable!).
I took someone's suggestion of trying dramatic lighting, and I think it's working nicely. Still having problems with the shadows, but I'll leave them till the final render.
I'm not 100% sure about the jeans atm, so any crits around this area (and anything else) would be much appreciated
Thanks for looking, and thanks in advance for any comments and crits. Hopefully I'll move on to the rigging soon!
I did a little paintover, but it turned out terrible. Starting nudging things around too much but maybe you can take some ideas from it anyway.
I was still getting some weird shadowing around the bottom half of the face, so I've added in a new light to balance the lighting, and added in extra resolution around the chin to combat some artifacting (if that's the right word?).
seeing as we are up close I thought I should point out the eyes. specificly the iris/pupil area. the white seems fine as far as coloration but they look a bit flat. do you have them modeled on a masic sphere shape? or something entirely too flat.
with regard to photo reference what you want to remember and I suspect you already know is that if you transfer shadows from the photo to the texture and don't lighten them back you get a double shadow, one form the texture and one from the model render.
Thats direct shadows. With ambient shadow that's another matter. because your model has a slight underbite or is that overbite (I can never remember which is which) and I'm guessing your reference had one too, perhaps that's part of the problem.
the shadow indicates the cheek bone much too low, raise it up and merge it with the zygomatic process + arch. below this, the mandible can be flesh out, which will cause the jaw to widen a little. this should balance the face.
also be sure the neck is thinner than the top of the neck
thers a paintover to tease your brain for ideas, its crude sorry! but theyr minor tweaks that i thought of heh.
Heres my latest update, finally! I made a bunch of improvements to the textures and model, and I've also rigged, skinned, and posed the character. I've tried out some new techniques like 3ds Max's CAT and some new skills with morph targets, really enjoyed using CAT.
Let me know what you think:
(higher res version)
As for CAT, compared to other rigging systems I've used, its amazing, so simple, clean and easy. It does all the IK, FK work for you, and plenty of room to make the rig more complicated/versatile. I learnt it using a tutorial by Rick Vicens from Bethesda Game Studios (Digital Tutors).
for the UV space you could optimise it and gain a lot of space by using only 1 arm and 1 eye.
Also it looks like the you dont have an AO map in your difuse. that could really help.
also specular map for the skin looks better with a bluish hue. and some part like the nose and the part all around the eye are more specular.
the color of the skin looks a little too orange to me and the hair a bit too yellow.
for the eyes i dont see well because of the size of the picture but the red spots look weird a little bit.
i dont know if you use crazy bump to extract your maps but if so the skin specular looks better when you add grain to it.
and the reason why i asked for mudbox is because for texturing it is really good. it actually support all the phostoshop layers and you can draw dirrectly on your 3d model and you map at the same time.
so you can use the projection brush to paint someones face on your model so you can get all pores details and a good color variation of skin
it doesnt really matter what the face that you choose look like your model or not.
if you can get mudbox i strongly recommend it for texturing.
or you can still do the projection in zbrush then rebake it just for the color map.
keep up the good work!
Also thanks for the advice with Mudbox, I will try and 'aquire' it and see if I can work it into my next project.
also im not sure about the skin tone on the face, thers a grey ish tone jus below the cheek bone that throws it off. it could jus be me but it looks like dirt or sumtin, specially where the lighting is, that side of the face should be relatively even in tone (check reference).
also the right side of her face should be in shadow much more?
its shaping up rather nicely, good stuff!
Thanks again for everyone's input during this project, I feel like I've learnt alot and maybe leveled up a bit!