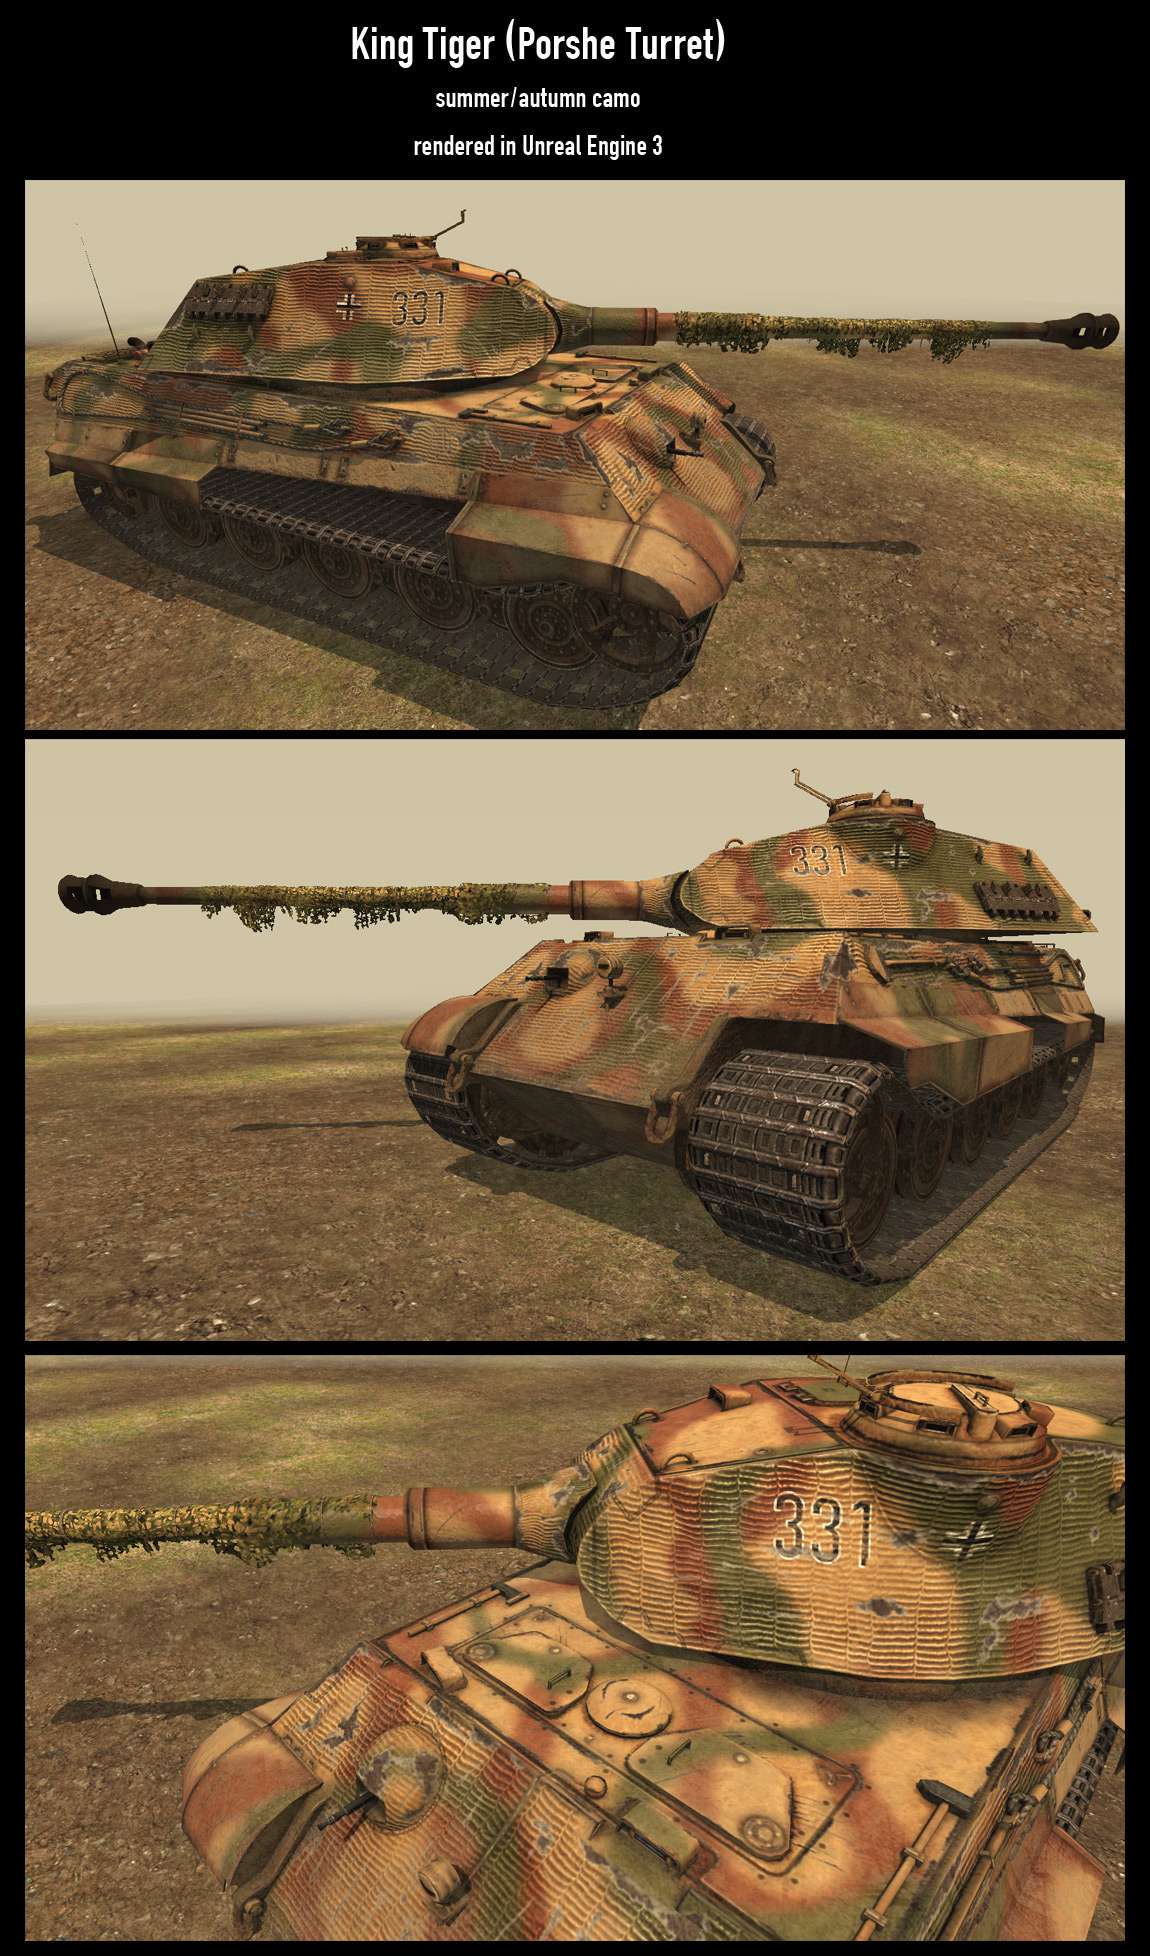
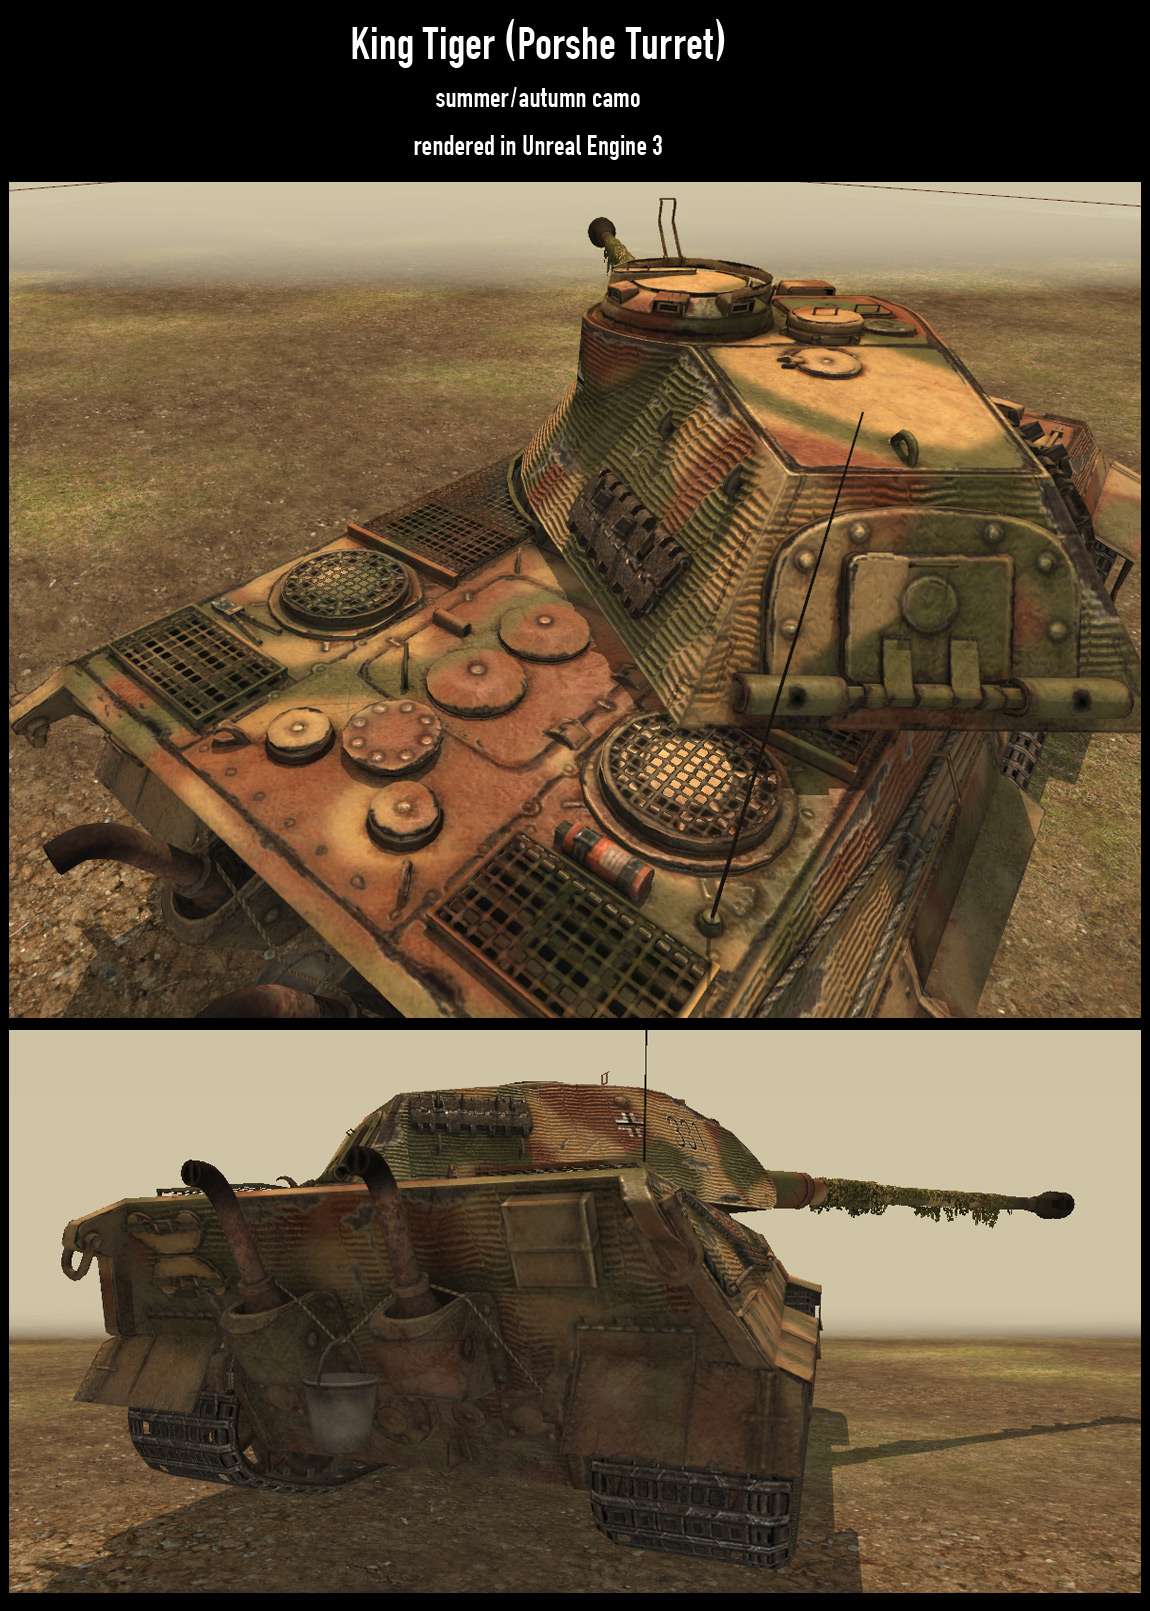
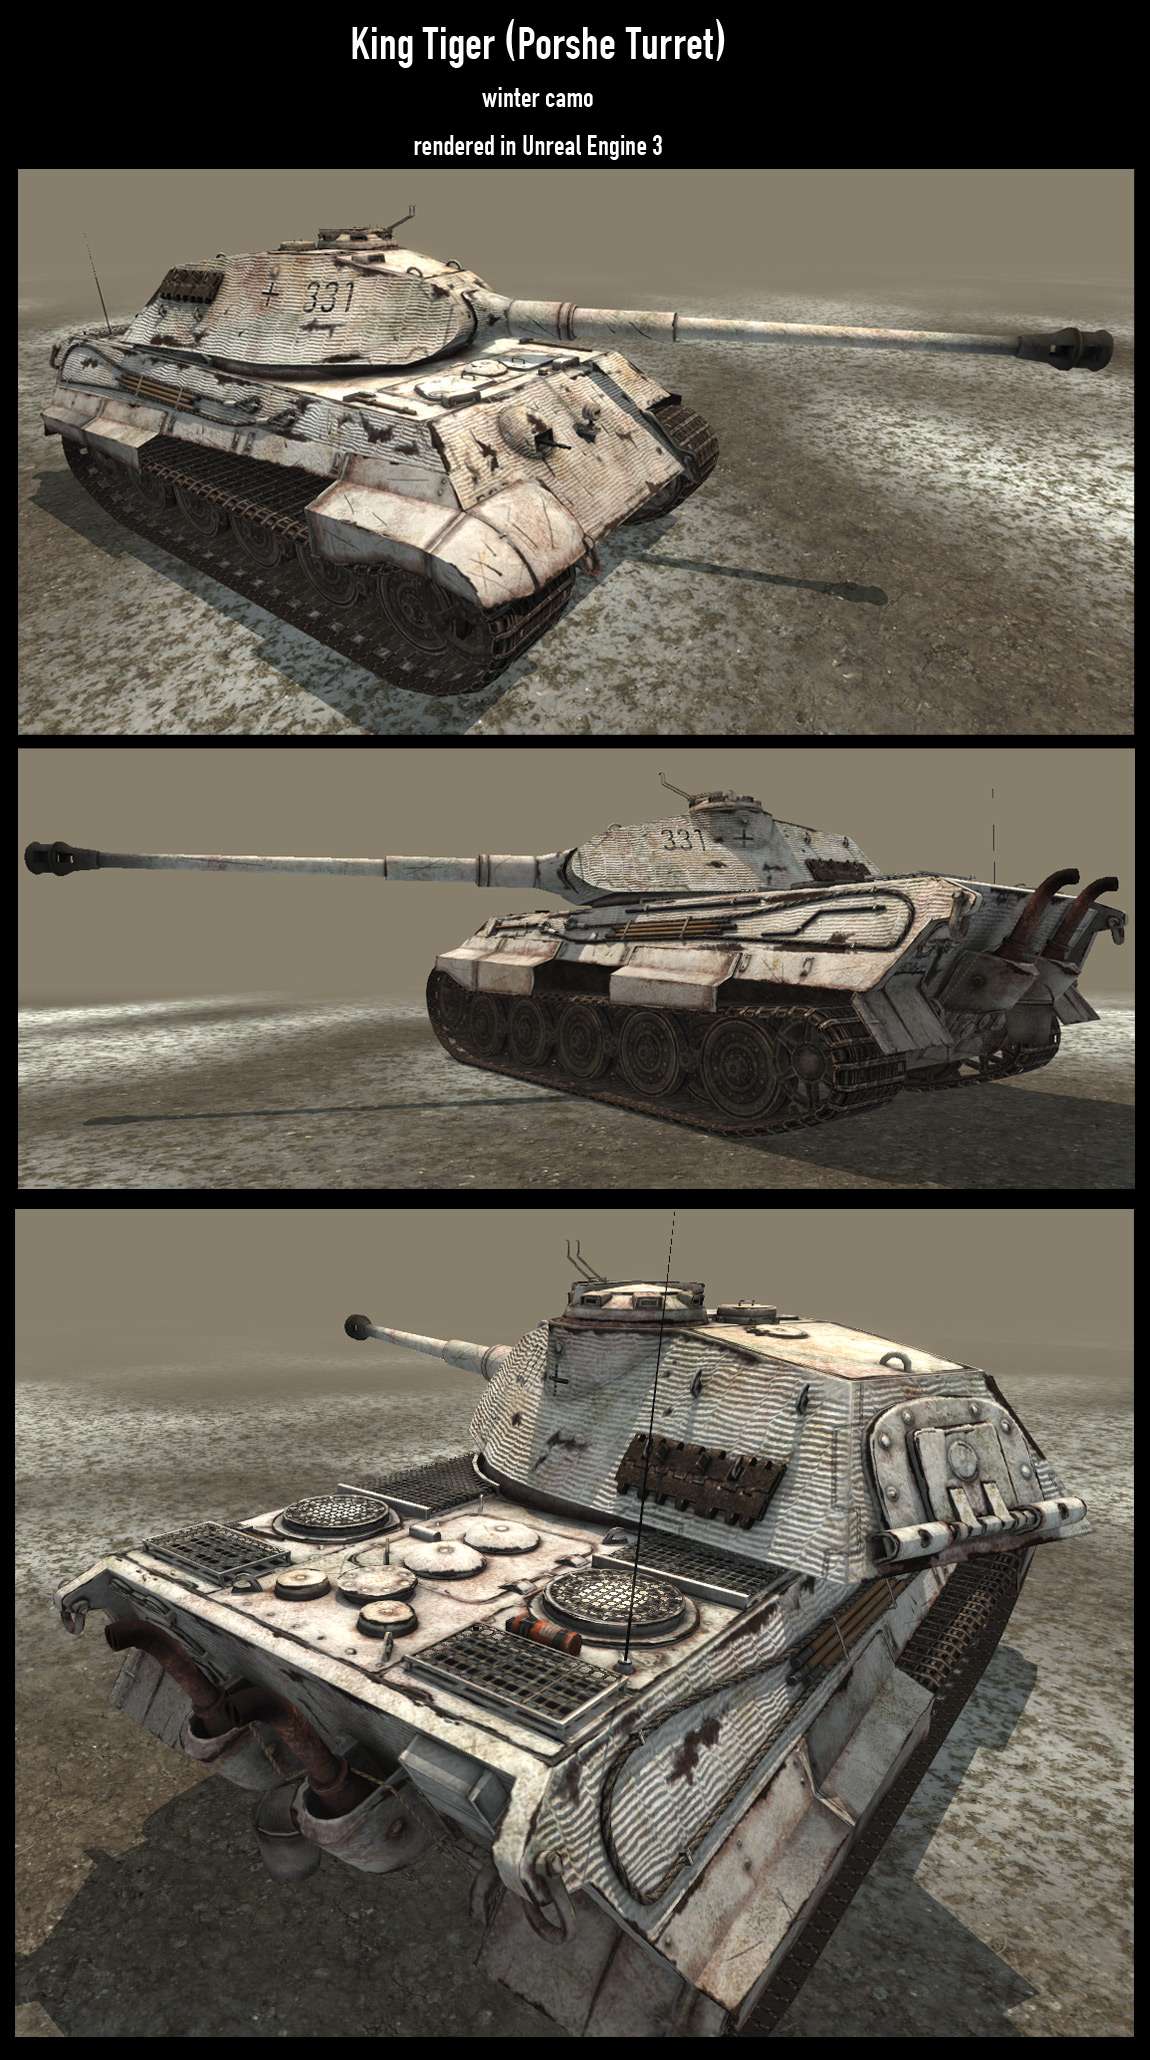
King Tiger Tank finished and "postmortemed"
polycounter lvl 11
Hi again everyone,
I have finished my Tiger II Tank and I decided to post it in a new thread because I liked the idea about a small postmortem of finished work proposed by adamBrome in his " Leaving Solace " thread ( http://boards.polycount.net/showthread.php?t=61109 ).
So here we go.
Basically it was my first complete "curent gen" combat vehicle with many polys and bunch of fun")
--- Reference material ---
Since it existed in the past I used blueprints and bunch of videos/photos found on web.
Thanks to everyone who have provided me with additional references and to blueprints.com !!!
Just a FEW examples of my references.
NOTE that colors and marks may vary since there were bunch of variations
http://www.naritafamily.com/Scalemodel/AFVs/16kingtiger/photo_gallery.htm
http://www.imagesofyoustudio.com/Porche-Tiger3.jpg
http://plamo.outthere.info/forum/printthread.php?tid=3715
[ame] http://www.youtube.com/watch?v=p8VyQ-gnYeI&feature=PlayList&p=23E08001D2BA4825&playnext=1&index=36[/ame]
[ame]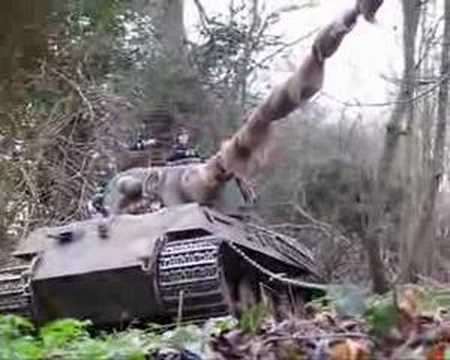 http://www.youtube.com/watch?v=L_RJSEeGMew[/ame]
I am a fan of WW2 vehicles therefore it was real pleasure to make this one here
--- General workflow ---
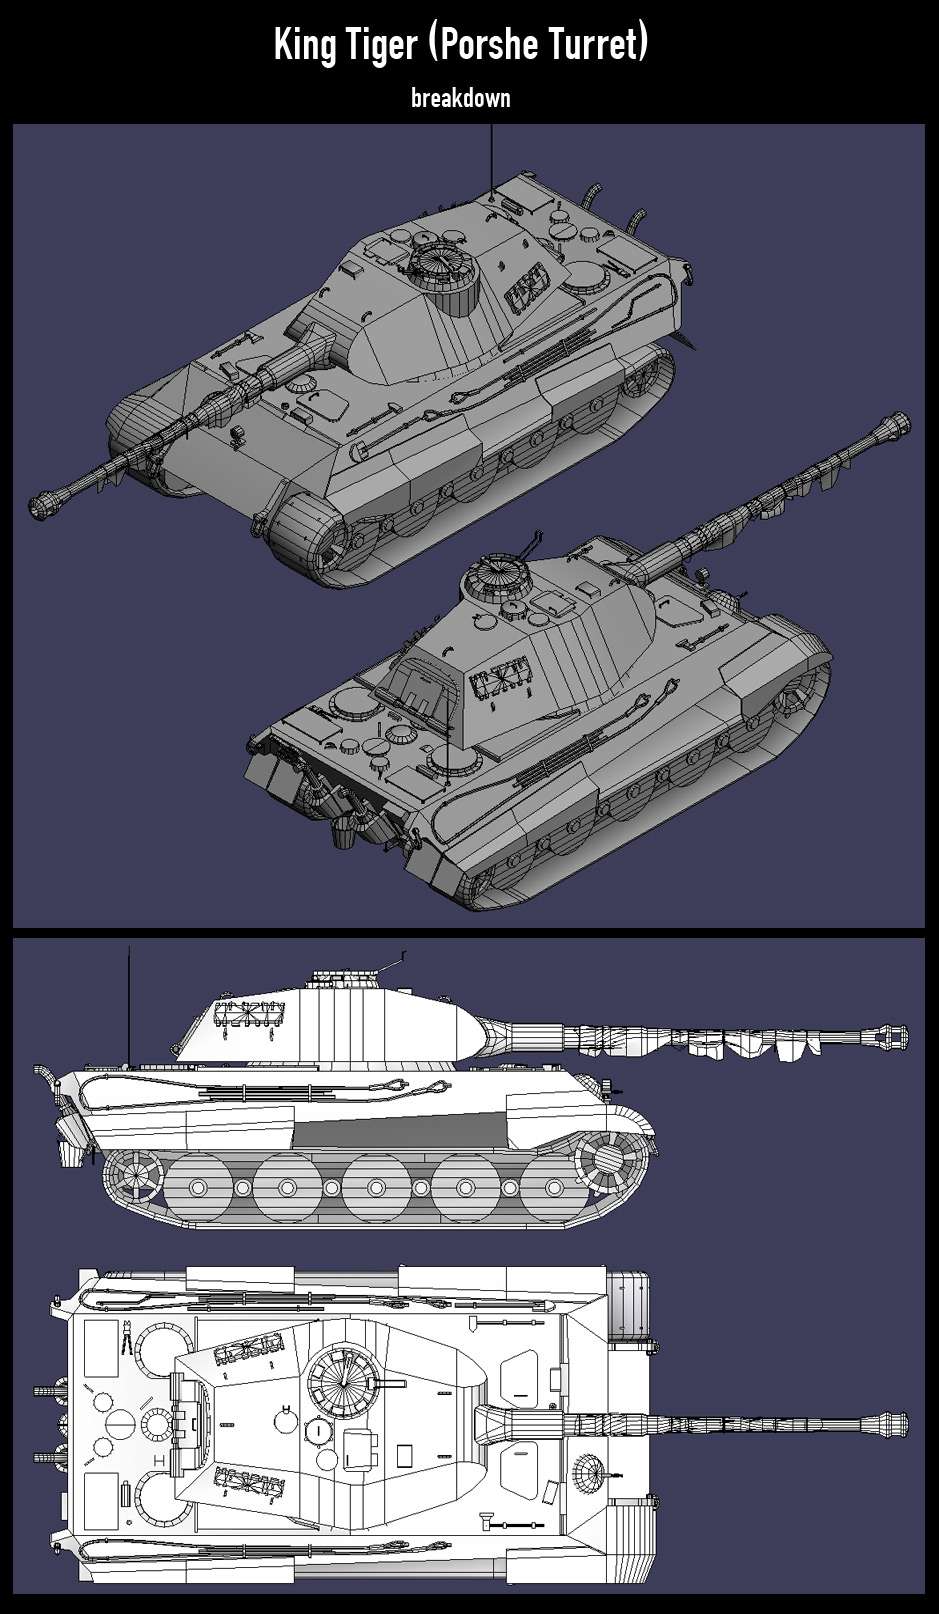
Nothing special here. I did low poly first. Then, i unwraped it. After that, I modeled high poly elements to be used in normal map bake.
I did not do complete hi res model but just several necessary parts due to several reasons:
1) There are lots of surfaces that both hi res and low res have the same (like main armour).
2) Many elements share same normal information like wheels or tileable caterpillar elements etc.
3) The silhouette part of hi res won't be used in normal texture.
4) Many things are easier and faster to do with B&W textures and pass them through CrazyBump (like my zimmerit coating or scratches)
5) One can get exactly the same baking result from "floating" seams, bolts and holes instead of cutting them carefully into the surface of "real" hi res model.
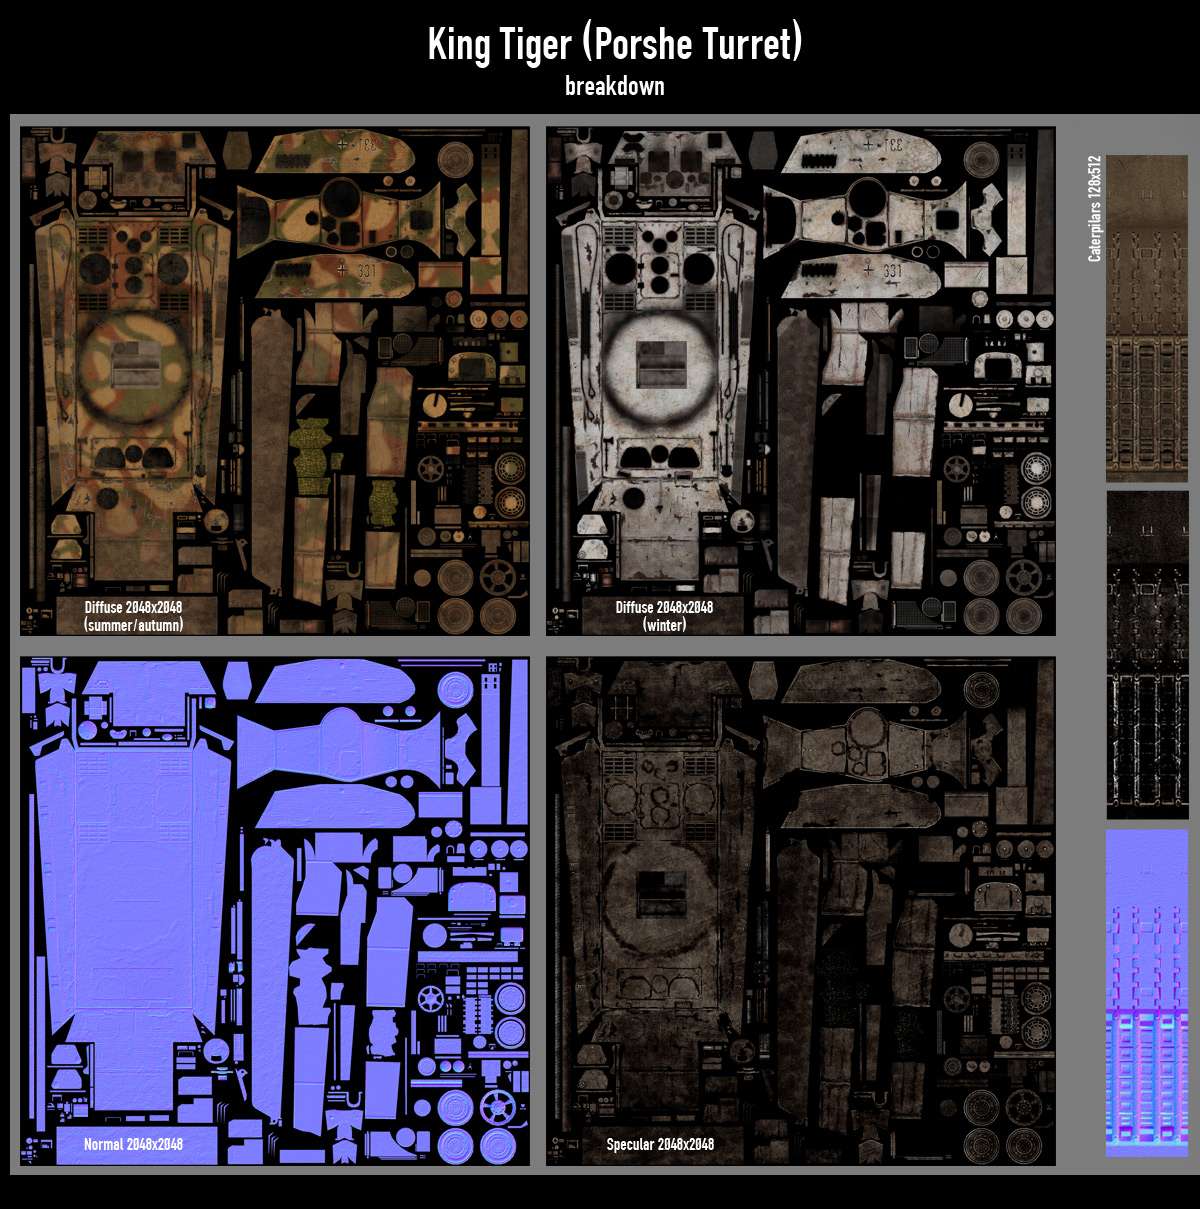
After that, I composed different baked normal map patches in the final texture layout. I got AO and highlights textures from CrazyBump. Definitely, those were edited and used with several blending modes for final result and then combined with another AO baked from low res model.
Eventually AO and edges' hightlights were used to make Diffuse and the rest.
Camouflage pattern was a bit of a challenge but luckily I could use Smoke 3D map of max to generate basic grayscale images to use that for 3 camouflage colors in photshop.
The advantage of 3D procedural maps is that they will always perfectly fit the model and don't require any predefined UV layout. Having baked that into existing UVs u can be sure there won't be any seams in the final texture Unfortunately max's maps can't offer patterns to satisfy all possible camouflage patterns.
At the end, I added one more AO pass with vertex colors by using Vertex Color bake from Radiosity solution. It allowed to darken individually some elements that share same UVs and therefore cannot be done in the texture.
Finally, I brought it into Unreal3 and made a basic shader with a quick ground to place my model onto it.
Polycount: ~18K
Textures: Diffuse (2 camouflage versions), Normal and Specular
Texture Size: main texture 2048x2048 plus separate caterpillar tileable texture 128x512
--- What I would improve/avoid ---
My mapping could be better.
My problem was that I have built whole low-poly model in it's complete undamaged state; after that, I unwraped it and baked AO and Normals.
However, later I decided that it would be cool to remove some elements like skirt sections in order to bring more back story and realism to the vehicle.
That resulted in large gaps in my UV layout that looks as inefficient UV space usage.
Also I placed UV clusters for 4 road whees because wheels also have comouflage on them and I did not want it be too repeated on them (there are 18 road wheels in the model). Though, due to the dirt and mud that I added later on the wheels the camouflage became almost invisible so I could have done only 1 UV clauster for my support wheels.
Luckily i decided to add additional elements so I partially filled UV gaps with them.
I think it also would be much better to keep textures that use alpha (camo net and rear grids) in a separate texture. Well, next time :P
...plus anything else that u might notice here as errors...
Anyways, here r images
I have finished my Tiger II Tank and I decided to post it in a new thread because I liked the idea about a small postmortem of finished work proposed by adamBrome in his " Leaving Solace " thread ( http://boards.polycount.net/showthread.php?t=61109 ).
So here we go.
Basically it was my first complete "curent gen" combat vehicle with many polys and bunch of fun
--- Reference material ---
Since it existed in the past I used blueprints and bunch of videos/photos found on web.
Thanks to everyone who have provided me with additional references and to blueprints.com !!!
Just a FEW examples of my references.
NOTE that colors and marks may vary since there were bunch of variations
http://www.naritafamily.com/Scalemodel/AFVs/16kingtiger/photo_gallery.htm
http://www.imagesofyoustudio.com/Porche-Tiger3.jpg
http://plamo.outthere.info/forum/printthread.php?tid=3715
[ame]
http://www.youtube.com/watch?v=p8VyQ-gnYeI&feature=PlayList&p=23E08001D2BA4825&playnext=1&index=36[/ame][ame]
http://www.youtube.com/watch?v=L_RJSEeGMew[/ame]I am a fan of WW2 vehicles therefore it was real pleasure to make this one here
--- General workflow ---
Nothing special here. I did low poly first. Then, i unwraped it. After that, I modeled high poly elements to be used in normal map bake.
I did not do complete hi res model but just several necessary parts due to several reasons:
1) There are lots of surfaces that both hi res and low res have the same (like main armour).
2) Many elements share same normal information like wheels or tileable caterpillar elements etc.
3) The silhouette part of hi res won't be used in normal texture.
4) Many things are easier and faster to do with B&W textures and pass them through CrazyBump (like my zimmerit coating or scratches)
5) One can get exactly the same baking result from "floating" seams, bolts and holes instead of cutting them carefully into the surface of "real" hi res model.
After that, I composed different baked normal map patches in the final texture layout. I got AO and highlights textures from CrazyBump. Definitely, those were edited and used with several blending modes for final result and then combined with another AO baked from low res model.
Eventually AO and edges' hightlights were used to make Diffuse and the rest.
Camouflage pattern was a bit of a challenge but luckily I could use Smoke 3D map of max to generate basic grayscale images to use that for 3 camouflage colors in photshop.
The advantage of 3D procedural maps is that they will always perfectly fit the model and don't require any predefined UV layout. Having baked that into existing UVs u can be sure there won't be any seams in the final texture
At the end, I added one more AO pass with vertex colors by using Vertex Color bake from Radiosity solution. It allowed to darken individually some elements that share same UVs and therefore cannot be done in the texture.
Finally, I brought it into Unreal3 and made a basic shader with a quick ground to place my model onto it.
Polycount: ~18K
Textures: Diffuse (2 camouflage versions), Normal and Specular
Texture Size: main texture 2048x2048 plus separate caterpillar tileable texture 128x512
--- What I would improve/avoid ---
My mapping could be better.
My problem was that I have built whole low-poly model in it's complete undamaged state; after that, I unwraped it and baked AO and Normals.
However, later I decided that it would be cool to remove some elements like skirt sections in order to bring more back story and realism to the vehicle.
That resulted in large gaps in my UV layout that looks as inefficient UV space usage.
Also I placed UV clusters for 4 road whees because wheels also have comouflage on them and I did not want it be too repeated on them (there are 18 road wheels in the model). Though, due to the dirt and mud that I added later on the wheels the camouflage became almost invisible so I could have done only 1 UV clauster for my support wheels.
Luckily i decided to add additional elements so I partially filled UV gaps with them.
I think it also would be much better to keep textures that use alpha (camo net and rear grids) in a separate texture. Well, next time :P
...plus anything else that u might notice here as errors...
Anyways, here r images
Replies
My immediate thought was the lack of shine on the exposed parts of the metal. In the parts of the shots where the tank is shadowed, it's fairly flat and hard to see the depth in the shapes you have.
ps: oh yeah, my first finished model was a tiger
Makes me want to do a WW2 era tank myself now.
I like both versions, but the winter one is beautiful. I think the zimmerit came out real nice. My only crit is that I think there is too much bump noise on the gun barrel; when the cannon was fired it recoiled inside the mantlet so the barrel would need to be smooth. (Like in this photo, note, I'm only talking about the barrel, not the mantlet)
Apart from that I think it's real solid.
Now, I would really love to see a Normandy version with crazy foliage camouflage (like in this photo, yea I know it's a StuG but I'm refering to the foliage on it).