Home 3D Art Showcase & Critiques

Tunnels - Environment (image heavy)

Hey guys,

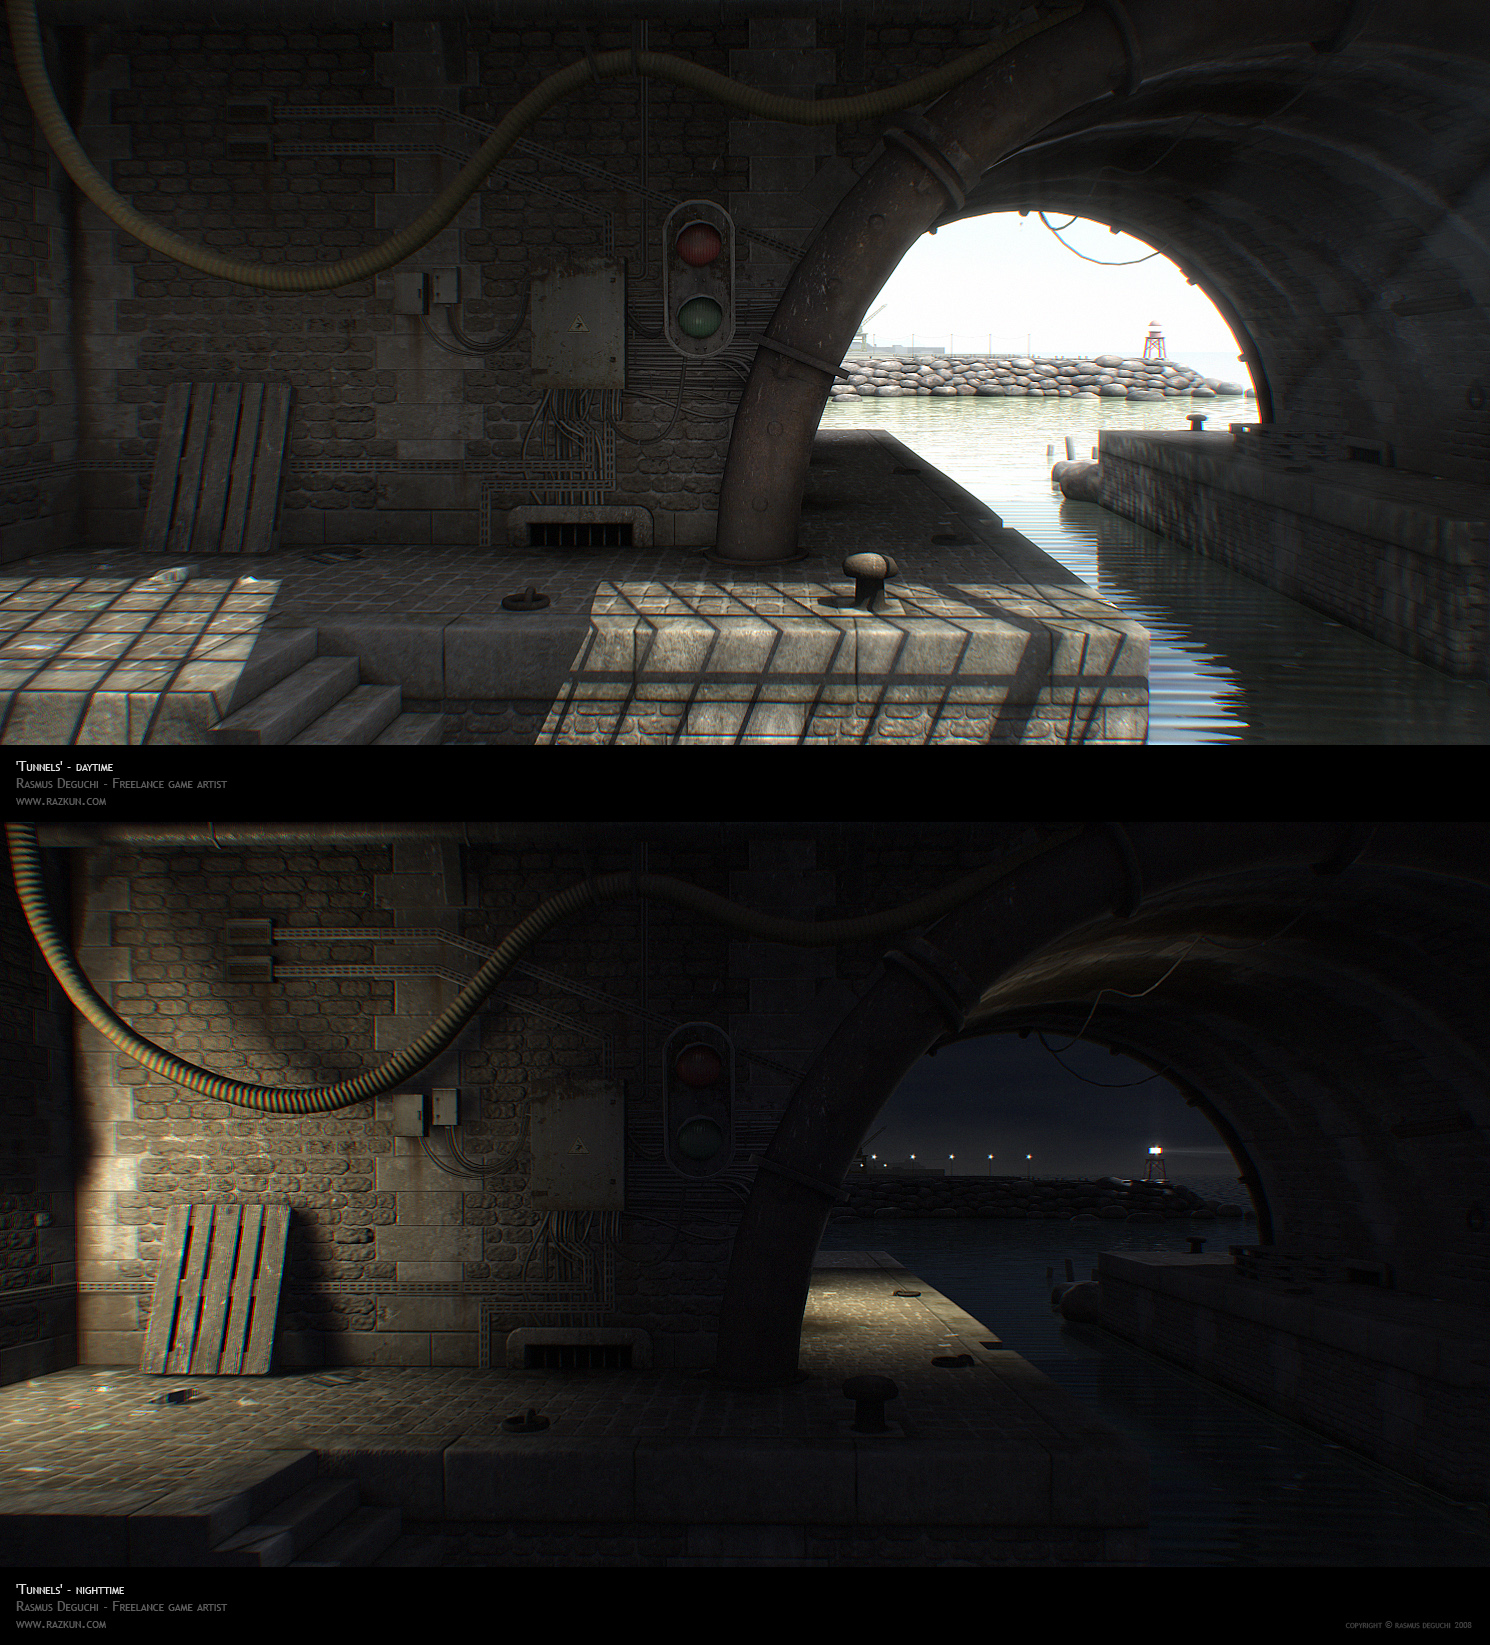
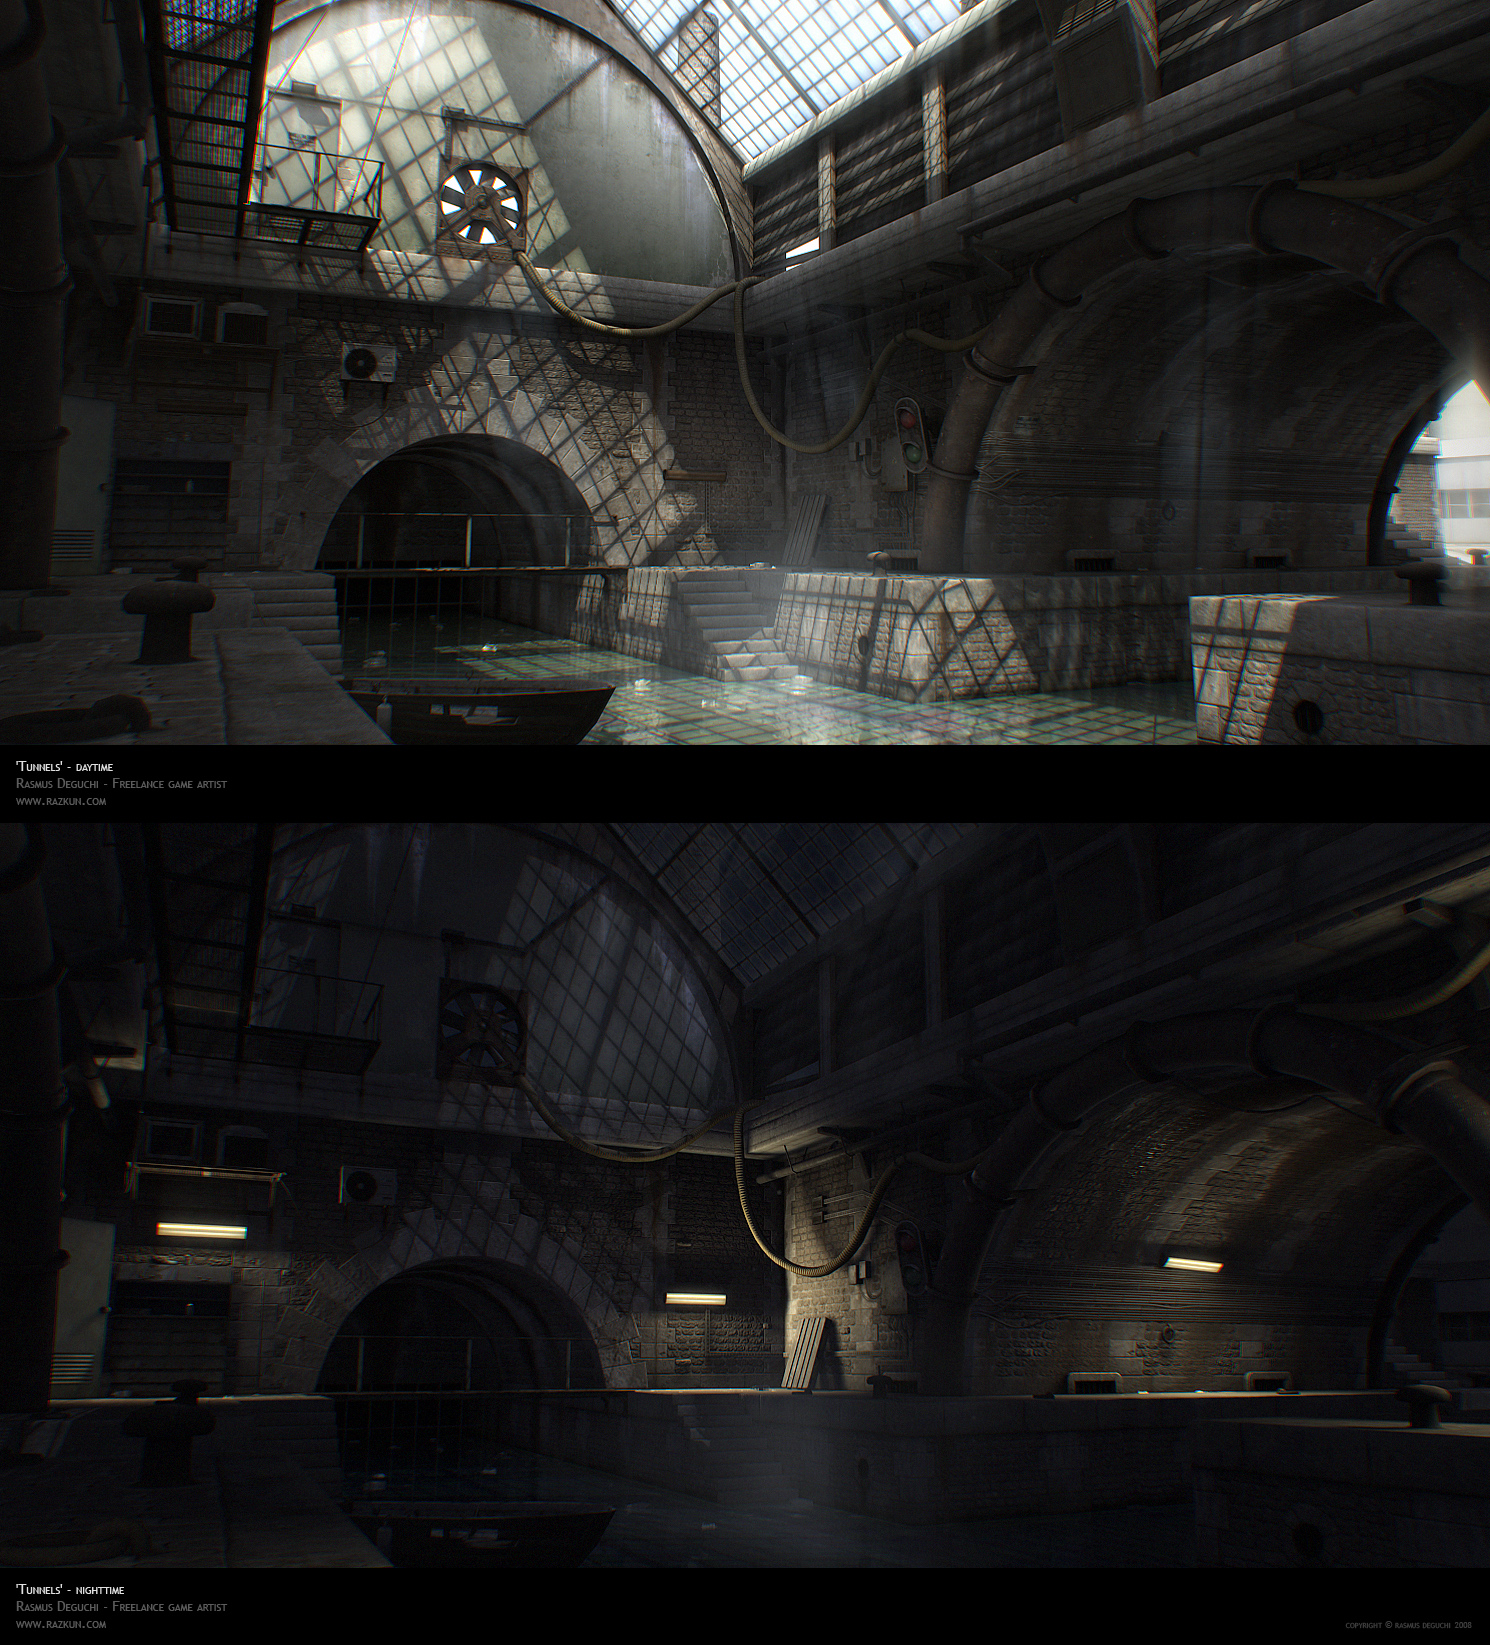
I kept a WIP on this baby over at GA last year, but now she's out of the closet, all purdy-like along with my new portfolio, so I can't resist showing her off over here. Made in Max with realtime specs in mind, this portfolio piece ended up taking a lot of time, much of which went into rendering, but I'm pretty happy with the way it came out. More details and stuff on my page, and all comments welcome. Cheers!

DN_Corner_Signal_1490x745.jpg
DN_Fullview01_1490x745.jpg
DN_Upperwall_1490x745.jpg

Replies

  • Gannon
    Options
    Offline / Send Message
    Gannon interpolator
    looks sweet, Love the lighting. I'd love to see a full map like this in UT3 or even HL2-DM. Love the lighting variations.

    cheers =)
  • rasmus
    Options
    Offline / Send Message
    rdmlegend: Thanks man. I actually set out to do this in UT3, but the bastard editor wouldn't run on my scrap-metal laptop :P
  • Peris
    Options
    Offline / Send Message
    Peris polycounter lvl 17
    Looking really cool =), is this made with game specs in mind? I'd love to see it in a game engine! Not a big fan of the slight color channel offset i'm seeing here and there.
  • rasmus
    Options
    Offline / Send Message
    Hey Peris - thanks for an inspiring Unearthly entry! Yes, this is all made with game-specs in mind. I'll post a wire. Lots of decals though. Don't like the color offset? But chromatic abberration is the new lens-flare! ;)

    Fullview_FlatWire.jpg
  • Kevin Johnstone
    Options
    Offline / Send Message
    Kevin Johnstone polycounter lvl 19
    Theres a really nice consistent sense of scale and realism in this. The scene has focal points of background interest that seems natural whichever part of it you look at.
    I think a lot of people try to make things run down by throwing too much noise and clutter at it, you've been very disciplined about your placement of things.

    I like that there is a controlled depth and sharpness to the textures also, it helps communicate the scale further when you see that its a little beaten up when you get closer to a surface but its subtle enough that each texture seems bold and clear from a distance.

    The Lighting is rendered in the same frugal fashion, seems like each light source picks out another area in a natural fashion and lends mood.

    So aye, fantastic work!
  • DrillerKiller
    Options
    Offline / Send Message
    DrillerKiller polycounter lvl 11
    nice work. what did you use to render this?
  • rasmus
    Options
    Offline / Send Message
    That's sharp, eloquent and flattering all at once, Kevin - thanks ;)

    DrillerKiller: Thanks - I used nothing but Max standard stuff, faking bouncelight with omni's and whatnot in a few places, with some simple atmospheric stuff to boot.
  • DrillerKiller
    Options
    Offline / Send Message
    DrillerKiller polycounter lvl 11
    id you dont mind me asking, how did you get the color fringing, chromatic aboration?
  • Peris
    Options
    Offline / Send Message
    Peris polycounter lvl 17
    whoa, i really like how much ambient lighting is painted in and the use of decals for that aswel. It's something a lot of prop and environment artists don't care about anymore.. expecting the game engine will do it for them. great work again!
  • rasmus
    Options
    Offline / Send Message
    DrillerKiller: Not at all - that's just post in Photoshop, the filter is called Lens Correction. I tried not to do anything in post that isn't being done in an existing game engine though - Valve recently did a featurette on Left 4 Dead's post fx, and I managed to google up an engine that did the abberration-stuff. Basically I wanted it to look real, and it really helps to sell the illusion of a shitty camera, as well as adding to the intensity of bright and hi-contrast areas. I set it up so that a single action in PS would execute a number of things, like grain, bloom and the lens distortion - a poor man's version of afterFX and stuff like that I guess.

    Peris: Thanks again, glad you appreciate it!
  • EarthQuake
    Options
    Offline / Send Message
    Sense of scale, lighting, cohesiveness in textures, all very solid stuff.
  • adam
    Options
    Offline / Send Message
    adam polycounter lvl 19
    Overall looks awesome. This is a problem with a lot of games, but because your shadows don't blend with one another a lot of the scenes in night time or with long shadows look like they have floating props. The very first image especially, the stuff on the wall perpendicular to the camera hasn't a lot of depth to it.

    It would have been nice to see shadows or occlusion in those shots but otherwise its a fun scene :)

    EDIT: Would be cool to see some of your texture work if you have the time. In this shot here, the plaster following the arch way looks like it was specifically painted for this piece, which is a large piece compared to others in the scene. Makes me think its uniquely unwrapped, which makes me wonder its resolution. Likely nothing too high, I'm just interested in stuff like that! :D
  • EbolaV
    Options
    Offline / Send Message
    EbolaV keyframe
    wow really cool environment. nice texture and decal work... light too man a lot is nice here. but one thing i asking me. makes that airconditioner much sense? that one under the railing, hope you know what i mean. But its cool stuff i need to study it a while to see why its so amazing :thumbup:
  • rasmus
    Options
    Offline / Send Message
    EarthQuake: Thanks a lot - if you ever need help at 3point... ;)

    adamBrome: I agree, that's one thing that's bugging me. In the end though rendering was killing me, so by the time I noticed I just couldn't be bothered fiddling with the lighting again, or adding even more decals to help those poor props out a bit :p

    EbolaV: Thanks :) And you know, sometimes "Because it looks cool" is the operative word ;)
  • adam
    Options
    Offline / Send Message
    adam polycounter lvl 19
    I have other questions for ya:

    -Did you do any highpoly work for this? If so, lets see!
    -How long did this take you?
    -Average texture size?
    -Inspiration?
  • EbolaV
    Options
    Offline / Send Message
    EbolaV keyframe
    ok then its accepted :) yeah what adam asked would be really interesting.
  • rasmus
    Options
    Offline / Send Message
    adamBrome: Fire away!

    I have some more info and shots on my page, but I realize not everyone can be arsed to go there :) I did hipoly work for most things - I set out wanting to model and render wall and floor textures, and pretty much all the props have been baked from hipoly meshes. I just never get around to showing that kinda stuff, but I'll see what I can do.

    As for time, I was working on this on and off for 2-3 months, plodding along and taking my sweet time - lots of balancing, adjusting, and a ton of slow, painful rendering. Props and stuff though I usually whip up in a day or two a pop - it's the experimenting and polishing that takes time.

    Largest textures sizes are 4096x2048 (for the green end-walls and the barely-seen ceiling arch, as well as the interior corridor). Other than that the average size is probably 1024x1024, but again, my website will show you this in more detail.

    Inspiration comes from many things of course, alot of it probably subconscious, but mainly this thing got set off by walking along a canal in Paris last summer. From there I just expanded and made it my own, but the brown rusty half-pipes are still intact from the real thing.

    Happy to blab on about this all night as you can see, so fire away if there's anything else :)
  • DrillerKiller
    Options
    Offline / Send Message
    DrillerKiller polycounter lvl 11
  • adam
    Options
    Offline / Send Message
    adam polycounter lvl 19
    I looked on your site and saw a lot of normal maps that looked like they were baked from an image, rather than a highpoly mesh. (No samples of the meshes on your site also had me thinking that.)

    Could we see some of the highpoly meshes?

    EDIT: Check your IM's as well, top right of Polycount
  • sir-knight
    Options
    Offline / Send Message
    sir-knight polycounter lvl 10
    here's a noob question for you :D

    On the archways, are those keystones/stones just intersecting geometry onto the wall?
  • vik
    Options
    Offline / Send Message
    vik polycounter lvl 13
    Nice textures &lighting, not too fond of the chromatic stuff tho, looks strange on my main monitor. But nice work nonetheless :)
  • ScoobyDoofus
    Options
    Offline / Send Message
    ScoobyDoofus polycounter lvl 19
    Don't like the color offset? But chromatic abberration is the new lens-flare! ;)

    You said it buddy... I hate that effect.

    That said, your scene looks pretty rad!
  • rasmus
    Options
    Offline / Send Message
    No more talk about lens distortion - if you don't like it and it really really hurts your eyes, you know you're alive :)

    adamBrome: yep, getting the hang of spamming people on the IM, thanks :) And yeah, that green wall you mentioned is painted in place, at 4096x2048. Trying to dig out some hipolys to convince you they exist, but you're gonna have to wait :)

    sir-knight: Yep, I just reused the same stones from the main wall texture, each on separate quads aligned in an arch. So they're not even sticking out, they're totally flat, but the normals help them out. It was a quick and dirty solution that stayed.

    vik: Thanks :)

    ScoobyDoofus: Thanks!

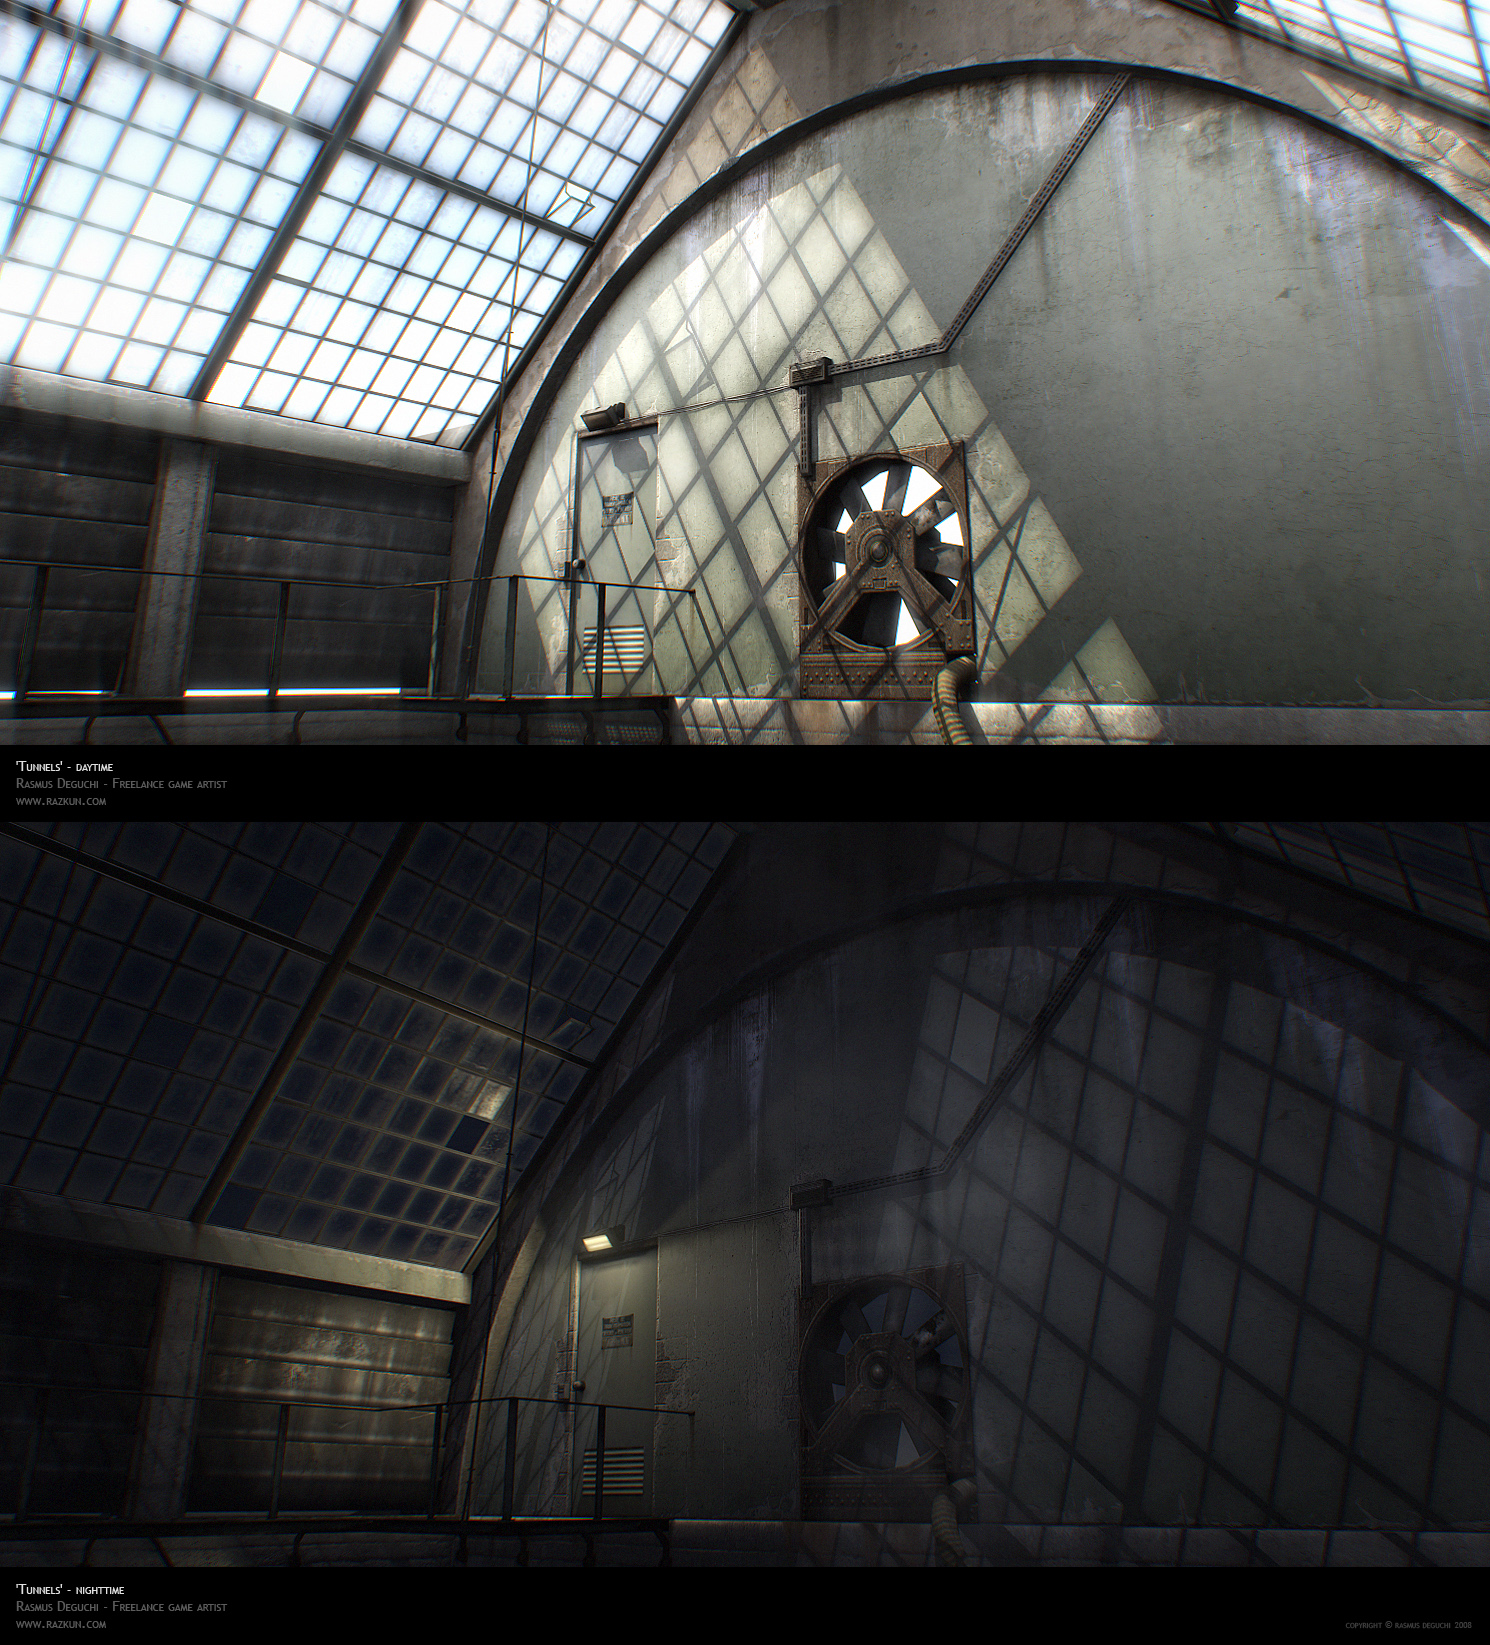
    Here's a detail shot just to break up the onslaught of text:
    content_Tunnels_15.jpg
  • JordanW
    Options
    Offline / Send Message
    JordanW polycounter lvl 19
    nice and clean, lighting is really nice.
  • PixelMasher
    Options
    Offline / Send Message
    PixelMasher veteran polycounter
    awesome work man, I really like the prop presentation on your website, looks great.
  • DInusty
    Options
    Offline / Send Message
    DInusty polycounter lvl 17
    pretty awesome. keep goin i would love to see this in a game engine sitting there in idle. you know the fan spinning slowly, rays of light shifting with dust floating within. looks great!
  • pixelherder
    Options
    Offline / Send Message
    pixelherder polycounter lvl 18
    i really liked these images when i first saw them, and i really REALLY liked them when i saw that they were game engine spec not full on "polygons-are-no-object" type renders.

    fantastic work - i particularly like the night time ones, great understated mood...
  • carlo_c
    Options
    Offline / Send Message
    Just gotta echo awesome work on these, your website is really nice and easy to navigate and I like how everything is presented.

    Little over the top with the chromatic-ab i feel but everybodys doing it lol :P
  • SHEPEIRO
    Options
    Offline / Send Message
    SHEPEIRO polycounter lvl 17
    really nice, very cleanly worked dirt
  • PeterK
    Options
    Offline / Send Message
    PeterK greentooth
    That looks "real". You did a fantastic job, I love the lighting and subtle normals.
  • Saidin311
    Options
    Offline / Send Message
    Saidin311 polycounter lvl 11
    Love it man, and thanks for putting the additional info on your website!

    If it's not so much of a headache do you think you might be able to post a closer wire shot of the bricked archway/waterway? The one that we're facing in the wire shot. I'm just curious as to whats floating, whats a decal and whats part of the main arch geometry.

    Sweet stuff, thanks for showing it off!
  • misterboogie
    Options
    Offline / Send Message
    misterboogie polycounter lvl 11
  • Jeremy Lindstrom
    Options
    Offline / Send Message
    Jeremy Lindstrom polycounter lvl 18
    looks good reminds me of the final tunnels in xXx then the boat goes out there and then the gate comes down.. :D
  • rasmus
    Options
    Offline / Send Message
    JordanW, Pixelmasher, Frozan, pixelherder, carlo_c, SHEPEIRO, Peter K: Thanks guys, glad you like it. Hopefully I'll get around to rendering a little cinematic so you can soak up the atmosphere more :)

    Saidin311: Thanks, I'll work on getting wires for all the views on my site, so pretty soon you should be able to see better, but basically the stones around the arch are floating on the wall.

    misterboogie: LOL :D

    Dekard: Haven't seen that one, maybe I should give it a look :)

    adamBrome requested some hipoly meshes, and here's a few:

    Hipoly_Props.jpg
    Hipoly_Walls.jpg

    Not the most exciting stuff in the world :) For the walls/cobbles I basically used world-space procedurals to displace my bricks, and rendered out a diffuse map along with the other maps coloring the different elements for easy separation in Photoshop. All small details were then done with the Nvidia filter. The fat slabs around the edge are actually mapped around the lowpoly geometry, baked around a 90 degree angle - something I wanted to try out that worked ok. Next time I'll try Zbrush for this kind of organic stuff. Thanks for watching!
  • Saidin311
    Options
    Offline / Send Message
    Saidin311 polycounter lvl 11
    Sweet man looking forward to updates on your site. Another followup what kind of polycount are you talking about for those bricks. Every time I try something like that in max the thing chugs at like 2.5 frames because of the sheer number of turbosmoothed bricks!
  • indian_boy
    Options
    Offline / Send Message
    that's pretty amazing man
    like
    pretty damned amazing

    thanks for showing ur work process and stuff too. its always helpful

    cheers!
  • imb3nt
    Options
    Offline / Send Message
    imb3nt polycounter lvl 14
    very inspirational stuff. Great work! :thumbup: :thumbup:
  • adam
    Options
    Offline / Send Message
    adam polycounter lvl 19
    Thanks for posting, the highpolys are nice and simple. I almost think the highpolys could have been skipped for this and you could have done all of that information using Photoshop and CrazyBump/nVidia. Save some beveled edges, its primarily nuts & bolts and some 2pixel edges here and there. (This is something I would also fault on, but now spend time to ensure I am getting things out of the highpoly that I should wouldn't get using a 2D method).

    Some of the texture resolutions you posted are questionable (4096x2048 for a wall that likely would have been as effective with smaller, tiling, textures and decals, etc). I also noticed the brick textures you're using have the shadows baked in the colour map. And while I think that in the end this sort of nit-picky detail is lost on the end-user, there is a definite discrepancy when a texture uses normal maps to render height details but also have a shadow baked on. Left 4 Dead environment textures would self shadow themselves using height info from the normal maps. Perhaps, if its what you're after, researching some more in to this for your 3D app of choice (Max?) might be something you could utilize.

    And, speaking of Left 4 Dead, you reference L4D using lens correction but I think they only used it in special instances when the flare from a friendly flashlight was perpendicular to your screen. At least, thats when its overally noticeable. In this scene, and especially on this monitor compared to the one I used when I originally saw these, it seems overly done. It's almost to the point that the effect takes away from the quality of the artwork.
  • shotgun
    Options
    Offline / Send Message
    shotgun polycounter lvl 19
    JordanW wrote: »
    nice and clean, lighting is really nice.

    yes, my sentiments exactly.
  • rasmus
    Options
    Offline / Send Message
    indian_boy, Imb3nt, shotgun: Thanks guys, thank you for watching.

    Saidin311: I know what you mean, it's a bit of a drag. Especially if you have displacement that wants to recalculate everytime you move something :) I think this came to 1.2M polys, but each section was separate. I haven't even tried Turbosmooth, I just sub-divide in Edit Poly.

    adamBrome: Normals-wise I'm happy with my workflow, getting what should be gotten from the hipoly's and quickly and easily adding everything else in PS. This way I have a base layer of baked normals (beveled edges and large shapes), and can then add the rest from a bumpmap - and let's not forget how important getting good AO from the hipoly is, which is hard to get any other way. While Crazybump is one crazy program, it can't substitute for a hipoly model when it comes to props.

    As for using slightly baked-in shadows in textures, I firmly believe that this is the way to go. Anyone saying differently is either a coder, or a communist ;) Seriously, normals on a surface don't do anything when that surface is in shadow, and if I switched it off in all the textures in this scene, it wouldn't look like much. And really, is there anyone these days that doesn't use baked AO in their textures? Ofcourse there will be up and coming technologies to do stuff in a more realistic, dynamic way, but until then I'd say it's a basic necessity. What you're saying from Left 4 Dead sounds really cool - more stuff like this is what we need, though it sounds like even this relies on a direct light source. More than anything though I would have liked to have it in a proper engine, as the shader stuff these days is surpassing what Max defaults can render (like nice offset mapping for my bricks).

    I was not referencing L4D regarding lens distortion, which I don't think they do, it was an article on other post-fx like local sharpening, vignetting, filmgrain etc.

    As for texture resolutions, well, sue me :)

    Thanks for your comments!
  • stimpack
    Options
    Offline / Send Message
    stimpack polycounter lvl 10
    these are fun! really fun! on a side note, with current techs that are hitting the market. That texture size is acceptable =) In the end, if it looks good, and fps stay up, the rest doesnt matter!
  • OBlastradiusO
    Options
    Offline / Send Message
    OBlastradiusO polycounter lvl 11
    Simply Excellent Rasmus. Very inspiring work and I appreciate the tips your giving out. Send more TIPS!! MORE TIPS!!

    Edit: What method did you use to bake the normals from the tiled cobble brick image you have posted. Was it the Max RTT method, XNormal or another method? I'm betting the RTT method.
    Also did you make the brick in Zbrush or Max?
  • adam
    Options
    Offline / Send Message
    adam polycounter lvl 19
    Normals-wise I'm happy with my workflow, getting what should be gotten from the hipoly's and quickly and easily adding everything else in PS. This way I have a base layer of baked normals (beveled edges and large shapes), and can then add the rest from a bumpmap - and let's not forget how important getting good AO from the hipoly is, which is hard to get any other way. While Crazybump is one crazy program, it can't substitute for a hipoly model when it comes to props.


    IMO, what you had shown from the models doesn't really benefit much to the normal maps, but baking AO from them I can see.

    As for using slightly baked-in shadows in textures, I firmly believe that this is the way to go. Anyone saying differently is either a coder, or a communist ;) Seriously, normals on a surface don't do anything when that surface is in shadow, and if I switched it off in all the textures in this scene, it wouldn't look like much. And really, is there anyone these days that doesn't use baked AO in their textures? Ofcourse there will be up and coming technologies to do stuff in a more realistic, dynamic way, but until then I'd say it's a basic necessity. What you're saying from Left 4 Dead sounds really cool - more stuff like this is what we need, though it sounds like even this relies on a direct light source. More than anything though I would have liked to have it in a proper engine, as the shader stuff these days is surpassing what Max defaults can render (like nice offset mapping for my bricks).
    Baking AO and including drop-shadows in a texture are two entirely different things.

    The problem with baking in shadows is that texture is now locked in to one orientation. You cannot rotate in any other way (re: blending, or if you wanted some variation so you flip it, etc) and thus reduces its usability. I suppose if you always plan on using a particular texture orientated in one specific way (like for your scene here), its fine, but generally its best to go for optimal usage out of world textures rather than one simple direction. That's been my experience, anyway.

    As for texture resolutions, well, sue me
    While I certainly won't sue you (..er) I will point out that you stated you, "Made in Max with realtime specs in mind" yet utilize some extremely high-res textures for something as trivial as a plastered wall with grime and chipped corners.

    The overall piece is really nice, I just think from past experiences there's some execution discrepencies and faults in what would be acceptable for a real-time environment.
  • Generalvivi
    Options
    Offline / Send Message
    Generalvivi polycounter lvl 14
    This is awesome stuff man! Love everything about it!
  • EarthQuake
    Options
    Offline / Send Message
    adamBrome wrote: »
    Thanks for posting, the highpolys are nice and simple. I almost think the highpolys could have been skipped for this and you could have done all of that information using Photoshop and CrazyBump/nVidia. Save some beveled edges, its primarily nuts & bolts and some 2pixel edges here and there. (This is something I would also fault on, but now spend time to ensure I am getting things out of the highpoly that I should wouldn't get using a 2D method).


    Theres so much that you cant get out of just a simple bump map, like the actual surface normals from a larger shape of the highpoly, that suggesting he could have had the same results doing it all in PS is just silly. Sure, you can add some bolts in photoshop, but guess what, you can add them even faster in your 3d app, and bake correct normals, AO, and also have them properly stretched/distorted on your uvs, something you really cant do in PS. So the little advantages to doing stuff in PS are really null, unless it takes you 2 days to model and instance a bolt.

    Just because you have what are seemingly "simple" props, does not in any way negate the advantages of doing a proper highpoly. On the contrary, because these are just simple props, it should be very quick to whip up the highres mesh as well. The things that i like to use PS to do, as far as normals, are stuff that would actually take a lot longer to do in 3d, like some intricate pattern, or adding some noise overlays, etc. That sort of stuff is really the only thing i would suggest doing in 2d these days, as it can be a waste of time, and resources to add them in 3d.
  • rasmus
    Options
    Offline / Send Message
    adamBrome: Yeah, I realized afterwards that you probably meant the baked direction of the shadows in the cobble-texture - excuse my rant. Normally this wouldn't make sense for the reasons you stated, but since I knew exactly where it was going to be used I decided to try it.

    I see your point on calling me on the specs for the green wall there - it is probably overkill. On the other hand I could argue that spending that attention on it makes it anything but trivial :p

    Stimpack, Generalvivi: Thanks guys!

    OBlastradiusO: Thanks, really happy to inspire. Always happy to hand out tips if I can, so just ask. I used Max RTT, making the bricks with noise modifiers or procedurals as displacement.

    EarthQuake: Yep.
  • A-Train
    Options
    Offline / Send Message
    A-Train polycounter lvl 15
    Rasmus, nice work!

    You mentioned you created it for real time, any chance of seeing the wires and the texture sheets?
  • 00Zero
    Options
    Offline / Send Message
    on your website, where you break down the assets tri counts/texture sizes, i really like the last one, with the boat and the buoy. its a very neat composition.
Sign In or Register to comment.