urban environment WIP
polycounter lvl 11
Hi everyone,
heres stuff Im working on right now.
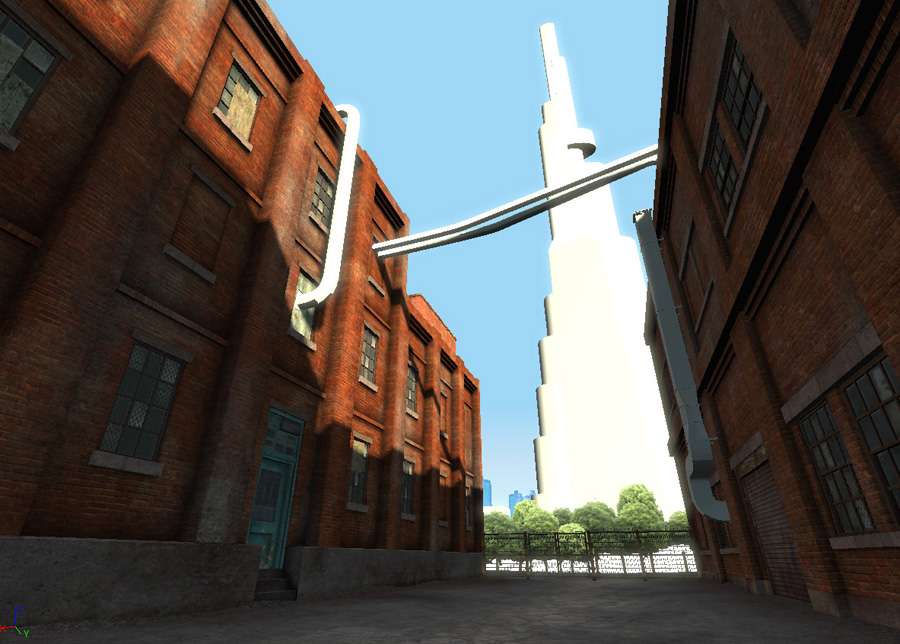
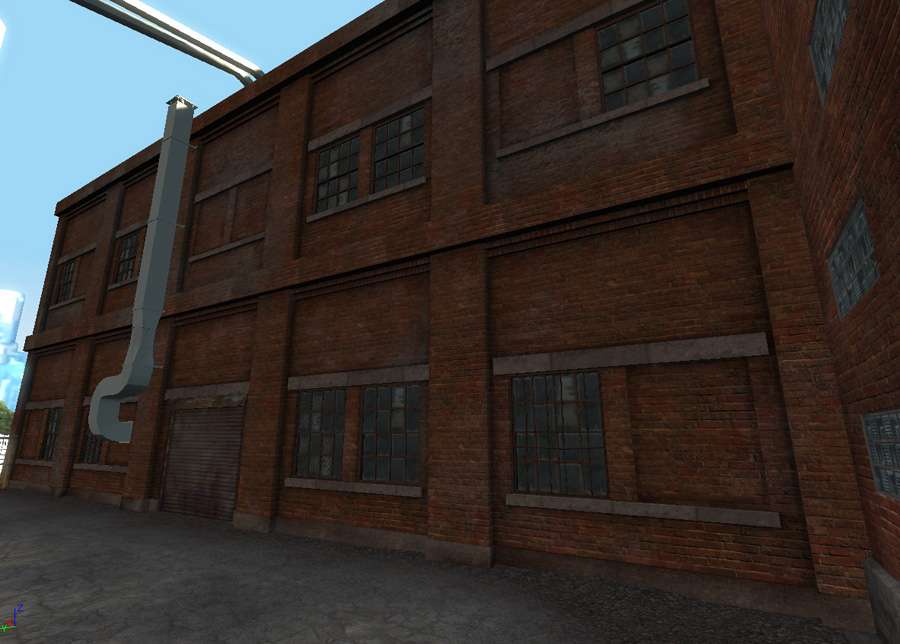
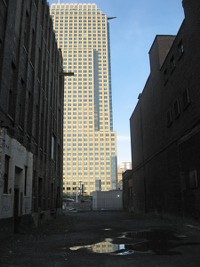
Ive done general structure of buildings that are close to spectator with their main shaders. Theres only diffuse pass. Spec, normal, environmental maps are not there yet.
Background stuff, skyscraper and some objects inside player area are still untextured or have some temporary quick texture. There is also some shadow map problem on some untextured faces, sry
More props and dirt/graffiti decals are still to come")
Shots are done in UT3:
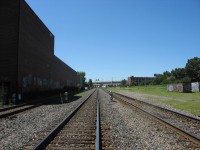
And here r some photos that I did a while ago that I used as idea providers and some inspirations:
heres stuff Im working on right now.
Ive done general structure of buildings that are close to spectator with their main shaders. Theres only diffuse pass. Spec, normal, environmental maps are not there yet.
Background stuff, skyscraper and some objects inside player area are still untextured or have some temporary quick texture. There is also some shadow map problem on some untextured faces, sry
More props and dirt/graffiti decals are still to come
Shots are done in UT3:
And here r some photos that I did a while ago that I used as idea providers and some inspirations:


Replies
a touch more spec on the glass aswell
the puddle in the photo would provide a good focal point, possibly reflecting the skyscraper
The panoramic buildings in that 3rd pic are too low res and lit weird. You may get better results modeling some simple buildings and putting them in your skybox. The tress are also too flat. Model out some simple trunks and use a few leaf planes.
Those two long rectangular things going across the buildings, although temp, don't look right. You could model some sets of wires strewn across to generate vertical interest.
I'm pretty sure the pipes going from one building to the next are just blocked in, but don't forget they normally are hung or sit on some kind of support.
Also don't be afraid to change up the buildings materials. Not all buildings are built at the same time or use the same construction methods.
I'm also not sure how modular your pieces are?
Shepiero, thanks, I agree about spec on windows and more props. My next step will be doing more props
FunkaDelicDass, lol, yes it sometimes a mess with some objects. Most of them r now just as placeholders, so that later i can just import new meshes and stuff but the composition will be already in place.
Vig, thanks man, definetely more grunge
I started my buildings by doing several modular pieces but when i was more or less happy with them i merged them into one mesh per building and added some stuff to connect them together:
The benefits of working with modules comes into play when you export a handful pieces and arrange them in UnrealEd to be an entire city block. Exporting one big mesh could lead to performance issues and wasted resources.
Since most of the brick around the windows is the same, you can break that down into one or two variations. Then take the window variations and make separate props.
You should also think about turning the window ledges and trim into separate props using all 4 sides as different variations. 4 pieces of window ledge for the cost of one prop, pretty sweet deal.
Things like the street could be handled by UnrealEd's terrain generation and it would probably allow for better faster player interaction then a large custom prop?
at work i would do what hes done, as this would actually allow me greter flexibility and helps the lighting no-end
edit-but as its for Unreal ill shut up ;-)
I agree, Vig, regarding splitting into many peices cause this saves memory and many ohter things.
In my current case I just want to concentrate on visual look, so i dont think as if this would be a part of a giant level, but just this piece, and so I cheat a bit
For example, since each building is one mesh (ecept 4 small details like grids and decals -in future-) I have several map channels on them. Some of map channels stay same as i did them for modular pieces but some take into consideration whole surface of final wall. Such a mapping is used by masks to mix several shadrs for example.
Street piece is very small so 4 me it was faster and better to do it as a mesh and use vertex color to mix textures.
So since it is not a big level production, i prefer not to do many small instances in this case because i need speed and flexibility, but I agree with this as the way to do stuff for many real levels.
SHEPEIRO, no props yet
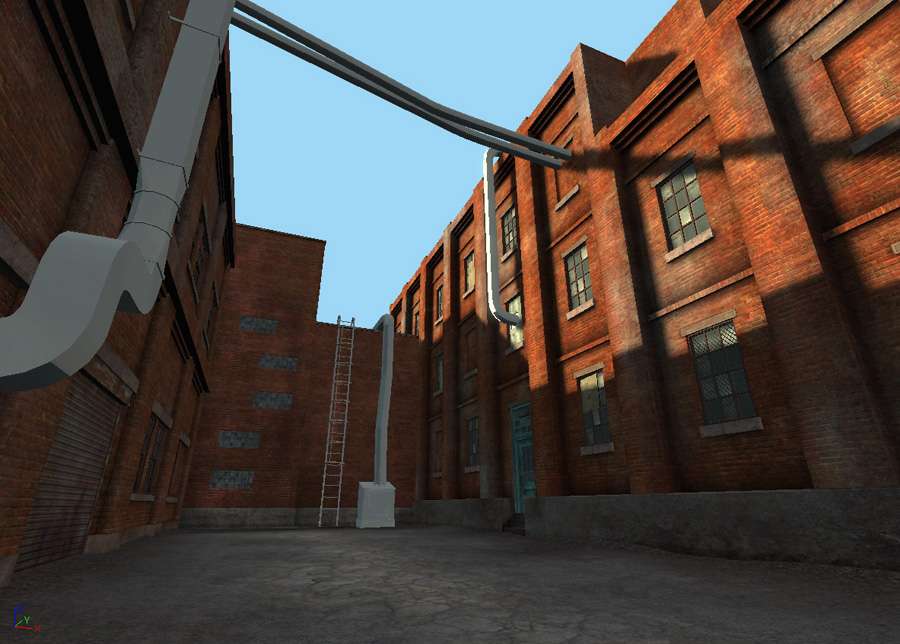
Major changes: added more material variety to buildings, plus some additional major objects like exterior elevator and modified yet untextured pipes:
lol, after a looong break finally some more updates :P
I redid one section of building group (once again, that's why it took so long - i feel demotivated when i redo things several times but i'm glad now lol):
Also i added and textured (again, diffuse only by now) several pipes though i am still experiencing some shadow issues, so sometimes shading looks odd:
Also i followed suggestions regarding transparency for windows, so now elevator and buildings have some basic shapes inside and window glass is a sort of "dirty semi-transparent" :
Now after i reworked the damn dead end section i think my progress will go faster...
gamedev, i actually wanted them to be haphazardly placed in this place, i hope that doesn't look messy :P
Ok, going on now with some props.
This is a rubble pile messy thing
Got one more tiny update
Btw, since several people keep asking about textures and mapping I'll make a post about it next time, just gotta go to sleep now :P I wanted to do so before but i always forget
For now i retouched rubble pile by making bricks' color fitting more the nearby building (i already got used to that color so tell me if u see that it doesn't quite fit), added more 3d bricks and made 2d brick patch smaller and a bit more subtle:
and also i did several wooden em... things
thanks again for any critics u might have or had
As promised, here i got some breakdown of texturing. Basically, nothing new, just got different approaches from several people whom i saw sharing their techniques on the web.
I need to split this in 2 parts cause otherwise i can't post it
1)--
The building starts with a couple of modular pieces that are mapped individually but they use tiled textures because this way I could keep texture res lower but get more detail by tiling it. However, edges of modules that touch neighbour module were mapped so that their UVs are 1 or 2 or 3 etc. In this case there won't be a seam between modular pieces:
Each piece also has another channel for basic ambient occlusion bake. UVs of all different pieces are combined within 1 texture space:
When pieces are combined together into a building and imported into Unreal with only 1 base diffuse texture it looks like this :
Then, using the same brick texture it is possible to create several color variations of it in order to mix them later using vertex color or image mask. In my case each color variation looks like this:
Next, there is a third texture channel that is just a planar map over the whole facade and is used to apply an image mask. Looks messy on some polys due to the mapping plane being parallel to the whole building but it wont bother in this case:
Now, using Linear Interpolate for brick color variations one can get something like this (2 color variations used):
After, I added vertex color in order to mix this with another texture. By using vertex color one can mix up to 4 things (2 with, say, red channel and then next 2 with remaining blue and green). In this case i did only 1 mix since that was sufficient i guess:
and that's the second texture I used. I did not care too much about the pattern cause it appears only in several spots so repetition won't be too evident:
And here is the result of all texture blendings:
Plus I multiplied AO at the end:
And that's how my node tree looks for the diffuse channel:
On top of everything, there is another unwrap for shadow map where needed.
And these are several tileable textures that I used. Most of them are done from those available on cgtextures or environment-textures plus some of my photos, nothing original here :P
The ground texturing is done by mixing 4 textures through vertex colors.
Also, great explanations there. Thanks for sharing that! It's nice to hear some exact technical explanations as sometimes things can get lost in translation. Saved to my reference folder for sure!
I'm curious about the AO stuff in Unreal. Are you using a lightmap as well? Whats the purpose of the texcoord node on that AO bake?
edit: I also really like the shapes of that building in the background. I was checking out the progress of the Burj Dubai the other day and was reminded of your project here.
edit2: I also don't understand that pink and multicoloured texsample node that comes on the two colour variations. Where did you generate that from?
One question, do you import the modular parts into UE3 and snap the building together in the editor or would you export it out of max as a buiding?
Saidin311 -- u r right, in general it is a skylight plus 1 main directional light (for the sun) and a couple of secondary directional lights to make a sort of bounced and reflected rays. Anyways, I am changing the lighting theme right now so it won't be the same but the setup principle stays the same.
AO is baked in max using Sky light and Light Tracer (can be done with mental ray AO shader as well). AO is multiplied with the Diffuse in UT3. Shadowmaps r engine generated. Some meshes still receive vertex lighting though. The Tex Coord node plugged into AO is to use the second UV channel. About the Dubai, lol, honestly, i was actually using that as inspiration
The "multicolored' textures are actually AO and different masks that are combined in one texture. Such a texture is used to store up to 3 different B&W images - each image goes into one of RGB channels. This way one can have 3 textures for the price of 1
U can check that in tutorials from Eat3D.com - great source about UE3.
carlo_c -- i assemble buildings in max because they r modular only in terms of geometry, but the vertex color and image mask are applied over the whole building.
JohnnyRaptor -- it is around 130 megs
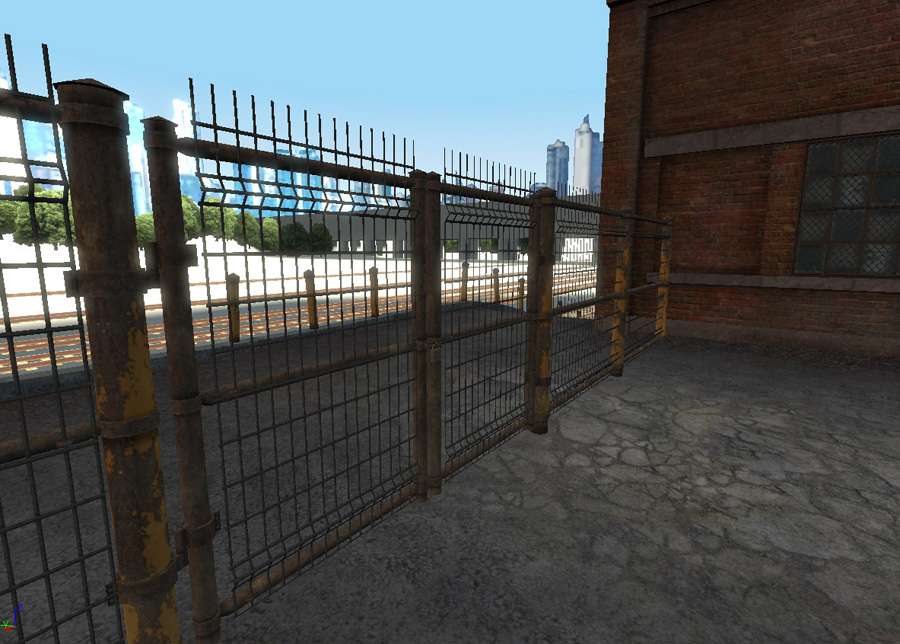
...a HUGE question to all possible Unreal folks How to get the masked opacity being calculated during static lighting build cause now my wire fence casts solid shadow even where there is opacity mask in my texture
Here is a general overview of what i am after (hopefully:) )
I also started adding some spec and normals (ground and rubble pile, woodn beams and other small props):
And also i mostly finished some basic interiors by adding neon lights and a bit more shapes inside:
As for alpha shadows. Not 100% sure but I've seen it done before.
http://boards.polycount.net/showthread.php?t=51687&page=141
about 6 or 7 posts from the bottom. He also explains how he did it on the first post of page 142. I think it has to do with setting the lighting component of the static mesh. I haven't done it myself though so I don't know the process.
As for the shadows I think playing with the light map settings maybe with the dynamic lighting setup would help. Haven't gone too far into it. The chain link fence so far has a whole shadow.
Looking good.
But as far as the pure max workflow is concerned,the building could be a single mesh,but again it might pose problems in the engine,as the entire mesh has to be rendered in a single draw call.
You could try and separate the buildings and then export to unreal for a more effiecient performance.Or if this is just for showcasing the art,this is fair enough.
Vj
Pliang, I'll probably just do a real 3d wire and put behind the fence for shadowmap bake and after I'll just delete it and leave low-poly opacity based fence. I just didn't find any option that could enable correct shadow casting from opacity-masked textures.
- vj_box, as far as i know about UnrealEngine, splitting model into repetitive pieces is intended to save on memory and to add flexibility for level designers. What concerns rendering, actually less objects render faster than bigger quantity of small objects even is total polycount is the same (considering that there is no dynamic lighting). In my case I still have smaller objects (props, some window elements etc.) but since i am just showcasing graphical aspect it goes faster if i assemble larger structures in max.
I added fire escapes:
Also quick illustration of lamp shader setup:
And some more rubble elements, like brick wall pieces and plywood piles.
Bricks' mesh is pretty messy, lol, I was experimenting with hi- to low-poly conversions but not 100% well :P
The fence shadows are a bit of a drag to. Maybe a light function to fake the cutout shadows.
Overall, good mate.
I have a question mostly out of curiosity. I'm setting up some ideas for an urban scene myself for my portfolio. When you do things like fire escapes did you unwrap that whole thing uniquely? I'm considering creating some sort of blanket rust metal and mesh/grate to apply to my fire escape rather than unwrapping a whole bunch of planes and boxes.
whats_true: i did add some bluish lights (outside lamps and sometimes inside windows), maybe it did not look enough though. I also wanted to have that sort of contrast that u mentioned but i don't want it to be too colorful. I want it still to feel sort of real so i don't want to push saturation of lights too much
EvilPixills : i haven't actually tried post-processing yet
Saidin311 : in my case fire escapes, pipes, grids and other large objects don't have their unique non-tiled unwrap like props or characters because otherwise it would result in huge textures.
But they do have their own textures (not essential to do that, i just did that for more texture variation).
Most of them are tileable in one direction in order to map them on long pipes or wires for example. For example I lighten or darken certain areas of a texture to add more definition to the edge of some metal element for example but i do it all the way throughout he texture so that it stays tileable. The way u described is close to that as well.
Meanwhile here is some update after my vacation time
I mostly finished the court area. Maybe some minor details remain to add or if you guys see some mistakes
I added cables, more rubble here and there, other objects, plants, normals and specs and a mirror. I struggled a lot with that damn mirror thing and for me it only works in the editor but it does to allow me to bake the map (which is not that big deal since i'm not doing a real UT3 map but still it is unpleasant).
Now the next step will be the background area
also some spec and a subtle environment map on windows:
Could you show some texture maps and sizes used? Me wants to know!!
@ SHEPEIRO: did u mean not to go with higher saturation? Or u mean saturate more lamps and reduse saturation ambient/sun lights?
Here I did a quick breakdown of some objects' texturing.
For other objects it looks similar. For architecture, as mentioned before, there are mostly multiple IDs that use tiled textures that are blended with image mask or vertex color.
Texture sizes are different. Walls mostly use 512 or 512x1024 tiled textures. Objects vary from 256 (lamps, bucket etc.) to 1024 or even 2048 (like big rubble pile but that can be reduced to 1024).
Nothing much new here but i hope that still can be of some help for those who r curious about texture stuff :P
good job man.
any way,keep up the good work.
Vj