Home 3D Art Showcase & Critiques

new character, spec map help

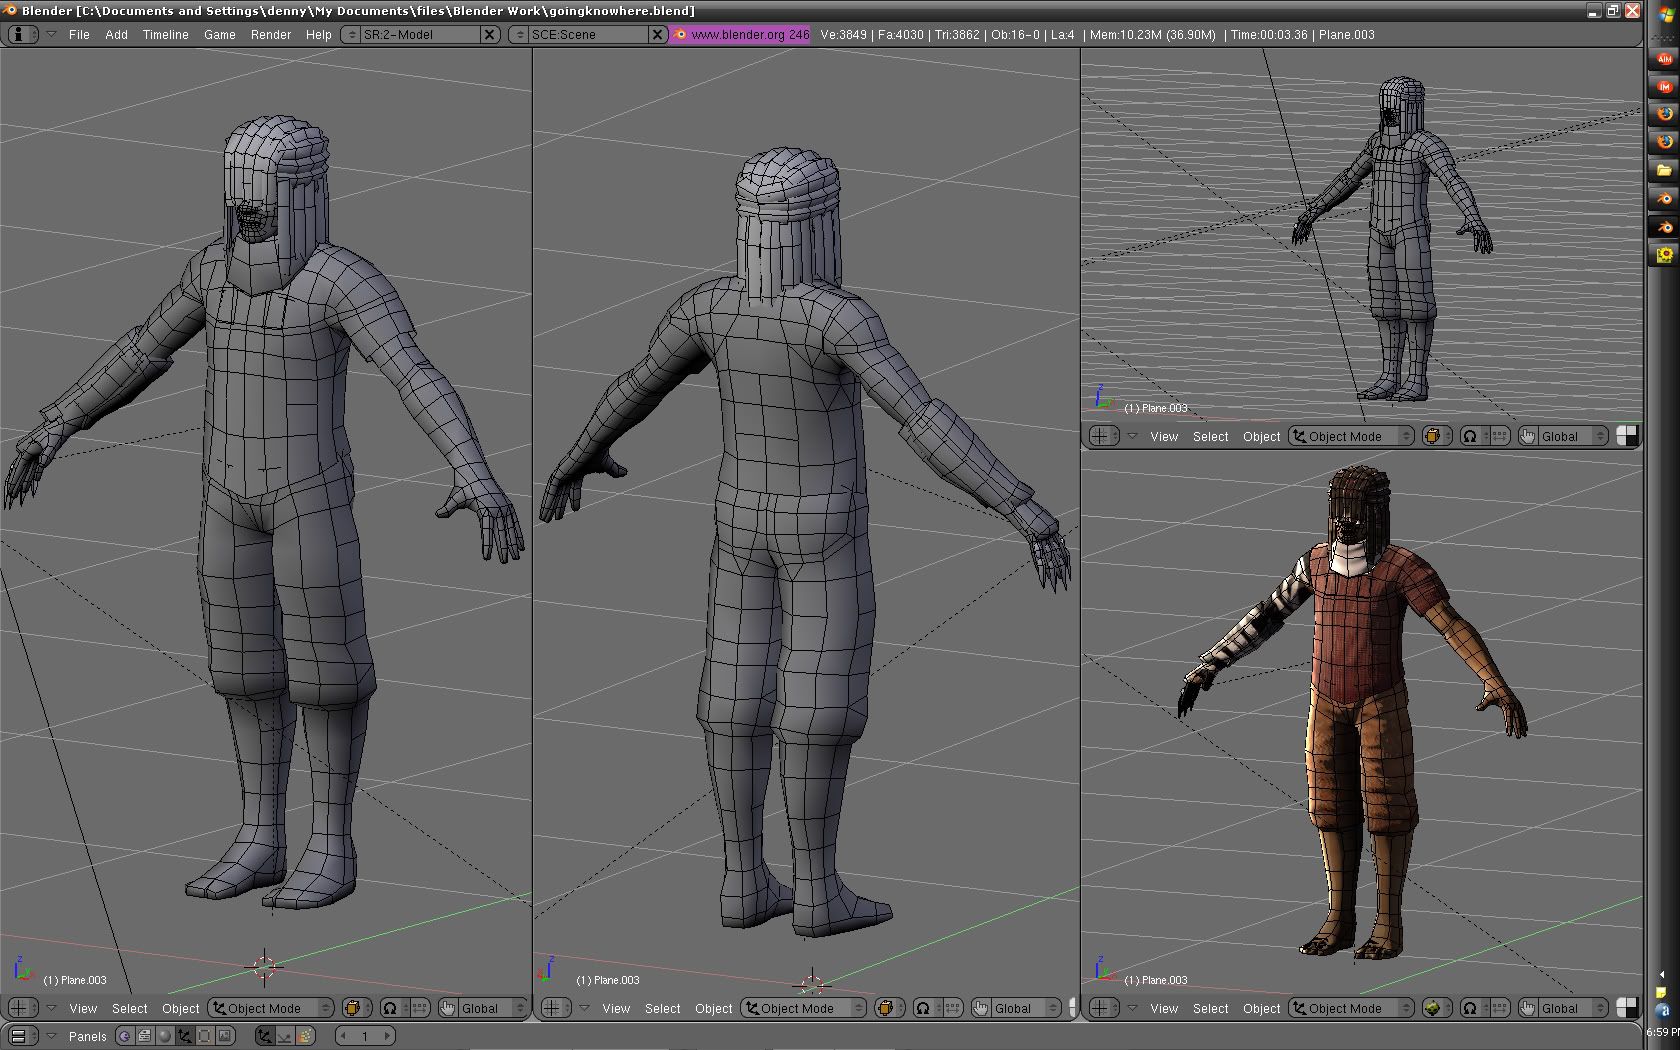
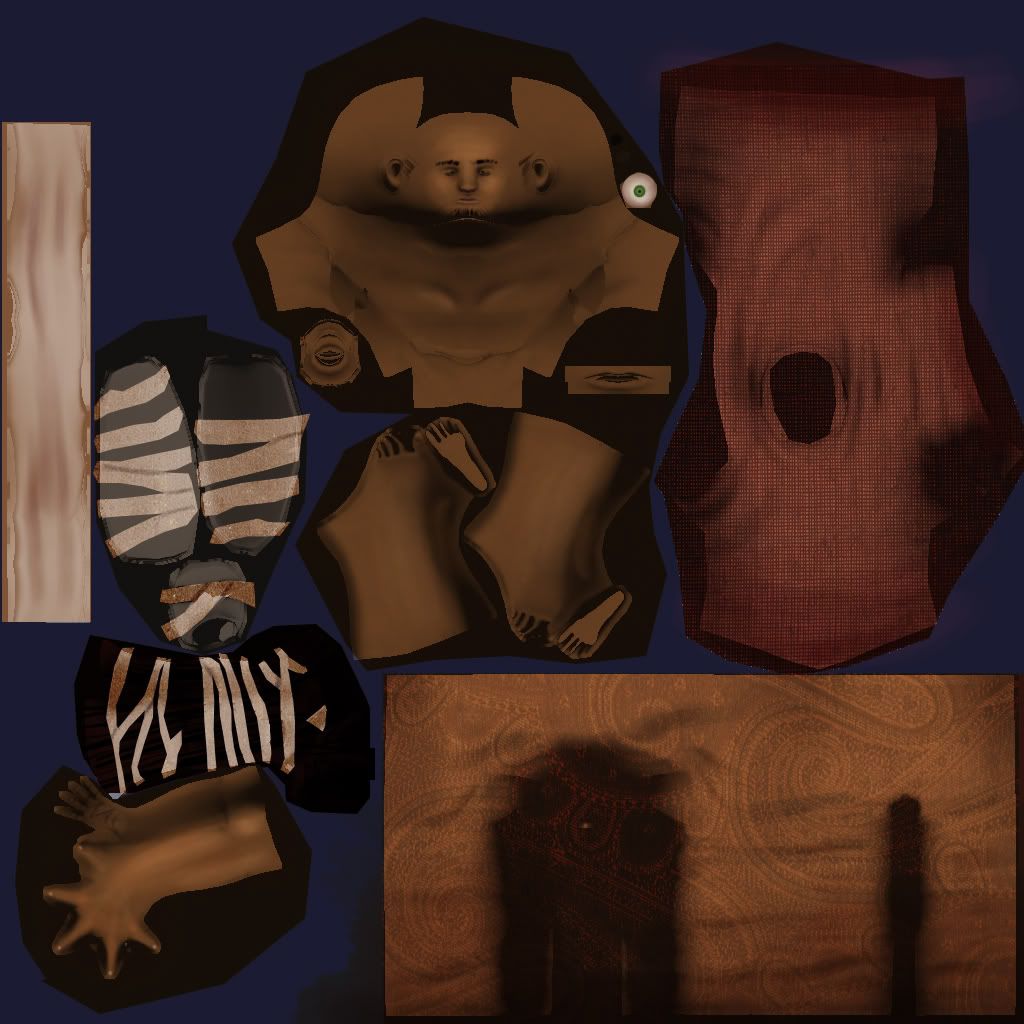
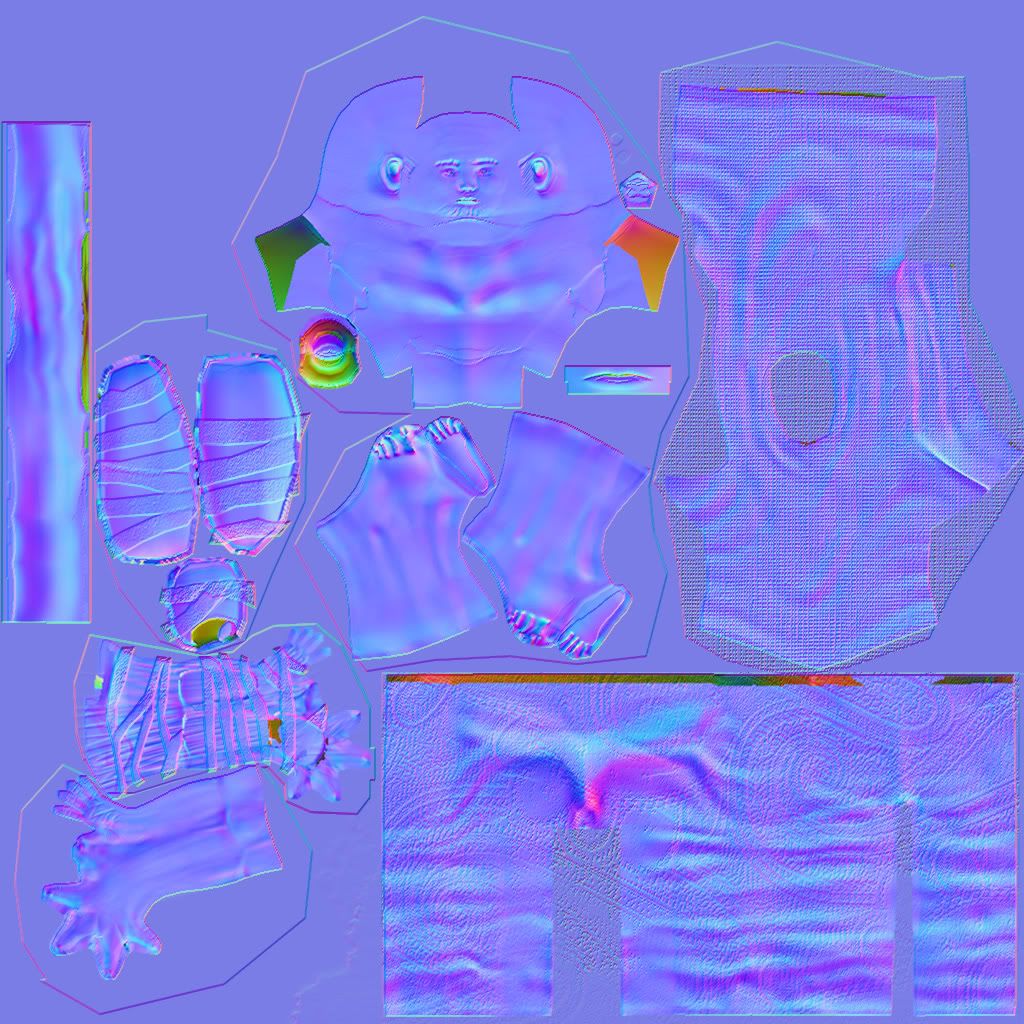
i've been working on this character for a while, this is the low poly + diffuse and baked normals
charWIP2.jpg
i'm wondering how to go about making a spec map? i have no idea where to start with that
char_diffuse.jpgchar_nor.jpg
everything's still a work in progress.

Replies

  • Squirmy
    Options
    Offline / Send Message
    Squirmy polycounter lvl 17
    how about a view with the maps applied
  • PolyHertz
    Options
    Offline / Send Message
    PolyHertz polycount lvl 666
    Immediatly reminded me of the Seekers from Panzer Dragoon Saga, though I doubt that was a point of reference (seeing as few people have ever played the game).

    critique wise, the model itself seems to have edges randomly missing all over. Try to make sure your mesh consists of only tris and quads, no 5+ sided faces. The texture is very basic, with little more then base colors, an ambiant bake, and a few overlayed textures scattered about. The normal map also seems to have some issues you'll want to correct.
  • Swizzle
    Options
    Offline / Send Message
    Swizzle polycounter lvl 15
    PolyHertz wrote: »
    critique wise, the model itself seems to have edges randomly missing all over. Try to make sure your mesh consists of only tris and quads, no 5+ sided faces.

    I think that's actually a display issue with Blender. Edges will be there, but they don't show up in some views.
  • John Warner
    Options
    Offline / Send Message
    John Warner polycounter lvl 18
    in general, i've found it's ususally best to remove the fine texture from the normal map, but that's obviously not true in every case..

    something to keep in mind, anyway..

    spec maps aren't so tough to do. you could start by desaturating your diffuse map and adjusting the values of each area so that it's the correct amount of shininess... then go back and add textural detail to define what ares are more matt because of stains, what ever. it's also a good idea to grab a black, artistic style brush and splatter it here and there so that when the spec goes accross the surface, it's uneven. i had a problem for a while where although i was putting in all sorts of variance into the diffuse texture, my spec hits were all fairly even... no good. really think of the shininess of the surface that you're describing, and just make a map to show that.
  • BlackulaDZ
    Options
    Offline / Send Message
    here's a better view with some lights. also, the pitch blackness by the foot is caused by dynamic shadows from a spotlight.
    Untitled-1-19.jpg

    @ Polyhertz: i dont have any polys with more than 4 or 3 sides, they arent even supported in blender <_< and yeah thats exactly what i did for the diffuse, im still painting values in the the base colors

    @ Swizzle: also, yeah blender does display some things odly. and yeah my normal maps arent great...still need to work on em, i want to fix the feet atleast.

    @ John_Warner: yeah I probably will take out the fine texture from the normal map, but keep it in the diffuse. also, the darker the area the less shiny right?
  • Michael Knubben
    Options
    Offline / Send Message
    First off, you'll want to use a highpoly model to create your normalmaps. Nvidia-filter/crazybump/etc... really aren't made for what you're doing. Secondly, a good place to start for a spec-map is to take your diffuse, and fiddle with the contrast. Mind you, that's only a first step, and that alone won't get you a decent specmap. You'll need to paint in certain things, such as making the eyes brighter (eg; shinier) as well as certain parts of the face. Play around with colour overlays, to see what each colours does (using the same colour in your spec as in your diffuse leads to very intense colours, which might work for bronze, for instance, whereas using the negative colour in your spec is good for skin)
  • BlackulaDZ
    Options
    Offline / Send Message
    @MightyPea: yeah i did use a high poly, sculpted it in blender, but not many small details, just the folds in the cloth basicly <_< i get really lazy with blender sculpting because its really hard to use/not very optimized yet. i have two layers for the normals in photoshop, one is the baked hi to low poly, and one on overlay on a low opacity which is the nvidia filtered texture, but i got rid of that one. and thanks for the spec map explanation! should i desaturate the diffuse then?

    Untitled-14.jpg
Sign In or Register to comment.