Sketchbook: Saidin311
polycounter lvl 11
Sketchbook rules: Anyone is welcome to post any comments, critiques or thoughts. I'll welcome any and all feedback. I'm just trying to learn and improve. Often I'll ramble a bit on stuff to give it some background.
On with the art.
Anyways, I bought the eat3d tutorial posted around here not too long ago. It was well worth the money for the information. But I followed the tutorial and learned quite a bit.
If I did this over I'd change the unwrap a little bit. I cut the seam too close to the outer edges of the cut out faces, I'd bring those in a bit.
And I'm still very unclear on how to make a proper spec. I think I got a lot of things right this time around, but the final spec result isn't quite what I was looking for. I'd probably also change a bit of the concrete base references I was using.
Here we go anyways.
And something I'm doing for fun. Gonna up some polys on this and take it into mudbox for a little dressing up before I unwrap and texture.
Replies
C&C always welcome.
edit: The black background was kinda throwing off the shadows so I just did another quick render with a grey background.
Anyways, I'm working on a new environment based on the Shambles in York, England. It's an old medieval street converted to a market. I haven't decided whether I'm going to modernize this or keep it purely medival (for deco things like electrics as opposed to hay carts).
I did the first building as a test to see how modular I could make everything, the screenshot after is me laying out the building pieces for modular construction. The point being that each of these pieces can be put together in various combinations to break up the system.
I'm also going to create standard timber planks for timbering up the frames. Half the buildings in the shambles are brick, but the other half are half-timber. From there I'll probably do 3-4 window types that can be scaled to fit the various size windows and then things like signposts, brick trim, awnings, lamps and flower pots will be made.
Definitely looking for C&C as this progresses. I might move this to the pimp forum when I get a little further along for that purpose.
I don't have much for the Pimping section, but I felt compelled to post some things I've been messing with.
First up is my current portfolio piece inspired by a concept art on the Dead Space website.
It's based on this:
I'm not too sure what I'm going to do to add some smaller details on the wall sections. I can't tell if it needs any. So if any eyes want to comment please feel free!
Also, some other things I've been working on.
A Chaos Axe from a concept by Mythic (WAR).
A dwarven cannon from the WAR site. I just got frustrated with the dragon head part. I'm not the greatest with organic mudbox sculpting yet. And I didn't like the look of it at all.
Some mudbox testing. I posted the bridge in the speed model thread a couple weeks back.
So Yeah. Thats that. I hope I'm learning something haha.
I think I'm going to call the 2 different wall sections done. That leaves the inside corner piece, outside corner piece, tiled flooring and an overhead section to complete before I can add the details. (edit the blue mesh ceiling is temp)
Some of the details I have planned are pipes, overhead lights, wall lights, the tram direction sign, other wall-signage.
I think I'm going to go in a direction like Shep did with his bath house and try to go with "passes". The high poly to low poly. Then a lighting pass, some specular pass, colour pass, damage pass, then finally add the props.
I haven't decided what I'm going to do about the floor. The concept is essentially a 1 way tiling texture with a different texture going off in the hallways. Because of time budgets I might just stick with a simple 'metal tiles' tileable. And use some decals to add in the "tram this way" type flooring. I'll hop into the game and see what they did for some of these areas. Get some more inspiration.
This is just the final pieces I have and I'm going to start the lows/normal baking.
There's 10 modular sections here. 2 wall sections, the vent detail is seperate so I guess it's modular. 2 Roofing sections, 2 pillar sections, upper trim detail and an inside and outside corner.
I think once I get these baked down and stuck into UE3 I'll take this to the P&P section for some feedback.
How are you finding UE3 to work with?
Some things I can't figure out are what to do about seams between wall panels. If I want a nice tileable flat wall section I always have to have some divider to keep the seam hidden. And that throws my whole grid off.
I sprained my wrist pretty badly in December and it really killed my motivation to work on this thing. I baked down some components and tried to get them in the engine, but I didn't like the scale and things weren't lining up around corners and such.
So now that it's at least comfortable using the computer again I'm getting back into some sub-d stuff. Working off a Gears of War fountain concept I saw online. I don't have the game (for my pc) so I can't compare my model to theirs in the engine. PLUS my mudbox trial expired and zbrush confuses me. So I will model this high poly and either leave it there, or just put in weather/wear and stone work in the diffuse and filter the normal.
Also used this time to test a lighting and material setup. Thanks to X-Convict for posting his info. I think it's a great way to present a HP model.
It's not very complicated, didn't take me too long a couple hours in the evening for 2-3 days. I'm definitely feeling better/faster at high poly modeling.
If anyone's curious it's based on this concept from GoW/epic.
It's a wall-light deco piece. I realize it's not a very large object or anything. Just a prop, but I'm definitely looking for some crits on basic forms/shapes. Nothing is smoothed yet.
Also every time I post a high poly render I work on a little simple lighting. It took me less than 5 minutes to drop down the lights for this one. I'm just working on a nice way to present a high res model.
Now to add some extra detail ala UT3. I might try to sketch out some concepts over top of this rather than blindly adding greeble. Because I want to push myself in all levels.
Some low poly work. It seems really high but this main body only wieghs in at around 850 tri's. My goal is to get this all under 1000 tri's which seems very doable while still maintaining a nice shilouette. Still have to do some high frequency details like some wires and stuff that are in between the 3 main pieces.
Also, for kicks I'm trying some more advanced high poly. After being heavily inspired by Kevin's words for Metalman in his thread I'm taking on the Engine KJ told him to model.
Some Edge Flow, trying to keep things smooth where they are smooth on the actual object since the main body is cast iron and won't have seams except for where the bolts hold it together. Some of the smaller shapes I'm leaving till later to instance around where they are duplicated.
Here's some small progress on one of the other main shapes. Next up the circles on either side of the engine and then all the bolts probably before I tackle the headers.
And some detail.
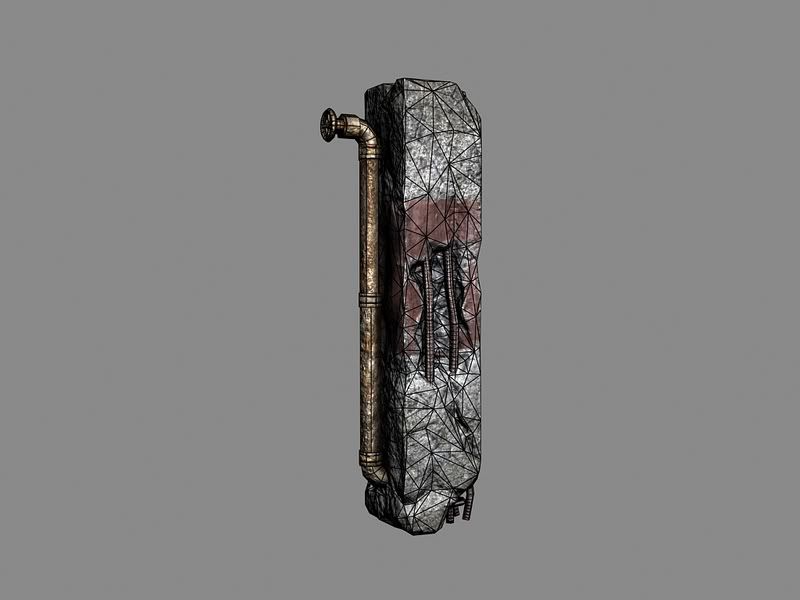
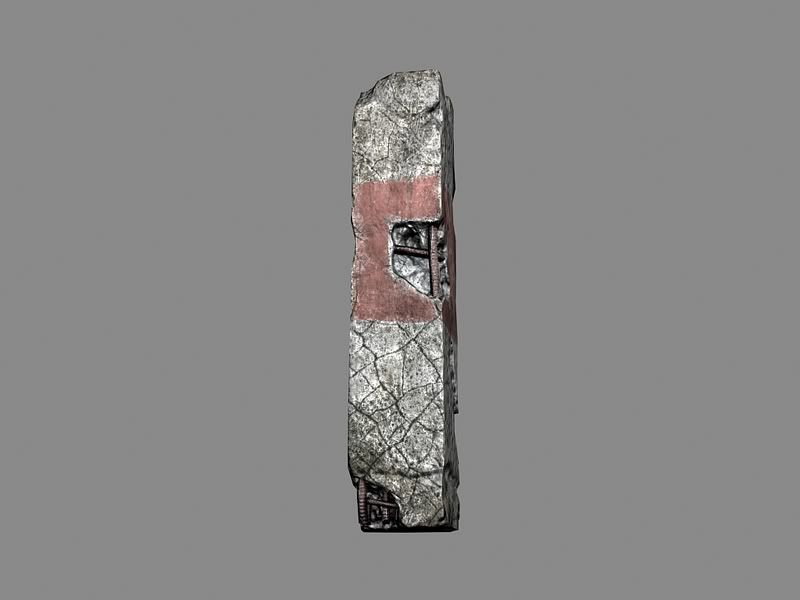
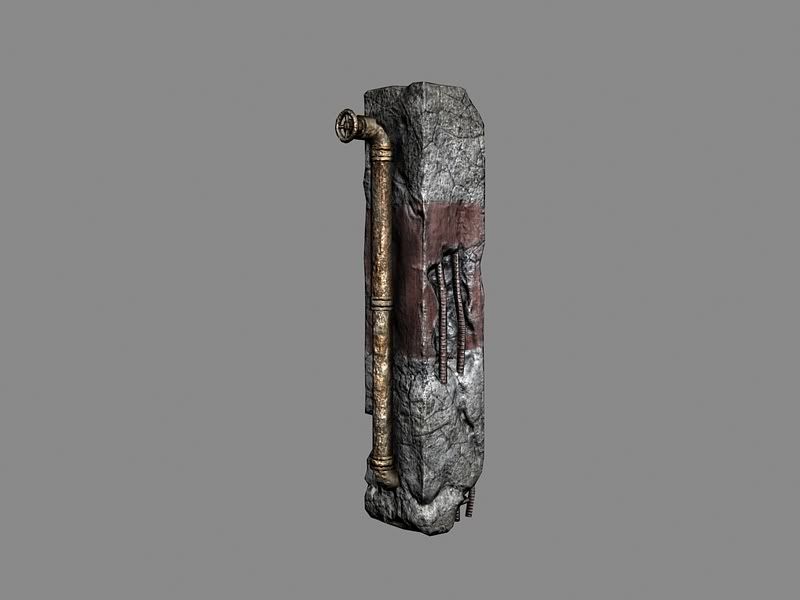
Also my entry for the storage container mini challenge. I'm having terrible baking issues, I just don't know how to get rid of all the wobblies that show up on the normal when I try to bake this down. It's highly unmotivating. I really like how the HP turned out, but its just frustrating always having such a terrible bake.
Here's the reference too (it's also in metalman's 'personal work' thread): Ref
I've learned an assload from it. A couple crashes set me back towards the end. I tried to keep as many forms as one single contiguous mesh for learning purposes. Some of the one's that I'm proud of are both sets of headers/pipes. The top circle bulge contains the headers and the oil pipes. And the bottom headers with the wonky intake valve on the end is all one piece. The gizmo's at the top are all one piece too. Learning the circular forms was a great experience. I'm much more confident in my sub-d modeling now.
edit: Also looking for any Crits if anyone has them. Feel free to rip it up. I'm using the likes of Convict, Kevin J, Eraserhead etc as my benchmark so if I'm getting even close (or further) it's always nice to know!
Did some real small simple tests, the door which I tried modeling in full in zbrush over multiple hours using the projection master. After not getting the look I wanted I built the door in max in all of 20 minutes and then took it into zbrush to project a simple pattern on the small part.
After that I created a simple knob and brought that into zbrush for some simple detailing. Again just trying to get used to the process and the interface.
Exported out the knob after some more work and baked it off to make sure it all works the way I'm used to. I'll also be using this door as a start to learning some more texturing stuff. I don't know much about metal and wood, so I'm gonna jump right into some beat up brass (for the knob, the knob plate and the kick plate). And then I'm gonna do some cracked and worn old faded painted wood for the door. Probably in a red colour.
I'm sure I'm not really impressing anyone with this, but I'm just posting my learning, if anyone sees anything at any time I'm not doing it right holla at ya boy!
Good thing you started simple. First time i used zbrush I decided I was gonna do a full blown scuplt of some incredible character, and needless to say, it didn't end well....
happy learning!
Love the lines of the engine, the pipework seems a little "artificial" for me but I still think that it's ace
Also started the workings of an ammo crate after being inspired by racers texturing tutorial. I also intend to take this into zbrush to add welding marks to the piece on the side. I think anyways, maybe rivets but we'll see. I also haven't forgotten about the door. The bake came out clean and I've started to texture a bit, but after seeing Racer's tutorial I realize I have a ton to learn.