Blending Normal Map
polycounter lvl 11
Hello, first post here. I've been told these forums are a great resource for questions etc! I'm hoping someone can help me with this issue. 
I have 2 normal maps that I would like on the same object. However when I use "overlay" in photoshop it washes out the colours a little and I seem to loose height in max.
I've experimented with adding a second bump in the normalBump area of Max materials to achieve the affect I want, however my ultimate goal is to bring the texture/material into Unreal Tournament 3 and I need a combined normal map because I don't know how to combine them in that editor yet.
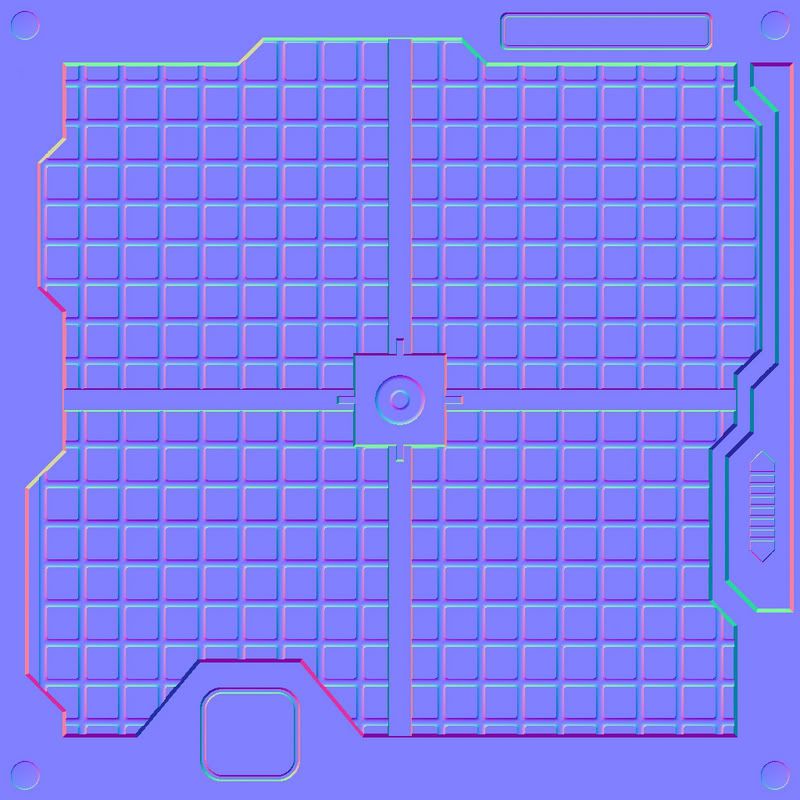
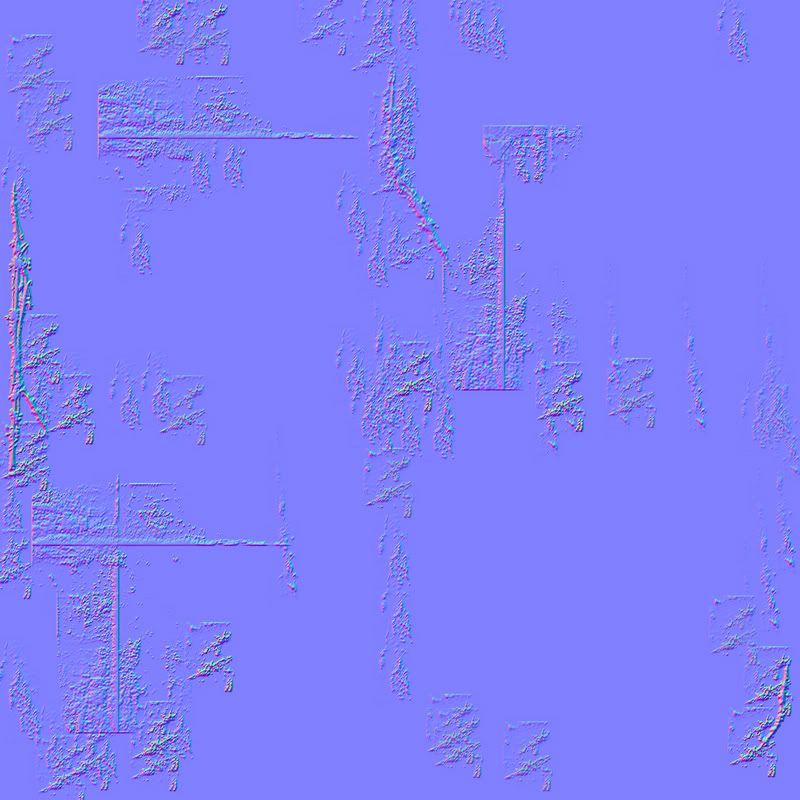
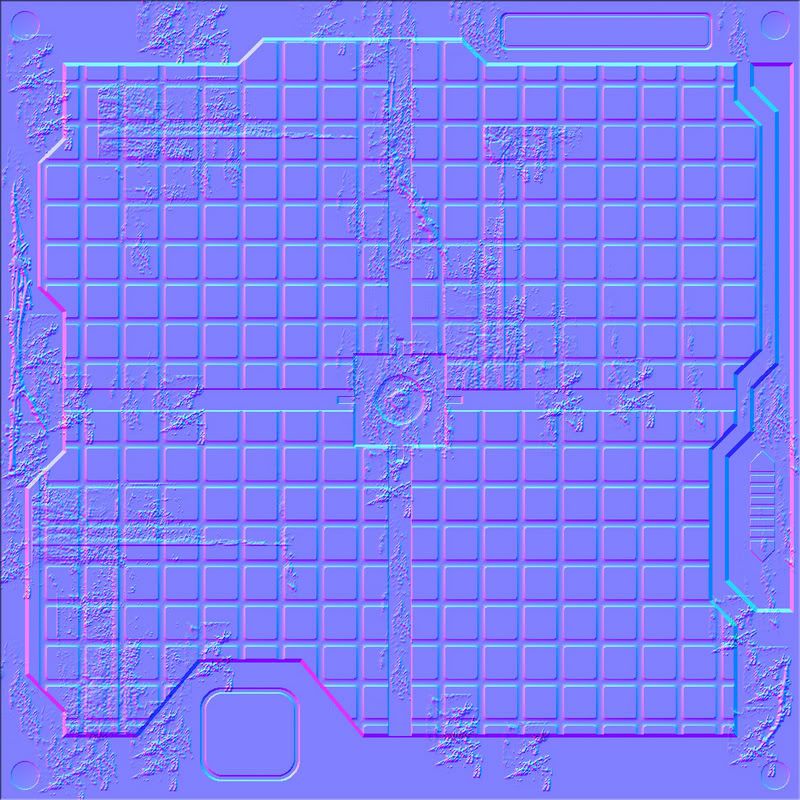
The following are the 3 images. The first is the object normal (created from Max). The second is my scratches and bumps created in photoshop. And the third is the combination of the two using "overlay" in photohop.
Note that the third one the colours are slightly washed out. I think thats causing my lack-of-height issues.
Using the 3rd as my normal map just doesn't seem to have the same height affect as using just the first or just the second.
I have 2 normal maps that I would like on the same object. However when I use "overlay" in photoshop it washes out the colours a little and I seem to loose height in max.
I've experimented with adding a second bump in the normalBump area of Max materials to achieve the affect I want, however my ultimate goal is to bring the texture/material into Unreal Tournament 3 and I need a combined normal map because I don't know how to combine them in that editor yet.
The following are the 3 images. The first is the object normal (created from Max). The second is my scratches and bumps created in photoshop. And the third is the combination of the two using "overlay" in photohop.
Note that the third one the colours are slightly washed out. I think thats causing my lack-of-height issues.
Using the 3rd as my normal map just doesn't seem to have the same height affect as using just the first or just the second.
Replies
Nm... edited...
Am I adjusting the saturation? The brightness? The levels? The colour balance? I just seem to be missing something?
Deleting the neutral pixels is something I didn't look at, although its not as clean of a solution as I'd like.
I've written a program to blend normal maps. It preserves data much better than a photoshop overlay. I think it's just what you're looking for.
I invite you to download the beta test from www.crazybump.com, and see if it meets your needs.
There is not much documentation yet, but just open the "normals mixer," and I hope you'll find the rest straightforward!
cheers,
-Ryan Clark
Along with a better blending operation, CrazyBump gives you sliders to adjust each layer, and a 3D preview.
http://www.projectoffset.com/blog.php?id=74
Just grab the action at the bottom of that page and run it on your normal map. Then paste your first normal map under the folder created by the action. This will give you much better results than the half blue/overlay method.
-Ben
There's a nice writeup of the Photoshop blend modes here.
http://www.simpelfilter.de/en/grundlagen/mixmods.html
Overlay basically Screens the bright background parts, Multiplies the dark background parts, then doubles the result.
And the writeup on Photoshop blend modes is a great read too. I'm not fully noob when it comes to PS, but its nice to read some technical descriptions to brush up on the knowledge.
In case anyones curious this is what the final texture turned out to be. I'm not quite happy with the amount of height, I wish there was more. But for a first run at creating a UT style texture I was happy.