Zbrush... how to divide polygons in local areas? (I'm a newbie)

polygon
Hello guys, new to the site. I have been trying to figure out how to increase my polycount in certain areas while preserving the polycount in other areas. I was following a tutorial by Rafael Grassetti and he did some technique where he made the face, hands, and feet, all separate sub-tools from the main body so he could give them much greater amounts of detail. Unfortunately he did not explain the method he used. I have been trying to find some sort of explanation online but, surprisingly, I haven't had any luck. I have found some tutorials that suggest masking an area and dividing that area, however when I ctrl+drag my screen to eventually remesh the d-topo it will recalculate the entire area, including the earlier masked region. The current inefficient method is to just increase and divide the polycount over the entire object which is really wasteful. I'm new to this program and the tutorials i have found are too basic or too advanced and they dont explain the technical details. Please help.
TLDR: How can I, by using sub-tools like Rafael Grassetti, create high poly areas like hands, the face, and feet, while seamlessly still having them connect with the main body so I can continue working?
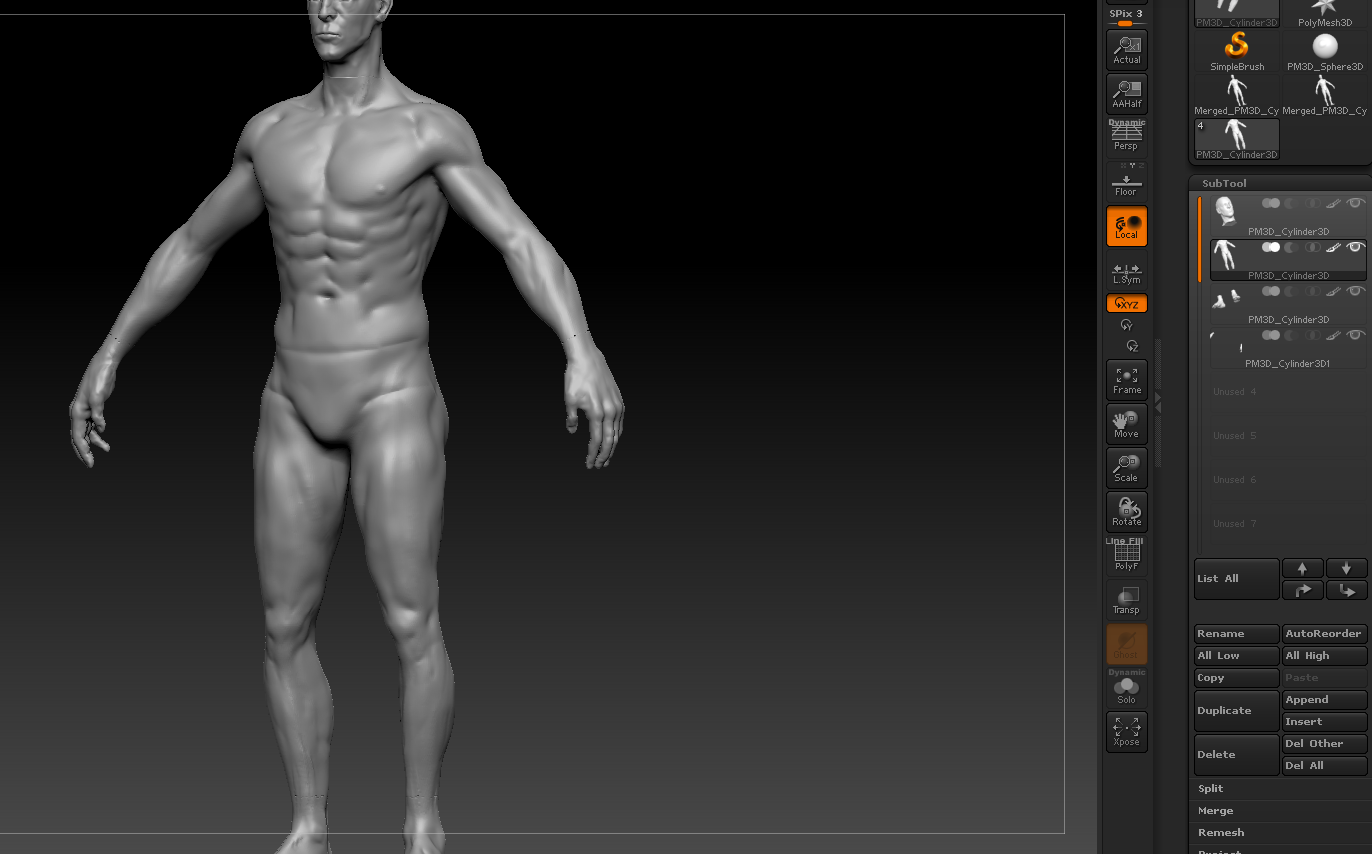
Below is the model i'm currently working on. I think the body is fine enough as is. However, The face lacks the polycount to allow me to actually go in and apply detail. I havent added hands or feet since I have not yet found a solution.

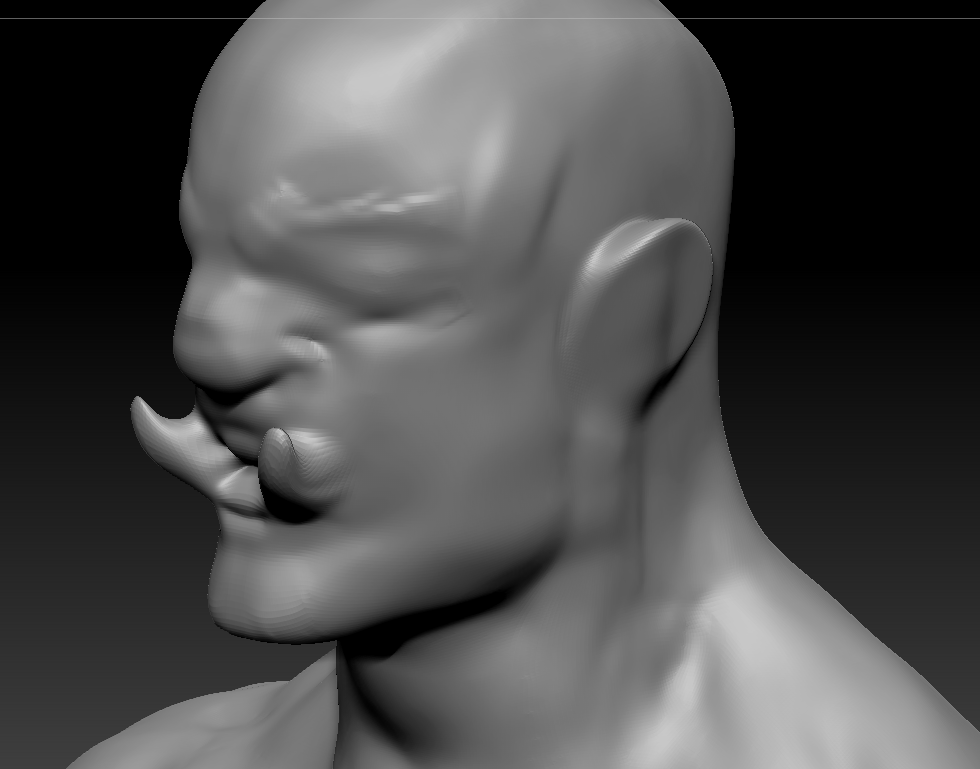
The previous model where I follow along with Grassetti. Note that the hands, neck, and wrists have seams (they are hard to see, neck one is noticeable though). They are not part of the body and when I attempted to rejoin them whenever I re-meshed d-topo to actually have them join, they would drastically reduce in polycount.
TLDR: How can I, by using sub-tools like Rafael Grassetti, create high poly areas like hands, the face, and feet, while seamlessly still having them connect with the main body so I can continue working?
Below is the model i'm currently working on. I think the body is fine enough as is. However, The face lacks the polycount to allow me to actually go in and apply detail. I havent added hands or feet since I have not yet found a solution.
The previous model where I follow along with Grassetti. Note that the hands, neck, and wrists have seams (they are hard to see, neck one is noticeable though). They are not part of the body and when I attempted to rejoin them whenever I re-meshed d-topo to actually have them join, they would drastically reduce in polycount.
Replies
Cheerio
Trying to take a full-body sculpt to completion at a very high Dynamesh res will result in you constantly fighting the forms and ending up with the blobby mesh that you have. This is a very common thing I always see from those acquainting themselves with Zbrush. Dynamesh is a fantastic tool but knowing when to use it is key.
My advice is to Zremesh to 30-50K points or so and start again on the forms at this low res.(or project from your DM and then refine those forms) And when you have those primary forms in place at a low res you can level up.
Edit: I'm still having an issue with this. I have broken the model down to about 20k polygons and I have created a polygroup for the hand. I was able to divide the hand, however, when working with the fingers I started running low on polygons again. How can I fix this? Do i need to make even more polygroups for each finger?
The current approach im considering is to work high detail in dynamesh and then zremesh but i feel like that approach is not efficient according to the previous comments. Plus, in my initial workthrough with using polygroups and staying down at 20-40k using D-topo and ctrl+dragging in the background to retopo would shoot it back up to 400k polys. A bit problamatic having to rezmesh all the time. What suggestions do the Zmasters have, I just want to sculpt a really good model efficiently and learn a good workflow :* (
Perhaps If I, like you all suggested, build form with dynomesh, then make polygroups, and then divide the polygroups multiple times, I will be ok. However, in my brief experimenting with that I do struggle with the fingers and local areas that need more polyies than other areas and as the part below shows they were still able to keep the fingers and hand in the same polyg as the rest of the arm.
http://wiki.polycount.com/wiki/BaseMesh
What I meant was dynamesh to 30-50K, sculpt your primary forms, Zremesh(with controlled density) and work from there(or even skip the dynamesh stage and go staight to ZRM)
Now you will be working with levels and have much more control all the way through your sculpt. You can adjust forms/proportions a lot easier at the lowest level, and changes will propogate up through your levels even at the final detailing stage of the sculpt you can make big changes and not worry about ruining the finer details on the higher levels.
Here's a sculpt I did recently using this method:
Workflow
Build form - low polycount (dtopo)
Zremesh - w controlled density
Create polygroups -arms, legs, head, body
Work on each region and subdivide as needed - work between multiple sub levels.
Regarding the "controlled" Zremesh was that just regarding setting up a range of roughly 40k polygons or did you mean something else by it?
Addtionally, You mentioned polypaint, I messed around with it a bit. I'm wondering how you would use it regarding the fingers. Could you explain the approach? As of now I'm not sure how it would help. Does it dedicate more polygons to the drawn over areas when remeshed or preserve the pre-existing polygons?
I'm in class right now, but I feel like when I messed with it earlier it only saved my painted areas from the zremesh process which meant that I had to have had already established a working poly system instead of setting up a topology in the fingers that allows me to stretch the forms out to make fingers.
then there's this method(from the Zbrush docs)
ZRemesher has the ability to retopologize only the visible portion of a partially hidden model. In this case ZRemesher will automatically maintain integrity with the hidden portions.
To accomplish this, ZRemesher can use two different connection algorithms. The default is quite similar to ZBrush’s Mesh Fusion feature. ZRemesher will treat the new topology as an inserted mesh and connect it to the hidden topology via a polygon bridge. The second method uses the Tool >> Geometry >> ZRemesher Freeze Border option. When this is enabled, ZRemesher will begin with the edges of the visible mesh and build the new topology out from there to create a perfect connection.
Partial mesh retopology requires a few simple steps:
It’s key to understand that when FreezeBorders is enabled, the first priority for the ZRemesher is to create the vertex points along the border so as to ensure proper welding. With this in mind, the Target Polygon value will be less of a factor. If your mesh is relatively high in polygon count then ZRemesher must match the borders with the hidden portion of the mesh before finishing the inner topology.
I wanted to share what I've been working on using the hide + zremesh feature. Any pitfalls i should be careful of with this workflow?
1. Dynomesh a figure
2. Zremesh to 20-50k
3. Continue to form at SubD 1
4. Zremesh at higher polycount head/hands
5. continue to subdivide and work as needed
I noticed doing this allows me to have a continually higher subdivision polygon count on the earlier zremeshed head/hand areas (conveniently formed into polygroups after remesh), while also increasing the subdivision on the rest of the body.
Only few (minor) issues I have only had to chance to think about currently is remeshing the head for instance. I could potentially just select the head polygroup and remesh it again but it seems if i remesh one area the whole model goes back to subd1. Maybe that is how polypaint can be used, either way, I will have to experiment and mess around with it tomorrow when I have a chance. Another minor issue is trying to blend in the high poly count neck area with the lower poly chest, the bridge between them is pretty small.. Any suggestions or tips for these issues?