General Texturing / UV help

polycounter lvl 9
Hi guys, I really could use some help if possible.
I'm pretty new with Normal mapping (and whilst I'm not new with texturing, I always avoided trying to get better than just flat / photo referenced textures) I'm trying to figure it all out currently.
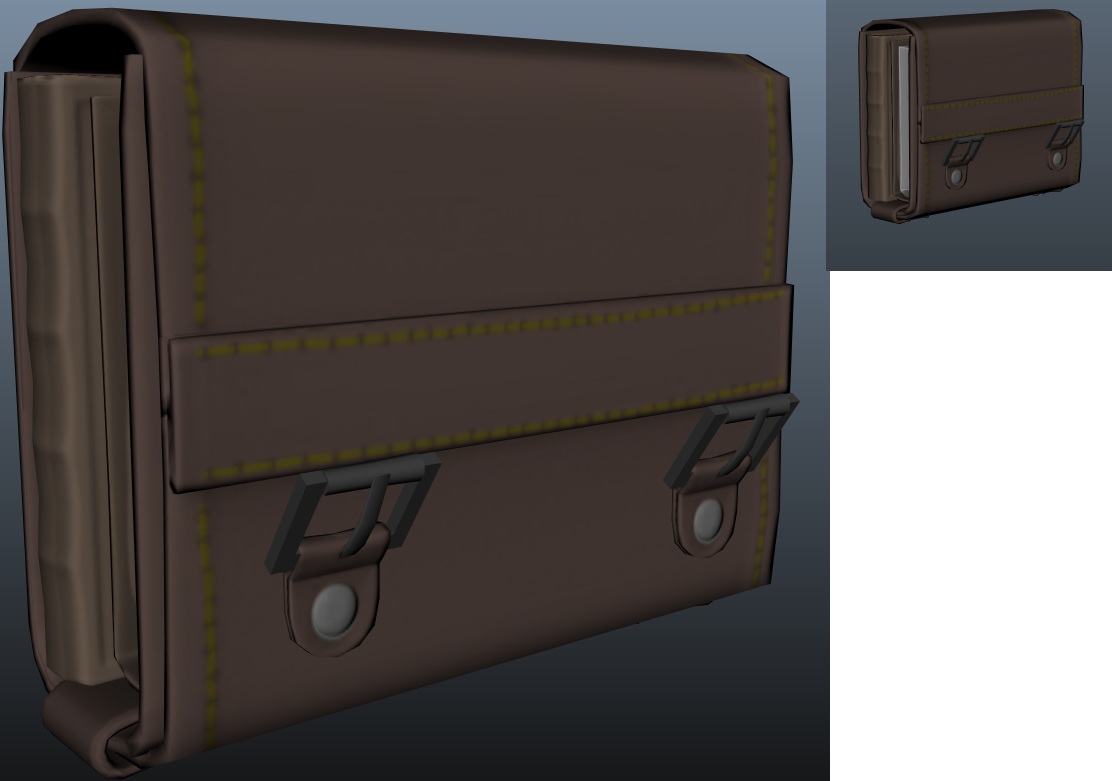
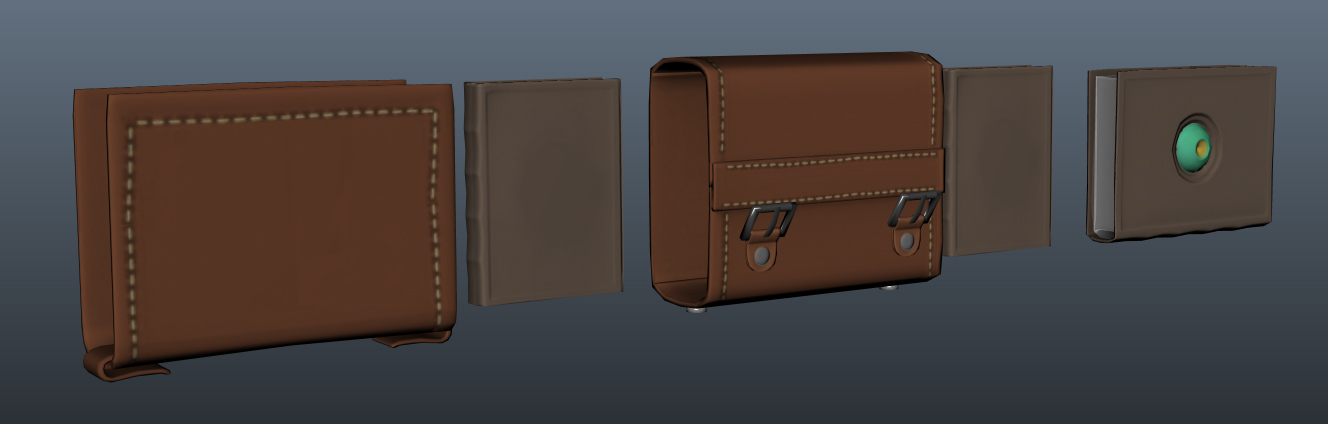
Here's my model :
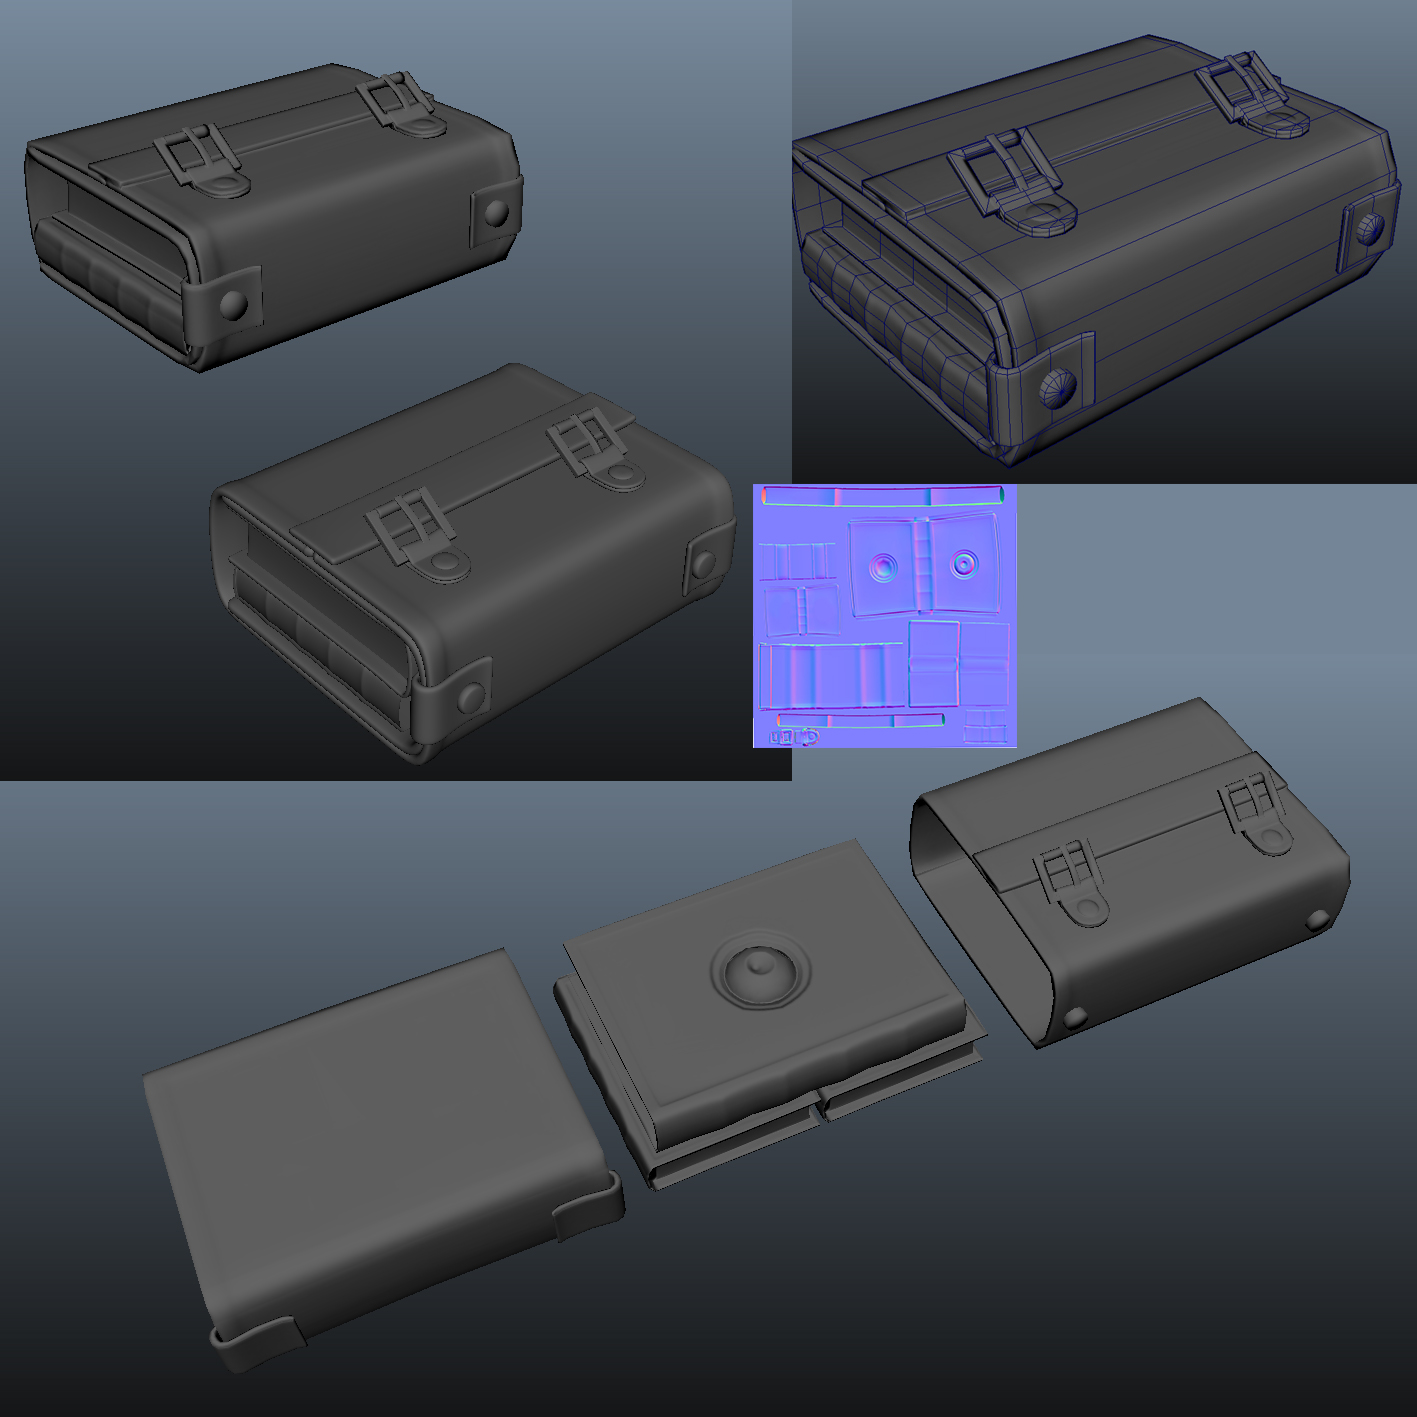
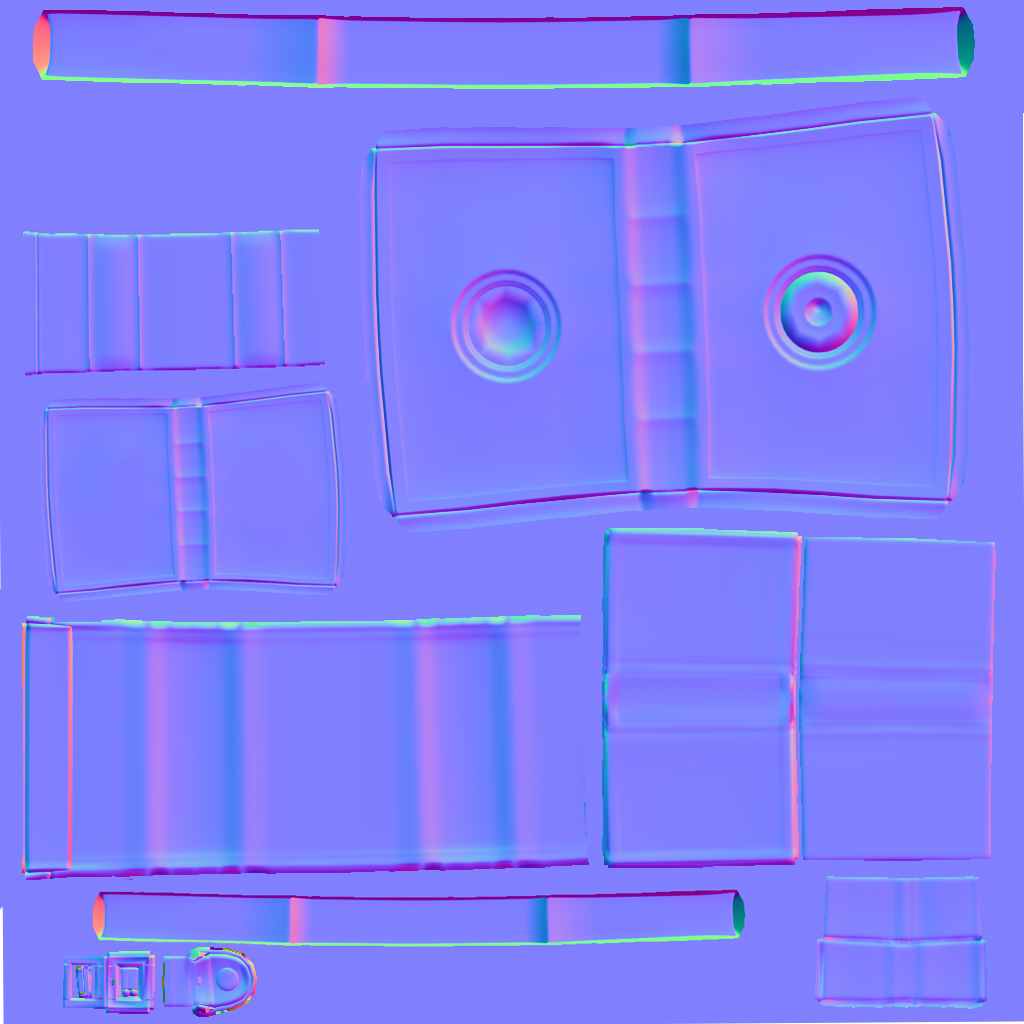
The above two images are the bake and Normal maps. I'm sure they aren't that great, it took me like 2 hours to model the high and low poly models, but the baking took me 6 hours to figure out (in the end I baked it out into about 7 different maps and combined them together using the exploding method.)
I also baked out Occlusion maps for all of the pieces to overlay with my texture.
Here are my UVs :
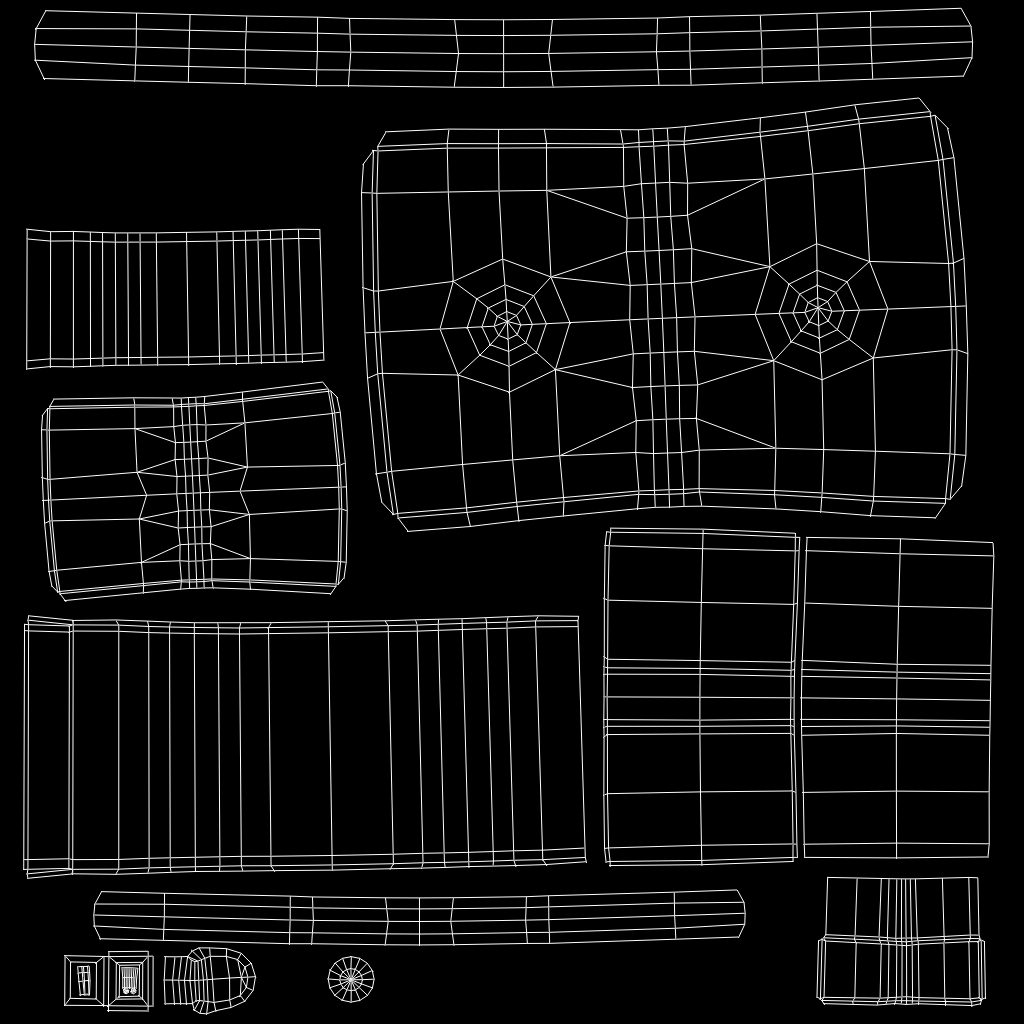
It's made in 1024x1024. As you can see I've put all the books and the carrier on one UV sheet. So essentially the elements are tiny on the sheet.
What happens then is that when I start painting, for example, the stitching, they are very pixelated, I even set the Filter type of the texture to Mipmap.
My question is, with an asset like this; should I break it down to multiple UV maps? Or increase the Texture size (Which seems silly for such a small asset essentially) to give context, this asset will have straps and be carried by a 'hero' character as it were. I already accept I'll probably have to rebake these normals, areas like the circle in the large book didn't bake so well because of too few polygons.
If someone could essentially break down the approach to baking such an object, and how to do so without it looking so low resolution when texturing.
Also, the stitching will look very flat. Would it be better for me to either model the stitches (or try to do them in zbrush) and bake them? or paint the textures and Crazybump/nDop the normals from that?
Thanks, I hope this all makes sense!
sheckee.
I'm pretty new with Normal mapping (and whilst I'm not new with texturing, I always avoided trying to get better than just flat / photo referenced textures) I'm trying to figure it all out currently.
Here's my model :
The above two images are the bake and Normal maps. I'm sure they aren't that great, it took me like 2 hours to model the high and low poly models, but the baking took me 6 hours to figure out (in the end I baked it out into about 7 different maps and combined them together using the exploding method.)
I also baked out Occlusion maps for all of the pieces to overlay with my texture.
Here are my UVs :
It's made in 1024x1024. As you can see I've put all the books and the carrier on one UV sheet. So essentially the elements are tiny on the sheet.
What happens then is that when I start painting, for example, the stitching, they are very pixelated, I even set the Filter type of the texture to Mipmap.
My question is, with an asset like this; should I break it down to multiple UV maps? Or increase the Texture size (Which seems silly for such a small asset essentially) to give context, this asset will have straps and be carried by a 'hero' character as it were. I already accept I'll probably have to rebake these normals, areas like the circle in the large book didn't bake so well because of too few polygons.
If someone could essentially break down the approach to baking such an object, and how to do so without it looking so low resolution when texturing.
Also, the stitching will look very flat. Would it be better for me to either model the stitches (or try to do them in zbrush) and bake them? or paint the textures and Crazybump/nDop the normals from that?
Thanks, I hope this all makes sense!
sheckee.
Replies
I think you've got a lot of wasted UV space. You should be able to pack them tighter than that. Don't break this up across different UV maps.
You can always use the sharpen filter in Photoshop once you've finished texturing. it should help a bit.
From the pics, I'm guessing you're using Maya. When baking you have the sampling quality. For the most detailed and sharpest bakes, put that to 4. You can do 8, but I hardly ever notice the difference between the two.
Hope that helps somewhat.
I love your Luciola's Garage by the way, very cool
It's the same bake settings as everything else, and everything else is baking rather lovely now on my tests. This one refuses to play ball though, I've tried altering the normals, even redid the UVs, all to no avail. Not really sure why it's doing this. Anyone know?
And one last thing. For some reason, on the maya 2014 trial I can't seem to get my bake cage to show at all, which is rather irritating. Is this just a bug with 2014?
TLDR: Rectangular UV-islands are the shizzle!