Learning Mudbox and baking
Hello!
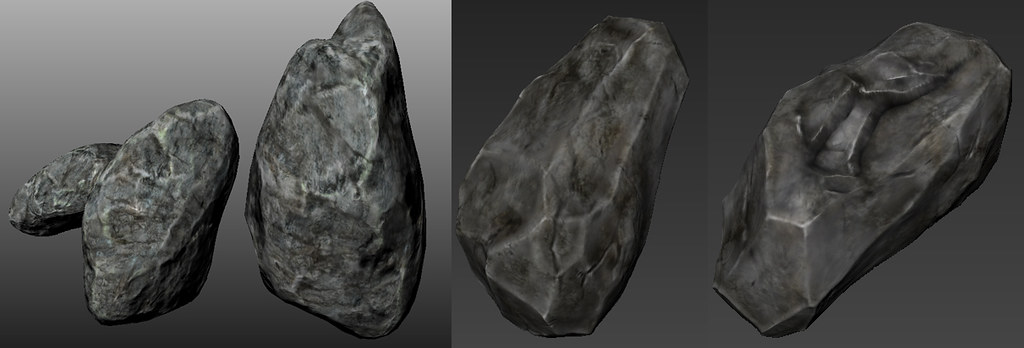
I have just started using mudbox, and decided to start with rocks for my next environment.
My problems have mostly been general blobbiness and ugly texturing (left). I'm slowly getting better (right), but I think there is still a lot to learn before I can start building the scene.
I will be doing a lot of sculpting and baking for this environment, mostly organic shapes but there will be some architecture as well.
It would be wonderful to get any tips or advice on how to get better!
Replies
I think you have a good start here! They do give the impression of solid rocks that weigh a lot. I looked at the picture for a moment, here are some suggestions and a quick paintover to demonstrate the thoughts below:
- the surface of the rock looks like it is forming draped folds or cloth-like wrinkles (more on the right side rocks than the left side rocks). This is caused by those pale veins that crawl around the rock. I would probably tone them down somewhat. It would be nice to know what kind of an environment you are planning to use these rocks for! At the moment they look sleek and slippery to me, something I'd imagine seeing in a watery environment.
- the shapes could still be a little more blocky and the layered shapes could feel even more three-dimensional.
- I noticed there are already splashes of color over the rocks, but this seems restricted to those darker spots. I would add wbigger regions of color on the surface that blend subtly together.
Here is my rock collection so far. Eventually I'm planning on using them in a wintery garden scene. I have a really clear idea of how a layered rock should look, but every time I try to sculpt it, I end up with a big blob and messy texture! I don't want to waste too much polygons on silly little rocks, but it's hard to find the balance between looks and optimisation. Right now the rocks are around 300 tris each, and that feels already quite wasteful to me.
I also hit a little problem in UDK, I'm guessing it has to do with the lightmaps (the resolution is 32 at the moment, but when I bumped it up to 128, the effect didn't look quite so bad. Still that doesn't seem like an effective/permanent solution).
UDK on the left and Maya on the right.
I'm using the scrape brush to get angular planes and sharp edges in Mudbox, then I add some details with the stamps and use knife to make cuts.
That one ended up looking a bit clumsy, so I decided to call it practice and made another one. I think this one has too many little pebbles, so it's more like a river bottom than a vertical wall.
1. Sculpt the plane normally, not worrying about tiling too much.
2. Export a displacement map and offset it in photoshop.
3. Open up a new plane, subdivide it up to whatever I had in step 1.
4. Tell Mudbox to sculpt the plane using the displacement map.
5. Keep sculpting until the seams are no longer noticeable.
I usually do texturing at this point as well, and then fix their seams in photoshop.
1) Sculpt rock shape
2) Create low poly based on sculpt
3) Unwrap, oh yes, unwrap
4) Render normals
All right stop, collaborate and listen.
5) Create new texture set, consiting of tiling diffuse, normal and spec
6) Create detail texture, hopefully a normal mapped detail texture
7) Take normals into Crazy Bump or something and get an edge texture
Get ingame
8) At this point it changes depending on the game, but set it up so that:
-The low poly uses the tiling texture with the correct pixel ratio based on mesh scale.
- The normal map from sculpt is blended as well, at 1:1 ratio.
- The detail map is applied.
This will allow you to create MASSIVE models ingame, with very, very little memory use. For example, this model only uses a few 512x512 textures:
[ame="